Model 2616RC | 2 • Hardware installation |
|
|
Note The
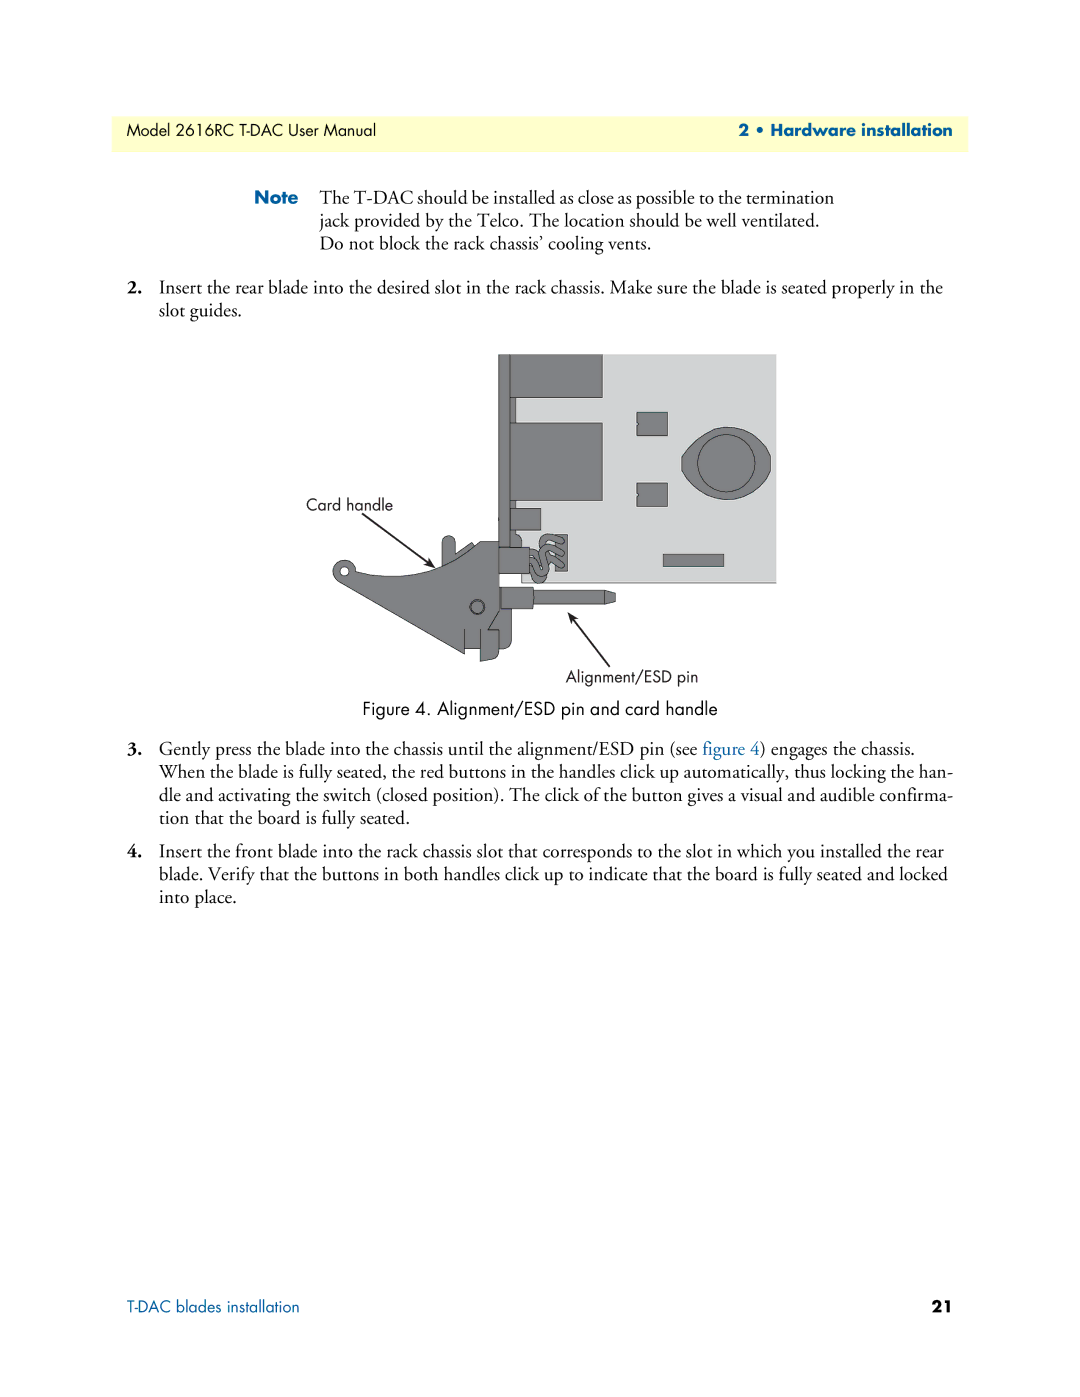
2.Insert the rear blade into the desired slot in the rack chassis. Make sure the blade is seated properly in the slot guides.
Figure 4. Alignment/ESD pin and card handle
3.Gently press the blade into the chassis until the alignment/ESD pin (see figure 4) engages the chassis. When the blade is fully seated, the red buttons in the handles click up automatically, thus locking the han- dle and activating the switch (closed position). The click of the button gives a visual and audible confirma- tion that the board is fully seated.
4.Insert the front blade into the rack chassis slot that corresponds to the slot in which you installed the rear blade. Verify that the buttons in both handles click up to indicate that the board is fully seated and locked into place.
21 |