SmartNode 4400 Series Getting Started Guide | 4 • Getting started with the SmartNode 4400 Series |
|
|
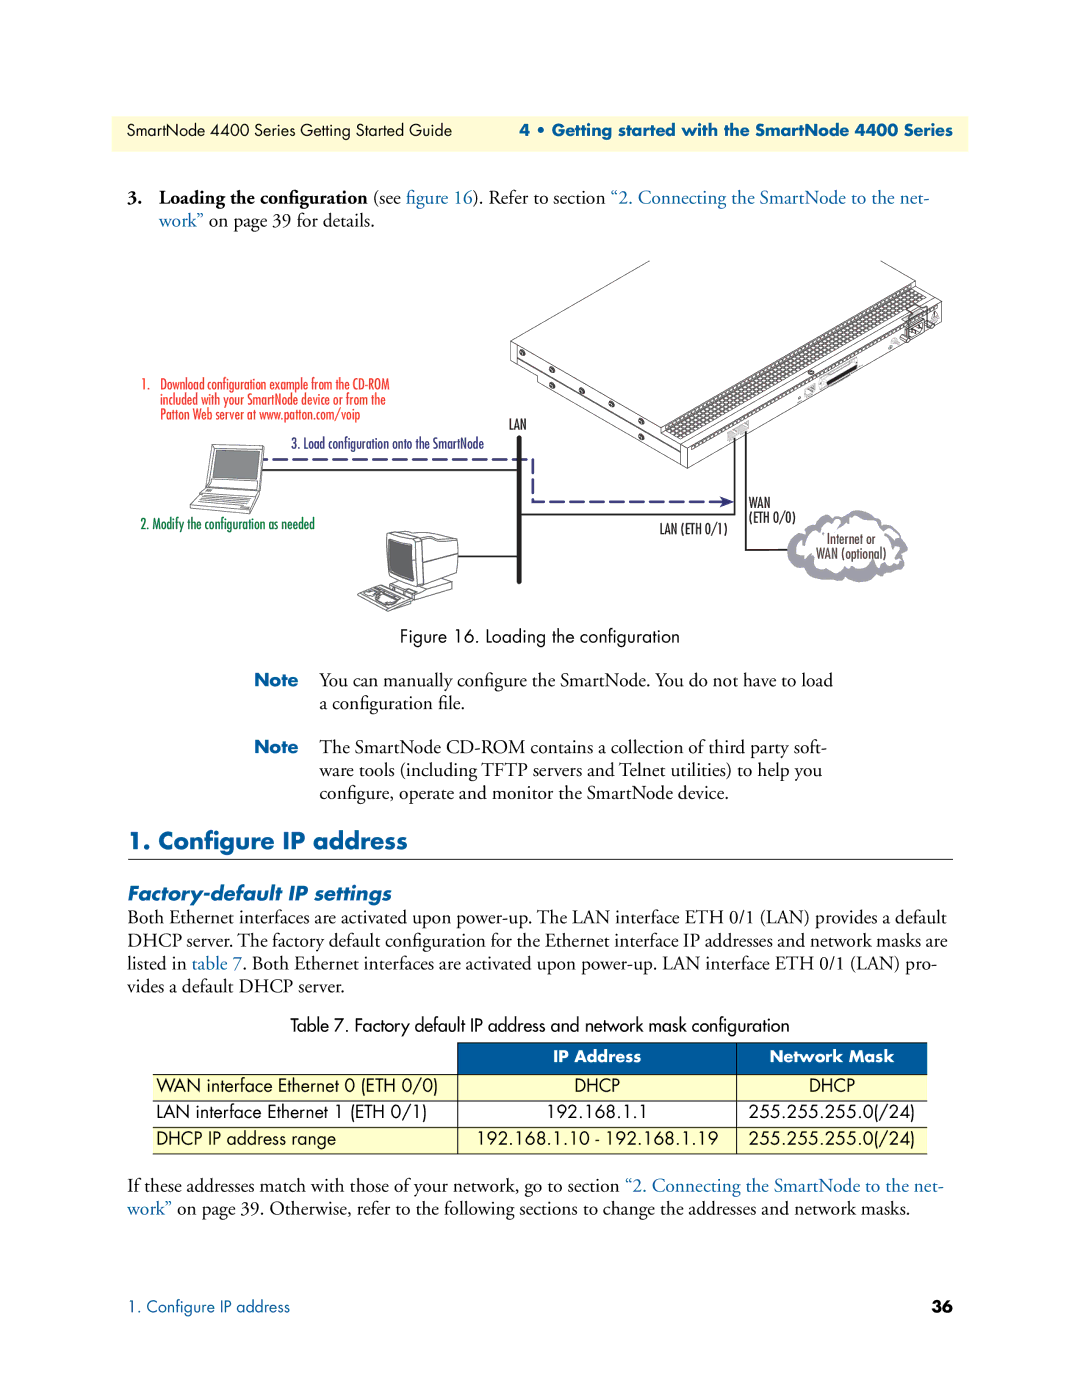
3.Loading the configuration (see figure 16). Refer to section “2. Connecting the SmartNode to the net- work” on page 39 for details.
1. Download configuration example from the
LAN
3. Load configuration onto the SmartNode
2. Modify the configuration as needed
| 240V |
| - Hz) |
(501 | AMP |
Ports
Telco
Console
Reset
0/0
ETH
0/1
ETH
WAN (ETH 0/0)
LAN (ETH 0/1)
Internet or
WAN (optional)
Figure 16. Loading the configuration
Note You can manually configure the SmartNode. You do not have to load a configuration file.
Note The SmartNode
1. Configure IP address
Factory-default IP settings
Both Ethernet interfaces are activated upon
Table 7. Factory default IP address and network mask configuration
| IP Address | Network Mask |
|
|
|
WAN interface Ethernet 0 (ETH 0/0) | DHCP | DHCP |
|
|
|
LAN interface Ethernet 1 (ETH 0/1) | 192.168.1.1 | 255.255.255.0(/24) |
|
|
|
DHCP IP address range | 192.168.1.10 - 192.168.1.19 | 255.255.255.0(/24) |
|
|
|
If these addresses match with those of your network, go to section “2. Connecting the SmartNode to the net- work” on page 39. Otherwise, refer to the following sections to change the addresses and network masks.
1. Configure IP address | 36 |
