SmartNode 4400 Series Getting Started Guide | 3 • Hardware installation |
|
|
Installation checklist
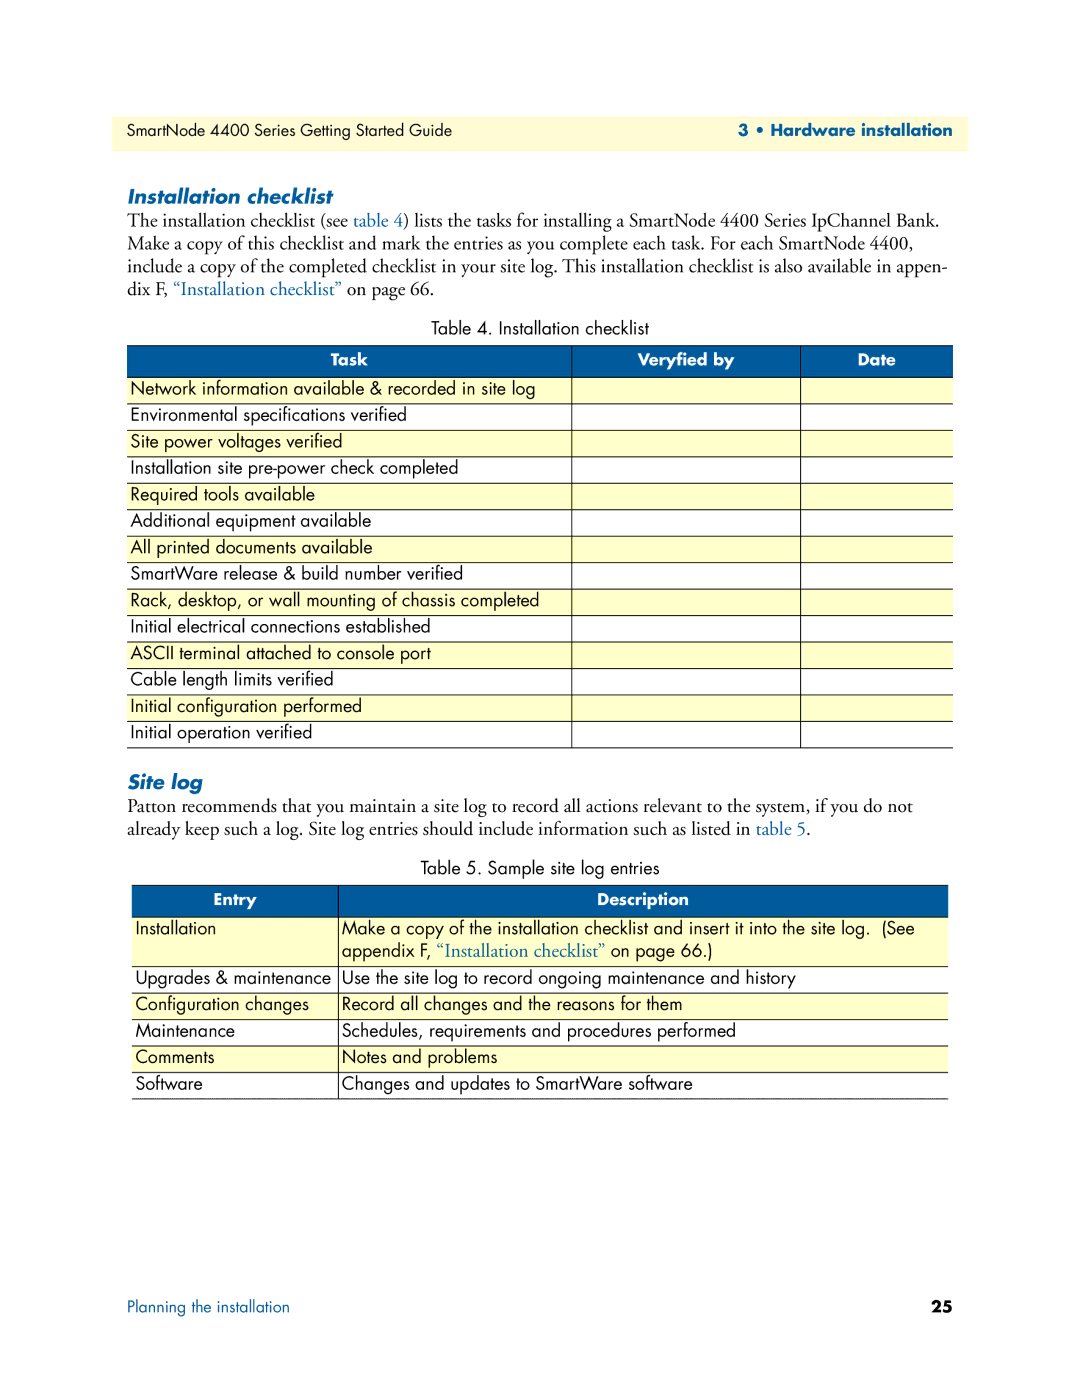
The installation checklist (see table 4) lists the tasks for installing a SmartNode 4400 Series IpChannel Bank. Make a copy of this checklist and mark the entries as you complete each task. For each SmartNode 4400, include a copy of the completed checklist in your site log. This installation checklist is also available in appen- dix F, “Installation checklist” on page 66.
Table 4. Installation checklist
Task | Veryfied by | Date |
Network information available & recorded in site log
Environmental specifications verified
Site power voltages verified
Installation site
Required tools available
Additional equipment available
All printed documents available
SmartWare release & build number verified
Rack, desktop, or wall mounting of chassis completed
Initial electrical connections established
ASCII terminal attached to console port
Cable length limits verified
Initial configuration performed
Initial operation verified
Site log
Patton recommends that you maintain a site log to record all actions relevant to the system, if you do not already keep such a log. Site log entries should include information such as listed in table 5.
| Table 5. Sample site log entries |
|
|
Entry | Description |
|
|
Installation | Make a copy of the installation checklist and insert it into the site log. (See |
| appendix F, “Installation checklist” on page 66.) |
|
|
Upgrades & maintenance | Use the site log to record ongoing maintenance and history |
|
|
Configuration changes | Record all changes and the reasons for them |
|
|
Maintenance | Schedules, requirements and procedures performed |
|
|
Comments | Notes and problems |
|
|
Software | Changes and updates to SmartWare software |
|
|
Planning the installation | 25 |