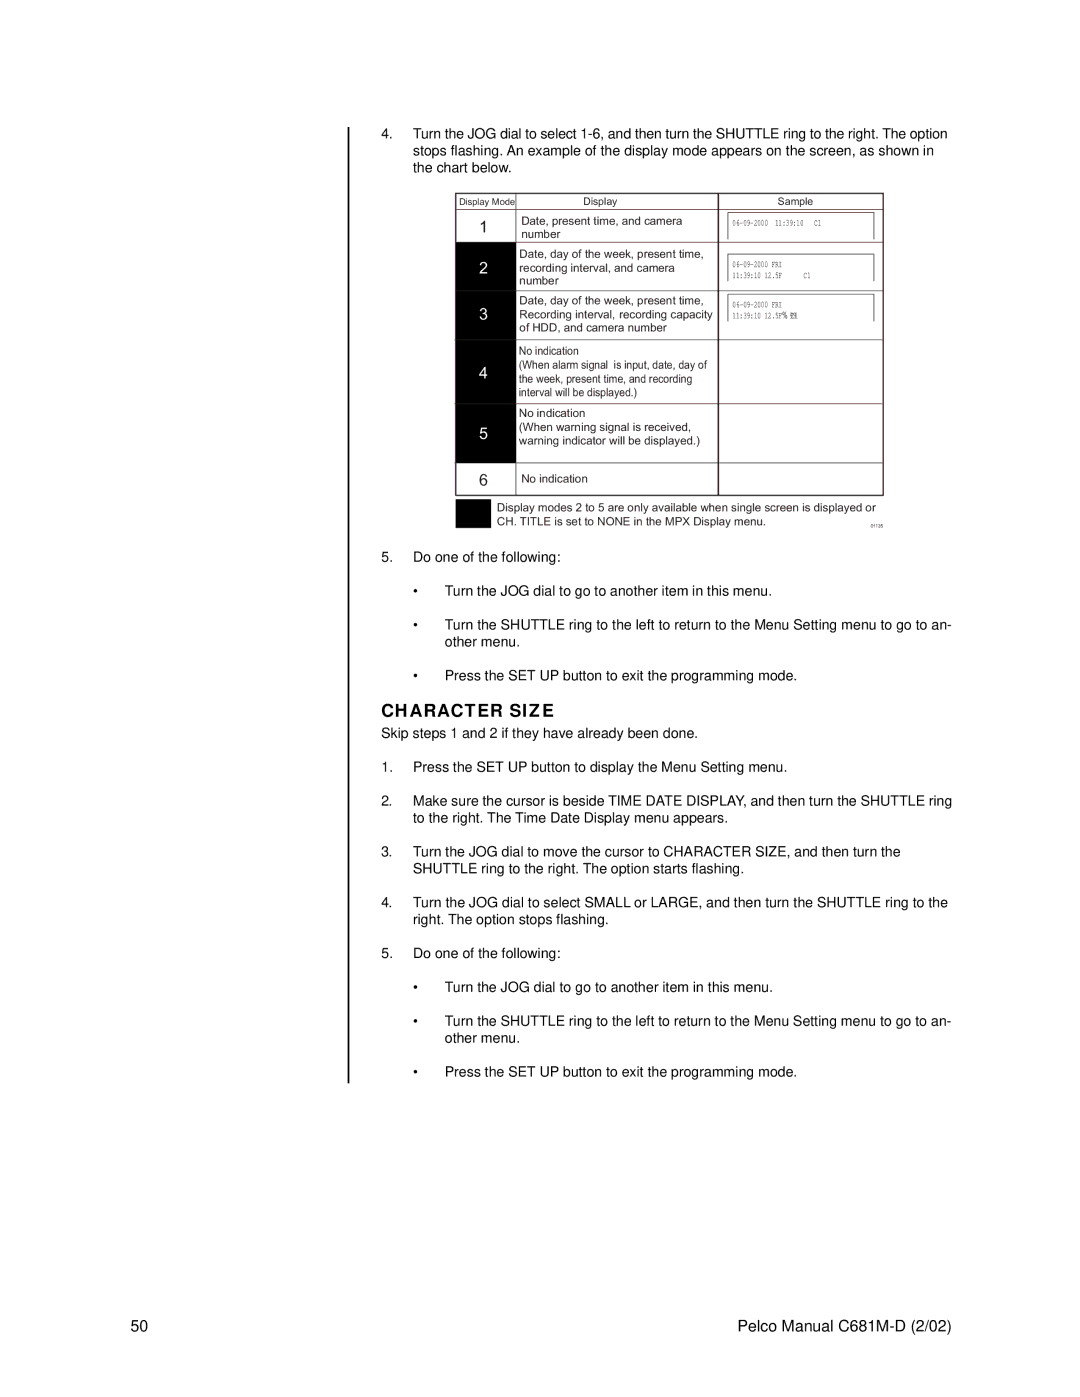
4.Turn the JOG dial to select
Display Mode | Display | Sample |
1 | Date, present time, and camera | C1 |
| |
number |
|
|
| |
|
|
|
|
|
2 | Date, day of the week, present time, |
|
|
|
recording interval, and camera |
|
| ||
11:39:10 12.5F | C1 |
| ||
| number |
| ||
|
|
|
| |
|
|
|
|
|
| Date, day of the week, present time, |
|
|
|
3 |
|
| ||
Recording interval, recording capacity |
|
| ||
11:39:10 12.5F% 99C1 |
|
| ||
| of HDD, and camera number |
|
|
|
|
|
|
|
|
| No indication |
|
|
|
4 | (When alarm signal is input, date, day of |
|
|
|
the week, present time, and recording |
|
|
| |
| interval will be displayed.) |
|
|
|
No indication
5(When warning signal is received, warning indicator will be displayed.)
6
No indication
Display modes 2 to 5 are only available when single screen is displayed or
CH. TITLE is set to NONE in the MPX Display menu. | 01135 |
5.Do one of the following:
•Turn the JOG dial to go to another item in this menu.
•Turn the SHUTTLE ring to the left to return to the Menu Setting menu to go to an- other menu.
•Press the SET UP button to exit the programming mode.
CHARACTER SIZE
Skip steps 1 and 2 if they have already been done.
1.Press the SET UP button to display the Menu Setting menu.
2.Make sure the cursor is beside TIME DATE DISPLAY, and then turn the SHUTTLE ring to the right. The Time Date Display menu appears.
3.Turn the JOG dial to move the cursor to CHARACTER SIZE, and then turn the SHUTTLE ring to the right. The option starts flashing.
4.Turn the JOG dial to select SMALL or LARGE, and then turn the SHUTTLE ring to the right. The option stops flashing.
5.Do one of the following:
•Turn the JOG dial to go to another item in this menu.
•Turn the SHUTTLE ring to the left to return to the Menu Setting menu to go to an- other menu.
•Press the SET UP button to exit the programming mode.
50 | Pelco Manual |