8.Do one of the following:
•Turn the JOG dial to go to another item in this menu.
•Turn the SHUTTLE ring to the left to return to the Menu Setting menu to go to another menu.
•Press the SET UP button to exit the programming mode.
TIMER RECORDING
When using the timer to start recording, the Define
Skip steps 1 and 2 if they have already been done.
1.Press the SET UP button to display the Menu Setting menu.
2.Turn the JOG dial to move the cursor to TIMER PROGRAM, and then turn the SHUTTLE ring to the right. The Timer Program menu appears.
3.Check that the cursor is next to SELECTED PATTERN, and then turn the SHUTTLE ring to the right. The option starts flashing.
4.Turn the JOG dial to the right to select the pattern (P1, P2, or P3) that will be used during timer recording, and then turn the SHUTTLE ring to the right. The option stops flashing.
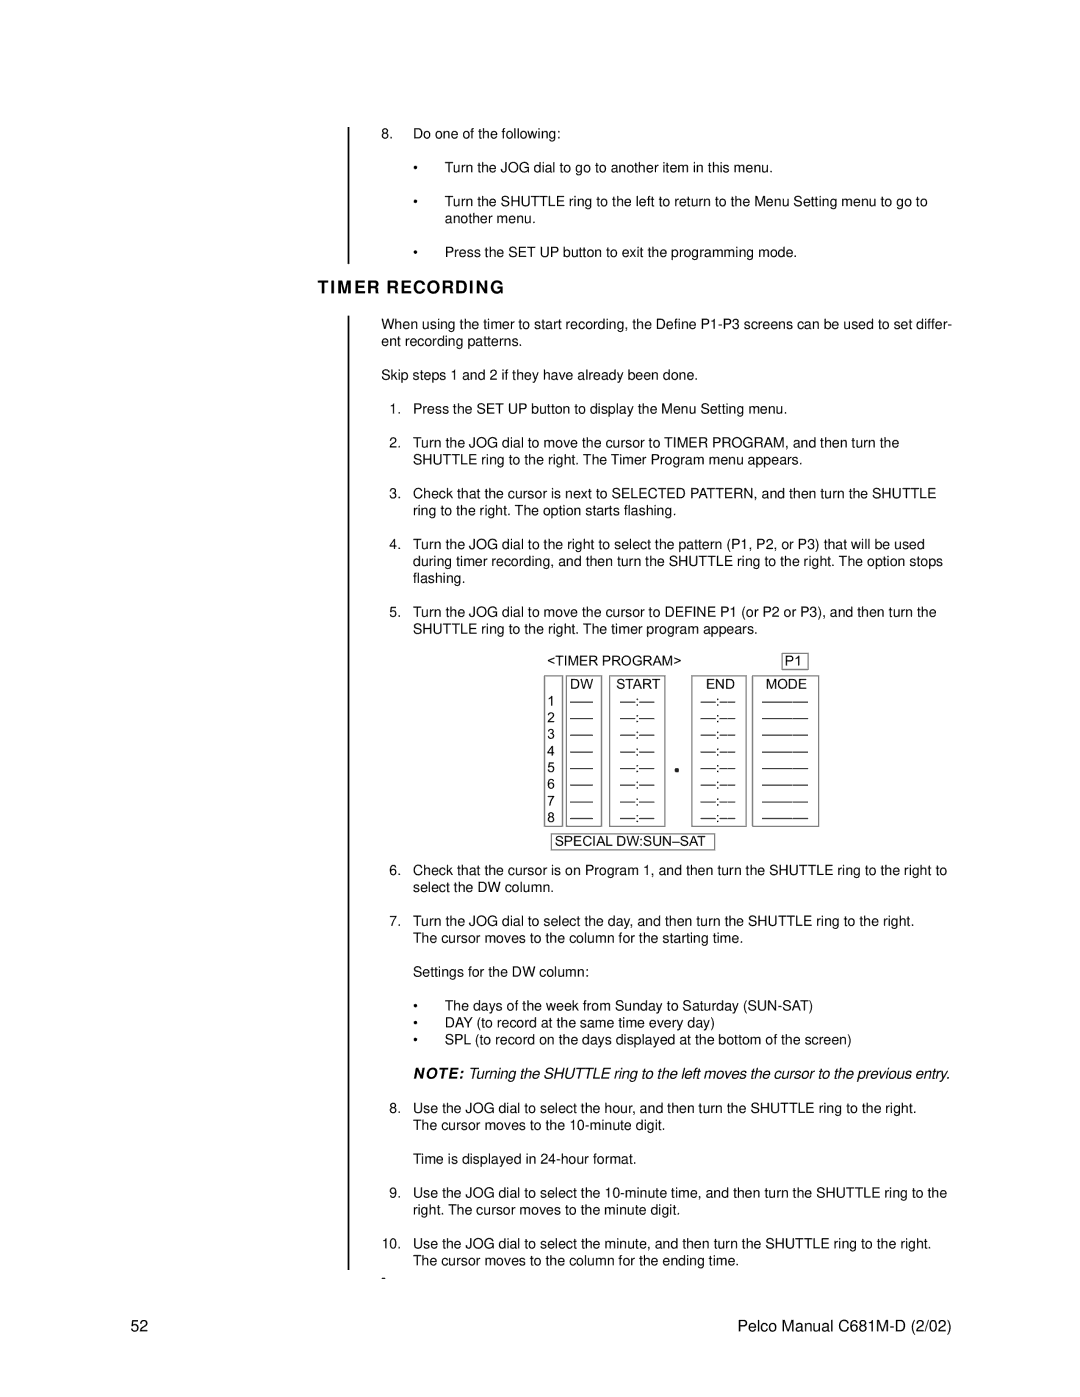
5.Turn the JOG dial to move the cursor to DEFINE P1 (or P2 or P3), and then turn the SHUTTLE ring to the right. The timer program appears.
<TIMER PROGRAM> |
| |||||
|
|
|
|
|
|
|
|
| DW |
| START |
| END |
1 |
|
|
| |||
2 |
|
|
| |||
3 |
|
|
| |||
4 |
|
|
| |||
5 |
|
|
| |||
6 |
|
|
| |||
7 |
|
|
| |||
8 |
|
|
| |||
SPECIAL
P1
MODE
6.Check that the cursor is on Program 1, and then turn the SHUTTLE ring to the right to select the DW column.
7.Turn the JOG dial to select the day, and then turn the SHUTTLE ring to the right. The cursor moves to the column for the starting time.
Settings for the DW column:
•The days of the week from Sunday to Saturday
•DAY (to record at the same time every day)
•SPL (to record on the days displayed at the bottom of the screen)
NOTE: Turning the SHUTTLE ring to the left moves the cursor to the previous entry.
8.Use the JOG dial to select the hour, and then turn the SHUTTLE ring to the right. The cursor moves to the
Time is displayed in
9.Use the JOG dial to select the
10.Use the JOG dial to select the minute, and then turn the SHUTTLE ring to the right. The cursor moves to the column for the ending time.
-
52 | Pelco Manual |