 Managing Groups
Create a New Group
To create a new address group:
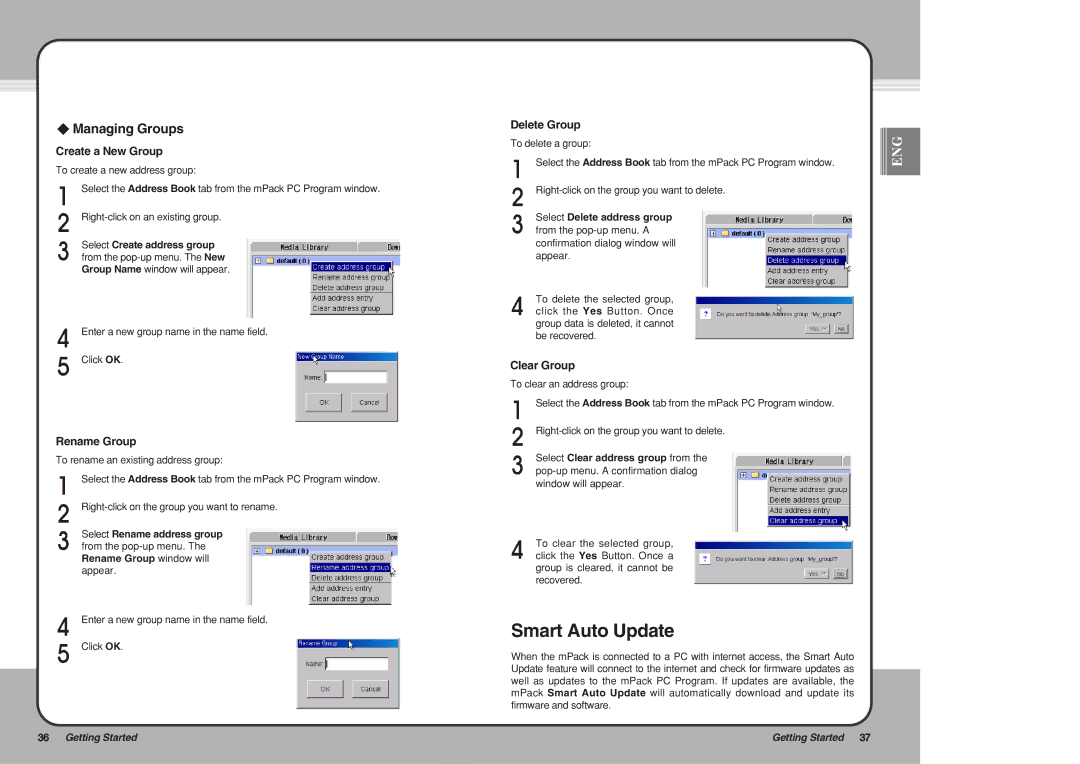
Select the Address Book tab from the mPack PC Program window.
Select Create address group from the
Enter a new group name in the name field.
Click OK.
Rename Group
To rename an existing address group:
Select the Address Book tab from the mPack PC Program window.
Select Rename address group from the
Enter a new group name in the name field.
Click OK.
Delete Group
To delete a group:
Select the Address Book tab from the mPack PC Program window.
Select Delete address group from the
To delete the selected group, click the Yes Button. Once group data is deleted, it cannot be recovered.
Clear Group
To clear an address group:
Select the Address Book tab from the mPack PC Program window.
Select Clear address group from the
To clear the selected group, click the Yes Button. Once a group is cleared, it cannot be recovered.
Smart Auto Update
When the mPack is connected to a PC with internet access, the Smart Auto Update feature will connect to the internet and check for firmware updates as well as updates to the mPack PC Program. If updates are available, the mPack Smart Auto Update will automatically download and update its firmware and software.
![]()
![]()
![]() ENG
ENG
36 Getting Started | Getting Started 37 |
