English
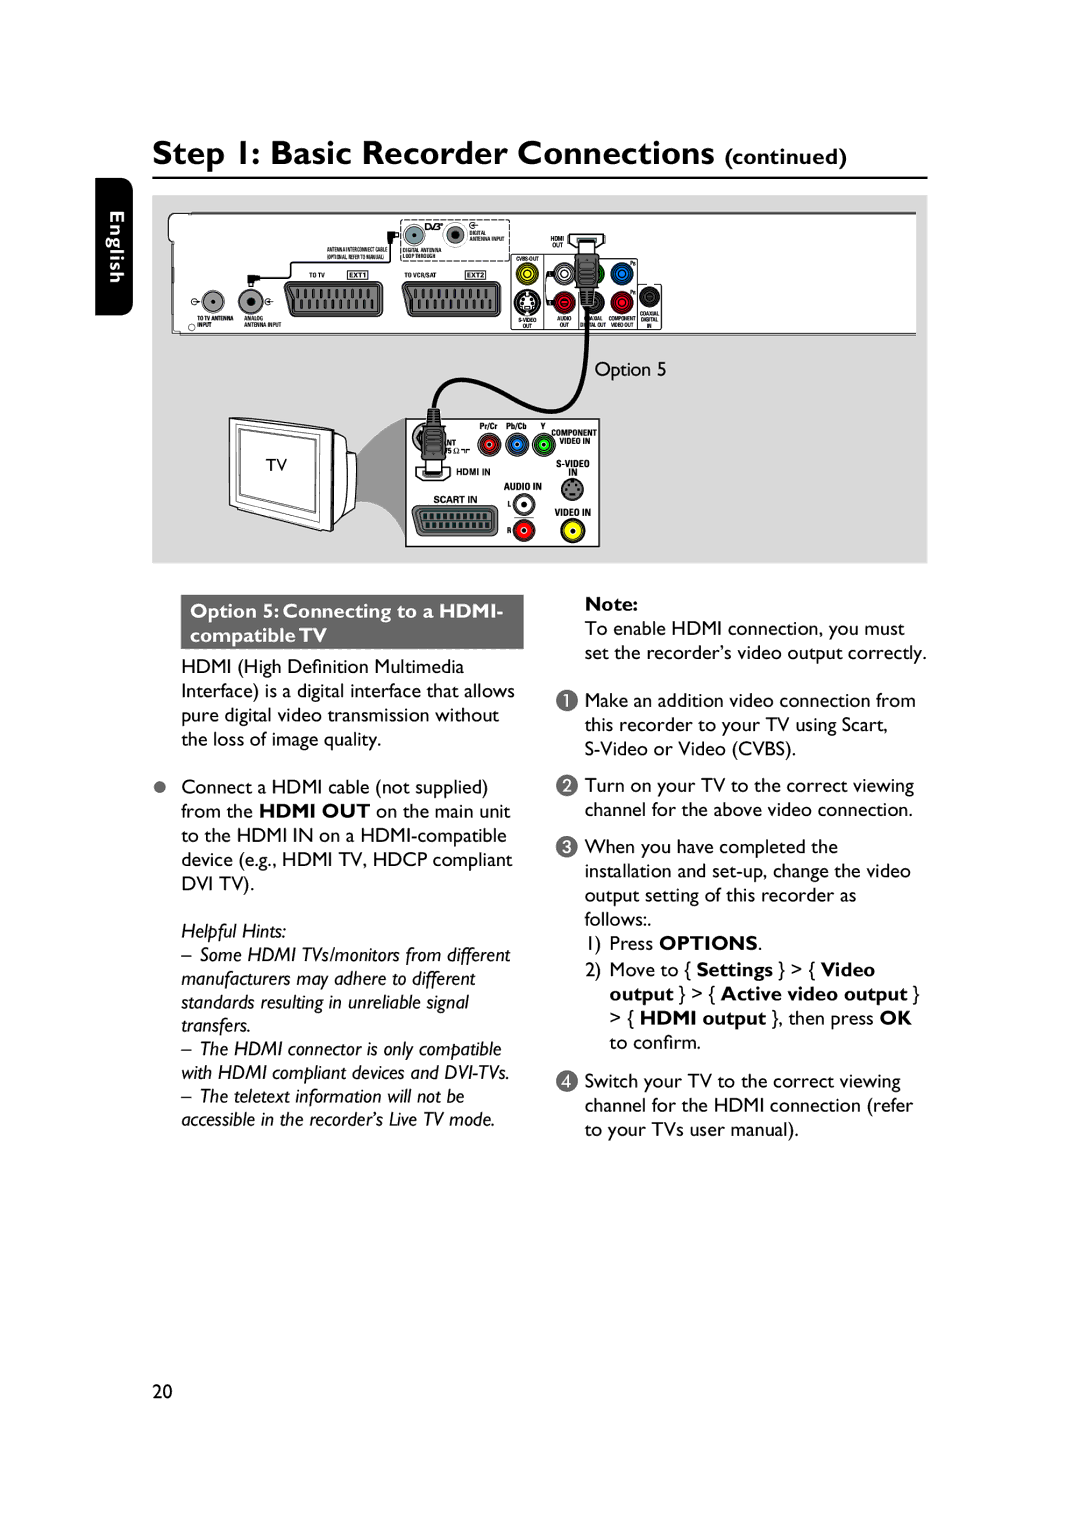
Step 1: Basic Recorder Connections (continued)
| DIGITAL | HDMI |
| ANTENNA INPUT | |
ANTENNA INTERCONNECT CABLE | DIGITAL ANTENNA | OUT |
| ||
(OPTIONAL, REFER TO MANUAL) | LOOP THROUGH |
YPB
TO TV | EXT1 | TO VCR/SAT | EXT2 |
| L |
|
|
| |
|
|
|
|
|
|
|
| PR |
|
|
|
|
|
|
| R |
|
|
|
TO TV ANTENNA | ANALOG |
|
|
|
| AUDIO | COAXIAL | COMPONENT | COAXIAL |
|
|
| DIGITAL | ||||||
INPUT | ANTENNA INPUT |
|
|
| OUT | OUT | DIGITAL OUT | VIDEO OUT | IN |
Option 5
TV
Option 5: Connecting to a HDMI- compatible TV
HDMI (High Definition Multimedia Interface) is a digital interface that allows pure digital video transmission without the loss of image quality.
Connect a HDMI cable (not supplied) from the HDMI OUT on the main unit to the HDMI IN on a
Helpful Hints:
–Some HDMI TVs/monitors from different manufacturers may adhere to different standards resulting in unreliable signal transfers.
–The HDMI connector is only compatible with HDMI compliant devices and
–The teletext information will not be accessible in the recorder’s Live TV mode.
Note:
To enable HDMI connection, you must set the recorder’s video output correctly.
A Make an addition video connection from
this recorder to your TV using Scart,
B Turn on your TV to the correct viewing channel for the above video connection.
C When you have completed the installation and
1)Press OPTIONS.
2)Move to { Settings } > { Video output } > { Active video output } > { HDMI output }, then press OK to confirm.
D Switch your TV to the correct viewing channel for the HDMI connection (refer to your TVs user manual).
20