Step 1: Basic Recorder Connections (continued)
|
|
|
| DIGITAL | HDMI |
|
|
|
|
| ANTENNA INPUT |
| |
|
| ANTENNA INTERCONNECT CABLE | DIGITAL ANTENNA |
| OUT | MAIN |
|
|
|
| |||
|
| (OPTIONAL, REFER TO MANUAL) | LOOP THROUGH |
| PB | |
|
|
|
|
| Y | |
TO TV | EXT1 | TO VCR/SAT | EXT2 | L |
| |
|
|
|
|
|
|
|
|
| R |
|
|
|
TO TV ANTENNA | ANALOG | S- | AUDIO | COAXIAL | COMPONENT |
|
INPUT | ANTENNA INPUT |
| OUT | DIGITAL OUT | VIDEO OUT | IN |
Option 4
TV
English
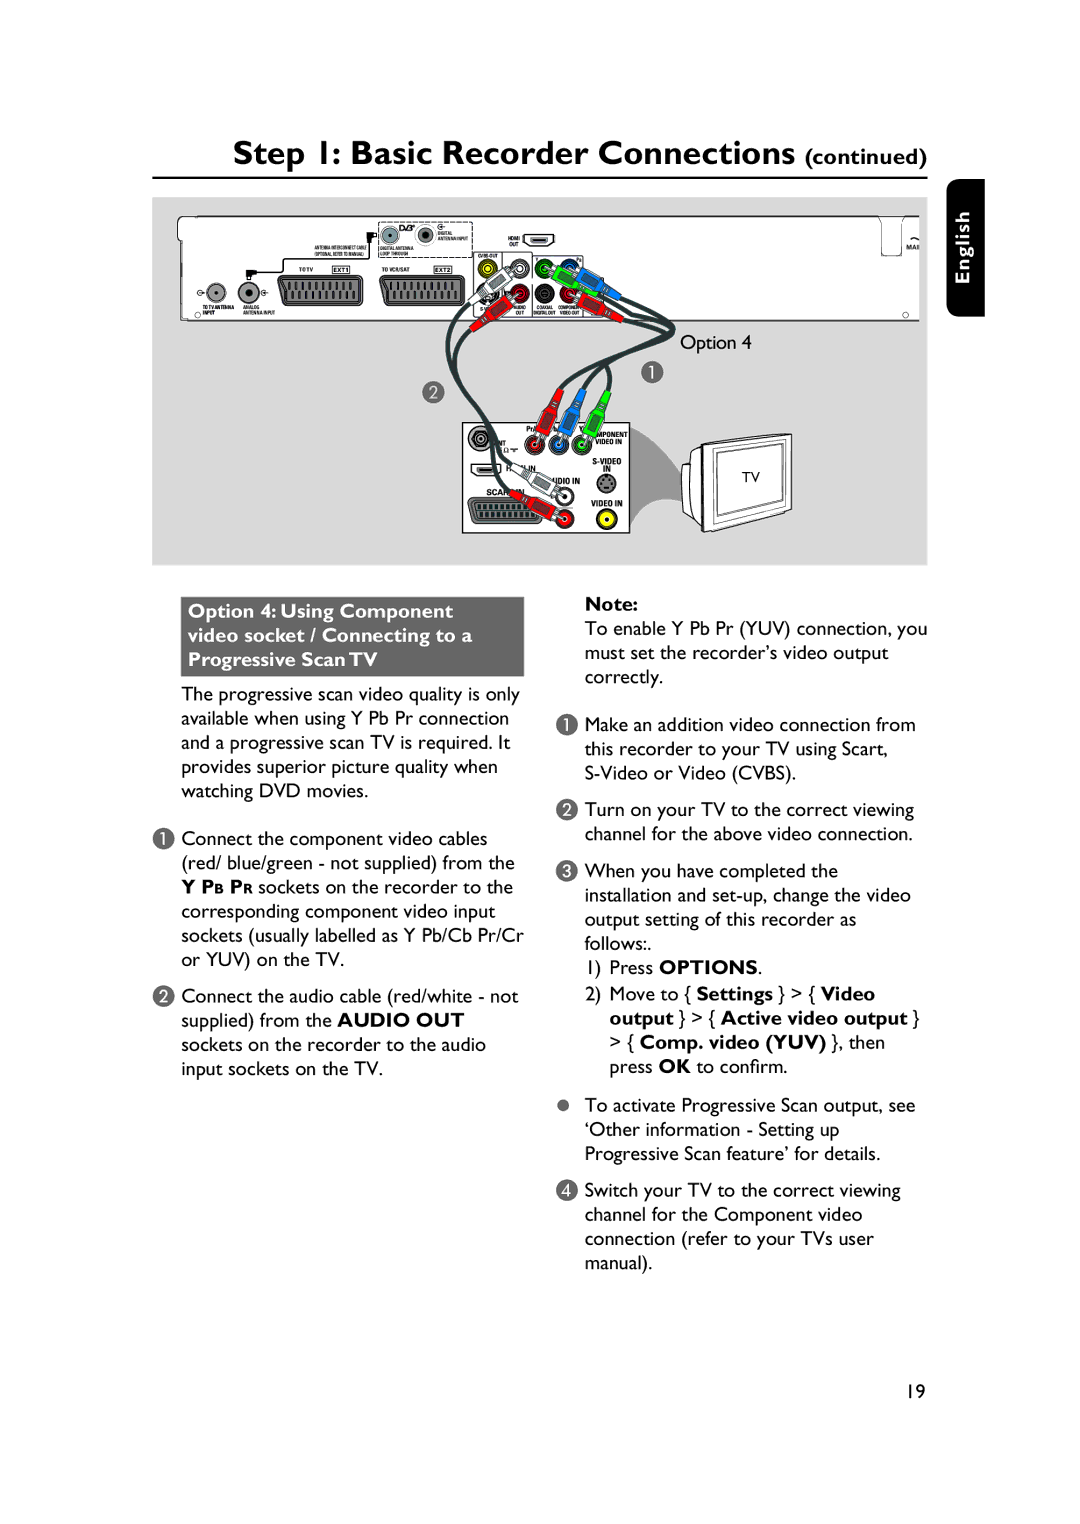
Option 4: Using Component video socket / Connecting to a Progressive Scan TV
The progressive scan video quality is only available when using Y Pb Pr connection and a progressive scan TV is required. It provides superior picture quality when watching DVD movies.
A Connect the component video cables (red/ blue/green - not supplied) from the Y PB PR sockets on the recorder to the corresponding component video input sockets (usually labelled as Y Pb/Cb Pr/Cr or YUV) on the TV.
B Connect the audio cable (red/white - not supplied) from the AUDIO OUT sockets on the recorder to the audio input sockets on the TV.
Note:
To enable Y Pb Pr (YUV) connection, you must set the recorder’s video output correctly.
A Make an addition video connection from
this recorder to your TV using Scart,
B Turn on your TV to the correct viewing channel for the above video connection.
C When you have completed the installation and
1)Press OPTIONS.
2)Move to { Settings } > { Video output } > { Active video output } > { Comp. video (YUV) }, then press OK to confirm.
To activate Progressive Scan output, see ‘Other information - Setting up Progressive Scan feature’ for details.
D Switch your TV to the correct viewing channel for the Component video connection (refer to your TVs user manual).
19
