|
| R | |
E. Glass Replacement |
| Door Latch | |
|
|
| |
| WARNING | Top & Bottom Frame |
|
|
|
| |
| • Glass is 5mm thick high temperature heat- |
|
|
| resistant ceramic glass. |
|
|
| • DO NOT REPLACE with any other material. | Center Posts |
|
| • Alternate material may shatter and cause |
|
|
| injury |
| Side |
|
| Glass | |
• | Remove door from appliance and place face down on | Frame | |
|
| ||
| a protected surface to avoid scratching the door. |
|
|
• | Remove all door rope. |
|
|
Replacing Center Glass |
|
| |
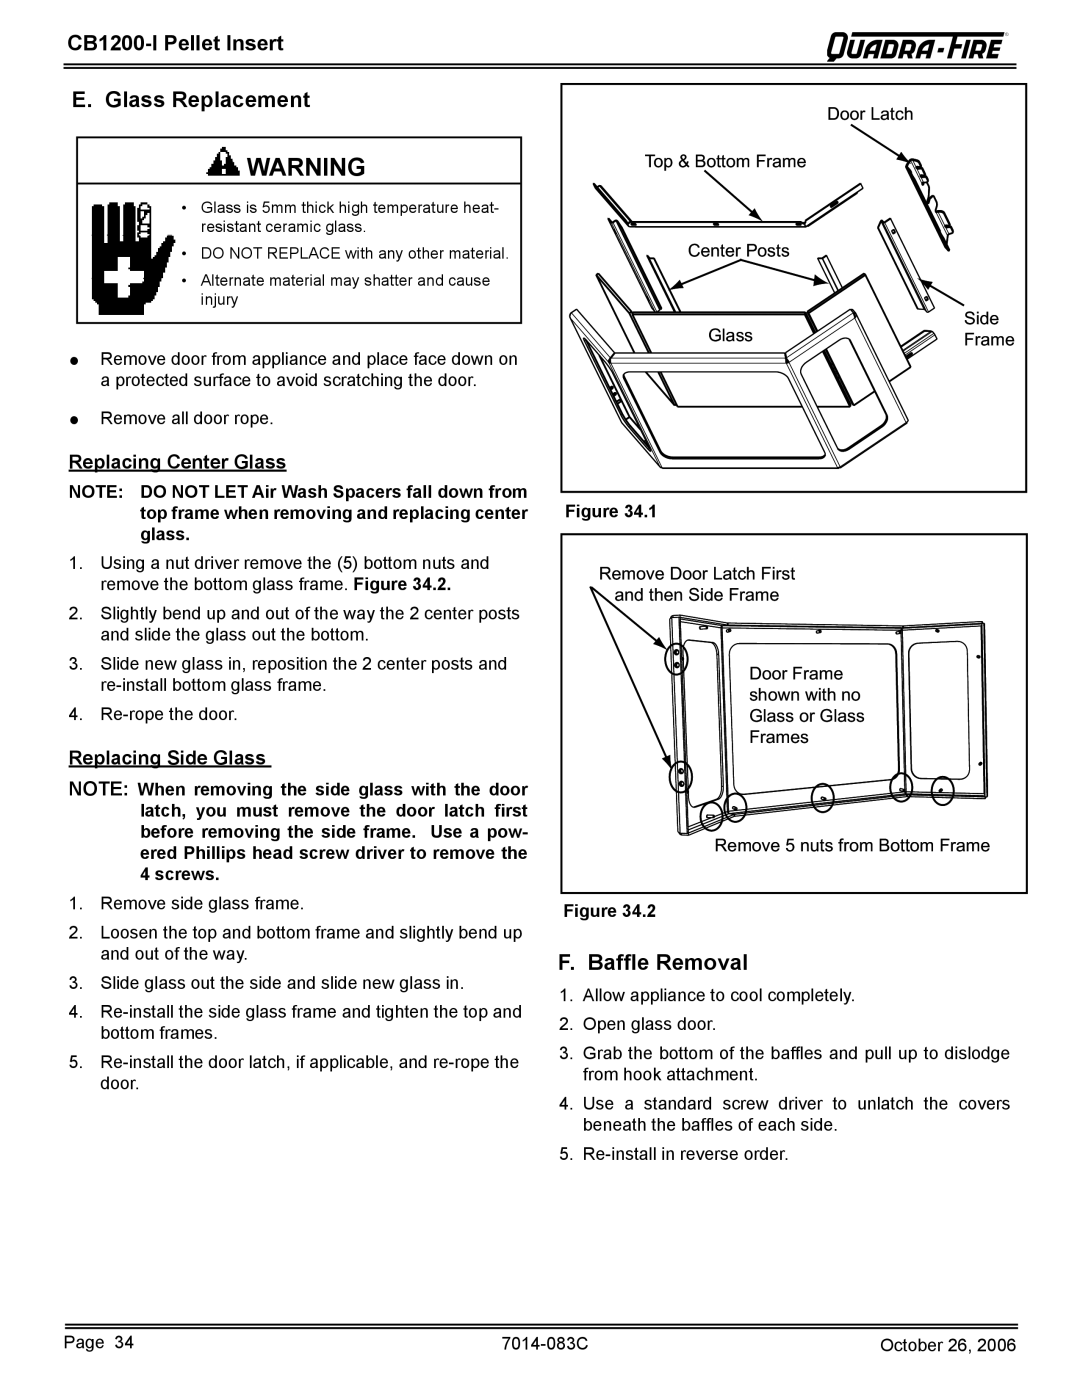
NOTE: DO NOT LET Air Wash Spacers fall down from | Figure 34.1 |
| |
| top frame when removing and replacing center |
| |
| glass. |
|
|
1. Using a nut driver remove the (5) bottom nuts and | Remove Door Latch First | |
remove the bottom glass frame. Figure 34.2. | ||
and then Side Frame | ||
|
2.Slightly bend up and out of the way the 2 center posts and slide the glass out the bottom.
3. | Slide new glass in, reposition the 2 center posts and |
| Door Frame | |
|
| |||
|
| shown with no | ||
4. |
| |||
| Glass or Glass | |||
Replacing Side Glass |
| Frames | ||
|
| |||
NOTE: When removing the side glass with the door |
|
| ||
| latch, you must remove the door latch first |
|
| |
| before removing the side frame. Use a pow- |
| Remove 5 nuts from Bottom Frame | |
| ered Phillips head screw driver to remove the |
| ||
|
|
| ||
| 4 screws. |
|
| |
1. | Remove side glass frame. |
|
| |
| Figure 34.2 | |||
2. | Loosen the top and bottom frame and slightly bend up |
| ||
|
| |||
| and out of the way. | F. Baffle Removal | ||
3. | Slide glass out the side and slide new glass in. | |||
1. Allow appliance to cool completely. | ||||
4. | ||||
2. Open glass door. | ||||
| bottom frames. | |||
| 3. Grab the bottom of the baffles and pull up to dislodge | |||
5. | ||||
| from hook attachment. | |||
| door. |
| ||
|
|
| ||
4. Use a standard screw driver to unlatch the covers beneath the baffles of each side.
5.
Page 34 | October 26, 2006 |
