R
CB1200-I Pellet Insert
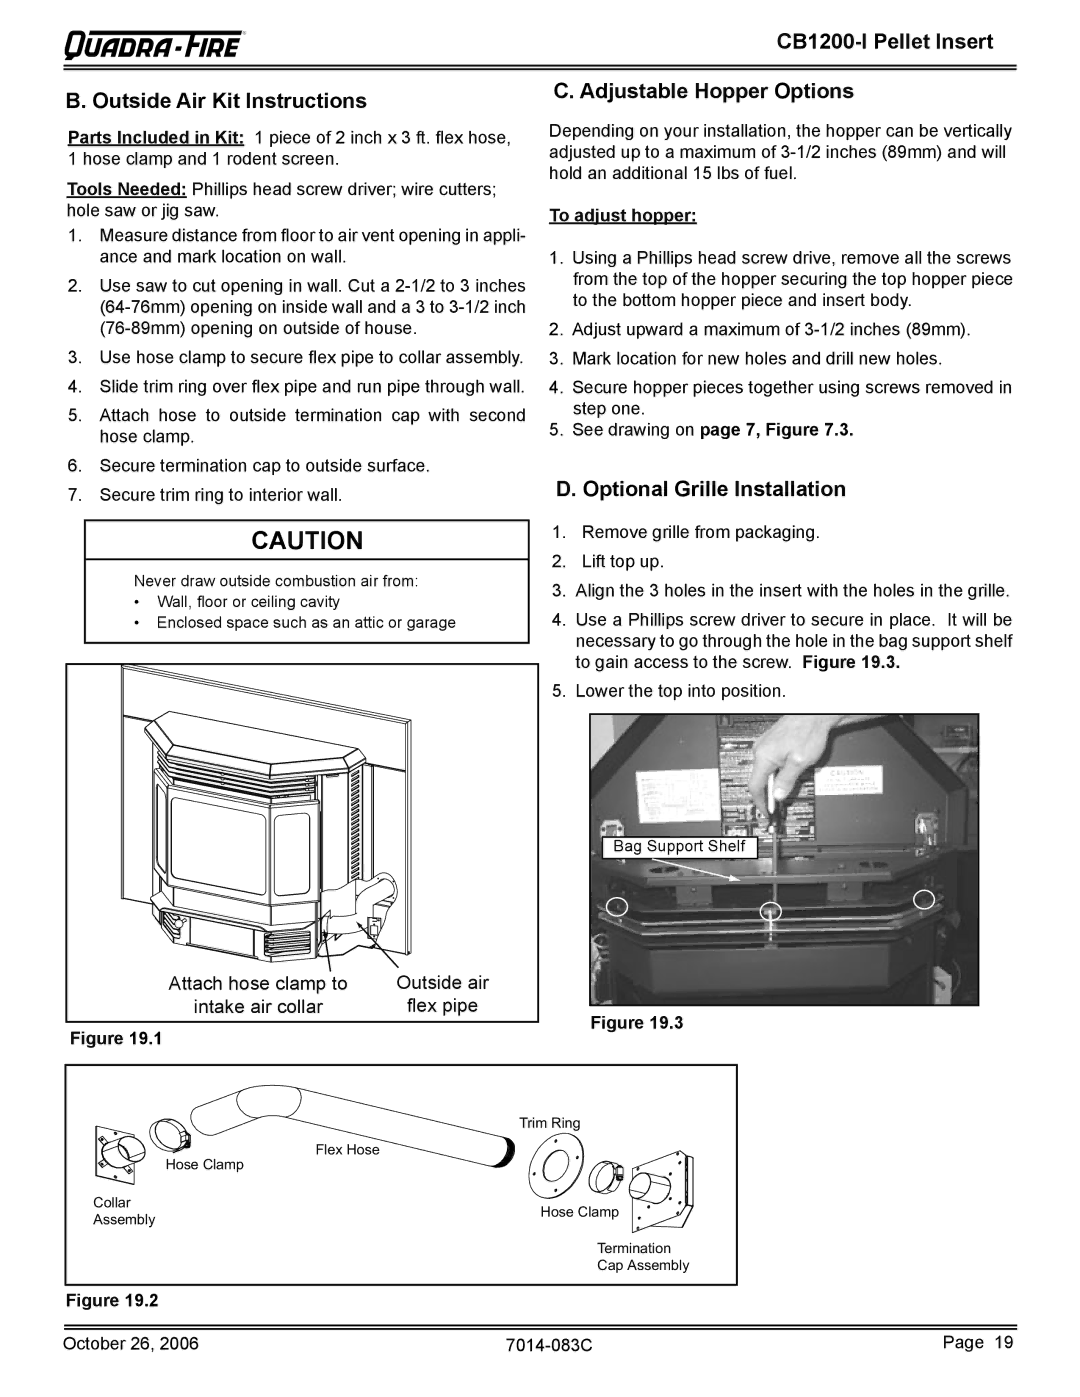
B. Outside Air Kit Instructions
Parts Included in Kit: 1 piece of 2 inch x 3 ft. flex hose, 1 hose clamp and 1 rodent screen.
Tools Needed: Phillips head screw driver; wire cutters; hole saw or jig saw.
1.Measure distance from floor to air vent opening in appli- ance and mark location on wall.
2.Use saw to cut opening in wall. Cut a
3.Use hose clamp to secure flex pipe to collar assembly.
4.Slide trim ring over flex pipe and run pipe through wall.
5.Attach hose to outside termination cap with second hose clamp.
6.Secure termination cap to outside surface.
7.Secure trim ring to interior wall.
CAUTION
Never draw outside combustion air from:
•Wall, floor or ceiling cavity
•Enclosed space such as an attic or garage
Attach hose clamp to | Outside air |
intake air collar | flex pipe |
Figure 19.1
C. Adjustable Hopper Options
Depending on your installation, the hopper can be vertically adjusted up to a maximum of
To adjust hopper:
1.Using a Phillips head screw drive, remove all the screws from the top of the hopper securing the top hopper piece to the bottom hopper piece and insert body.
2.Adjust upward a maximum of
3.Mark location for new holes and drill new holes.
4.Secure hopper pieces together using screws removed in step one.
5.See drawing on page 7, Figure 7.3.
D.Optional Grille Installation
1.Remove grille from packaging.
2.Lift top up.
3.Align the 3 holes in the insert with the holes in the grille.
4.Use a Phillips screw driver to secure in place. It will be necessary to go through the hole in the bag support shelf to gain access to the screw. Figure 19.3.
5.Lower the top into position.
Bag Support Shelf
Figure 19.3
| Trim Ring | |
| Flex Hose | |
| Hose Clamp | |
Collar | Hose Clamp | |
Assembly | ||
| ||
| Termination | |
| Cap Assembly |
Figure 19.2
October 26, 2006 | Page 19 |