Mt. Vernon Pellet Insert (AE)
R
c.Assemble the crevice tool from the micro cleaning kit to attach to a Shop Vac. Figure 38.1.
Figure 38.1
d.Use the crevice tool to fi nish cleaning the heat exchanger
fins. It is critical that the 2 exhaust exits at the back of the
firebox fl oor (left and right) be thoroughly cleaned. Figure 38.2. There are several ways this can done.
1.Use the crevice tool.
2.Attach a hose 1/2 inch (12.7mm) in diameter and approximately 2 feet (607mm in length to your vacuum hose.
3.Use a bottle brush and push the ash down to the bottom. Remove the combustion (exhaust) blower and then vacuum out the ash.
2 exhaust exits (left and right side) must be thoroughly cleaned. Each exit is approximately 4 inches wide, 1 inch across and 3 inches deep.
Figure 38.2
NOTE It is normal to see a certain amount of wear of the heat exchanger fi ns. You may notice some fl aking and pitting on some of the pins. The heat exchanger system will function as designed with as many as 15 of these pins missing.
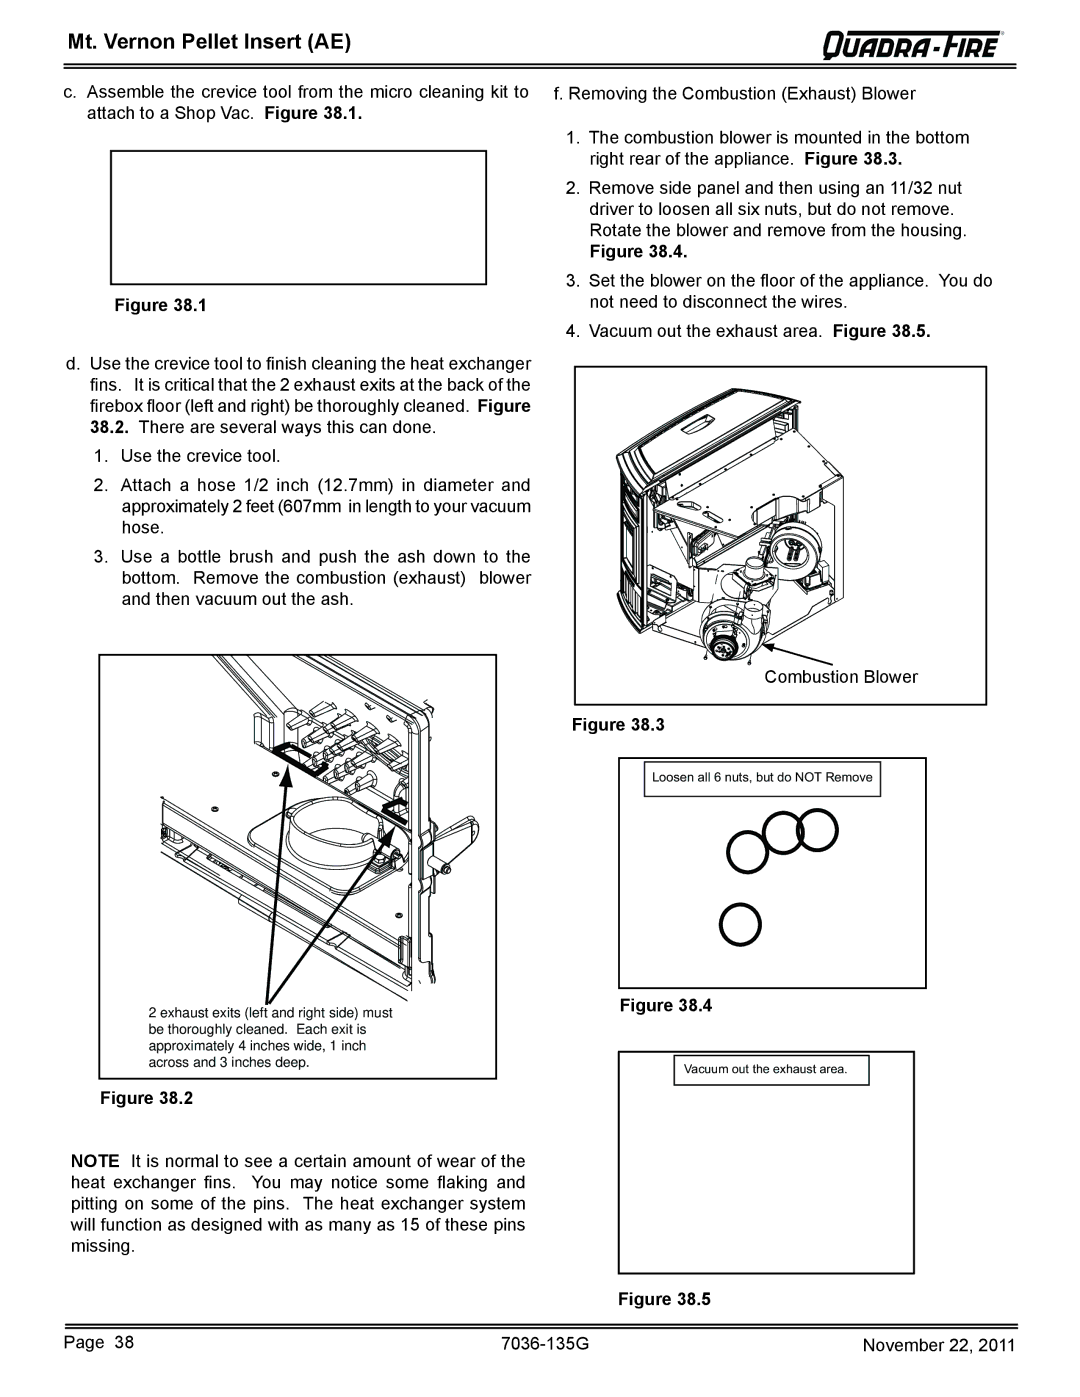
f. Removing the Combustion (Exhaust) Blower
1.The combustion blower is mounted in the bottom right rear of the appliance. Figure 38.3.
2.Remove side panel and then using an 11/32 nut driver to loosen all six nuts, but do not remove. Rotate the blower and remove from the housing.
Figure 38.4.
3.Set the blower on the fl oor of the appliance. You do not need to disconnect the wires.
4.Vacuum out the exhaust area. Figure 38.5.
Combustion Blower
Figure 38.3
Loosen all 6 nuts, but do NOT Remove
Figure 38.4
Vacuum out the exhaust area.
Figure 38.5
Page 38 |
| November 22, 2011 |