Step 9. Finishing
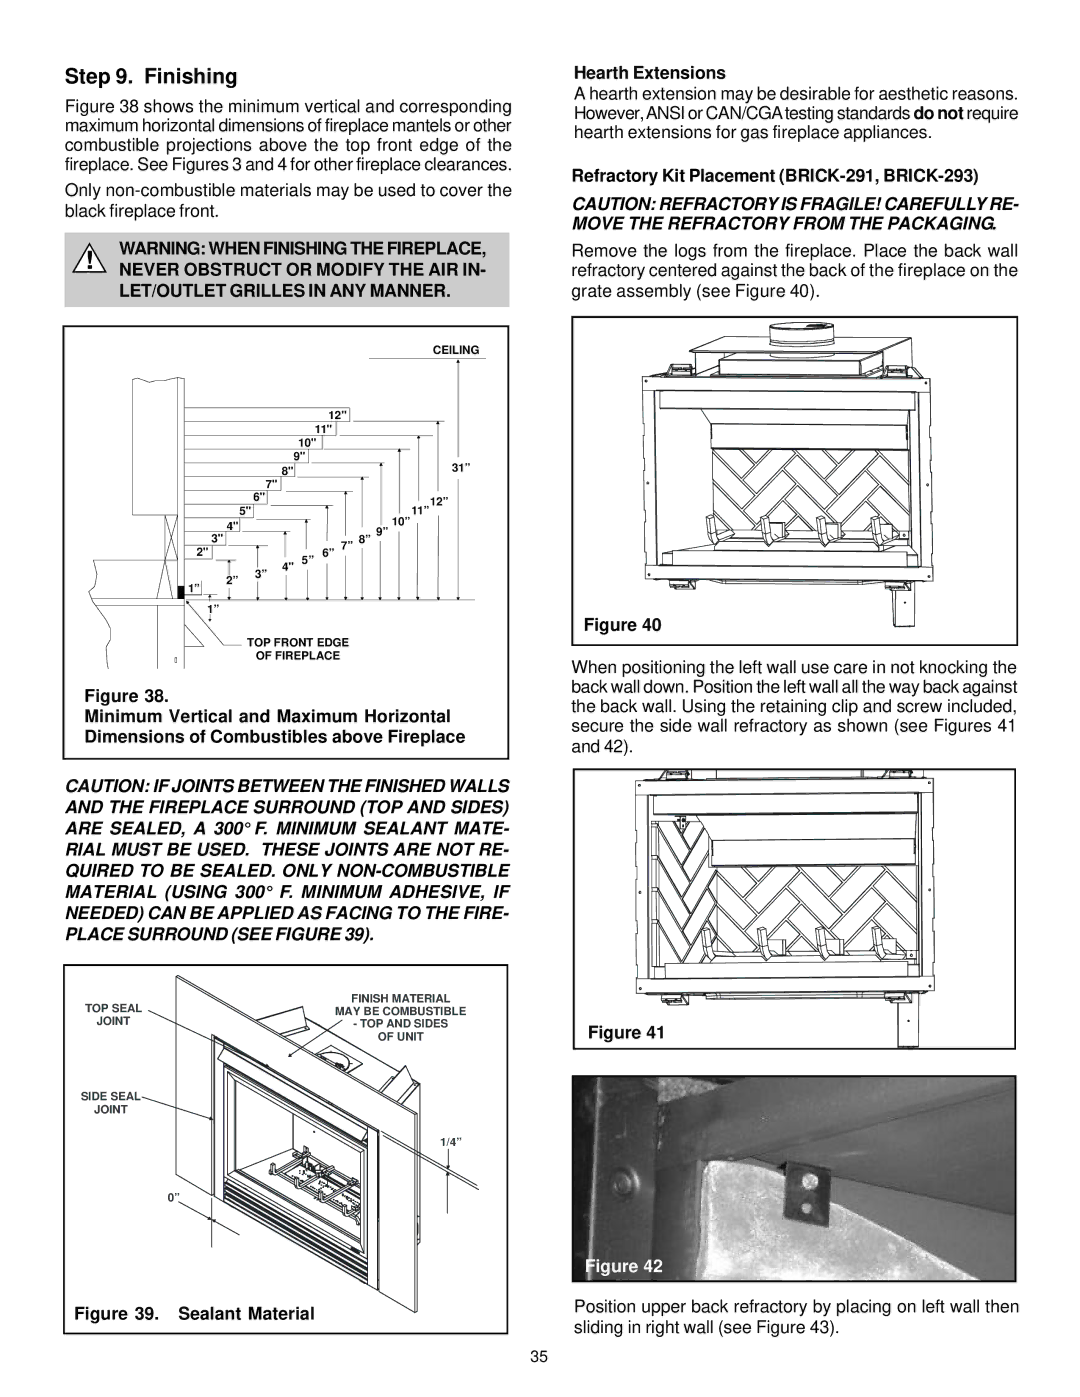
Figure 38 shows the minimum vertical and corresponding maximum horizontal dimensions of fireplace mantels or other combustible projections above the top front edge of the fireplace. See Figures 3 and 4 for other fireplace clearances.
Only
WARNING: WHEN FINISHING THE FIREPLACE,
!NEVER OBSTRUCT OR MODIFY THE AIR IN- LET/OUTLET GRILLES IN ANY MANNER.
|
|
|
|
| CEILING |
|
|
|
| 12" | |
|
|
|
| 11" |
|
|
|
| 10" |
| |
|
| 9" |
| 31” | |
| 7" | 8" |
|
| |
|
|
|
|
| |
| 6" |
|
|
| 12” |
| 5" |
|
|
| |
|
|
|
| 11” | |
4" |
|
|
|
| 10” |
|
|
|
| 7” 8” 9” | |
2" 3" |
|
| 5” | 6” | |
| 3” | 4" |
|
| |
2” |
|
|
|
| |
|
|
|
|
| |
1” |
|
|
|
|
|
1” |
|
|
|
|
|
| TOP FRONT EDGE | ||||
| OF FIREPLACE |
| |||
Figure 38.
Minimum Vertical and Maximum Horizontal Dimensions of Combustibles above Fireplace
CAUTION: IF JOINTS BETWEEN THE FINISHED WALLS AND THE FIREPLACE SURROUND (TOP AND SIDES) ARE SEALED, A 300° F. MINIMUM SEALANT MATE-
RIAL MUST BE USED. THESE JOINTS ARE NOT RE- QUIRED TO BE SEALED. ONLY
TOP SEAL | FINISH MATERIAL |
MAY BE COMBUSTIBLE | |
JOINT | - TOP AND SIDES |
| OF UNIT |
SIDE SEAL
JOINT
1/4”
0”
Figure 39. Sealant Material
Hearth Extensions
A hearth extension may be desirable for aesthetic reasons. However,ANSI or CAN/CGA testing standards do not require hearth extensions for gas fireplace appliances.
Refractory Kit Placement (BRICK-291, BRICK-293)
CAUTION: REFRACTORY IS FRAGILE! CAREFULLY RE- MOVE THE REFRACTORY FROM THE PACKAGING.
Remove the logs from the fireplace. Place the back wall refractory centered against the back of the fireplace on the grate assembly (see Figure 40).
Figure 40
When positioning the left wall use care in not knocking the back wall down. Position the left wall all the way back against the back wall. Using the retaining clip and screw included, secure the side wall refractory as shown (see Figures 41 and 42).
Figure 41
Figure 42
Position upper back refractory by placing on left wall then sliding in right wall (see Figure 43).
35