SETUP AND CONNECTIONS
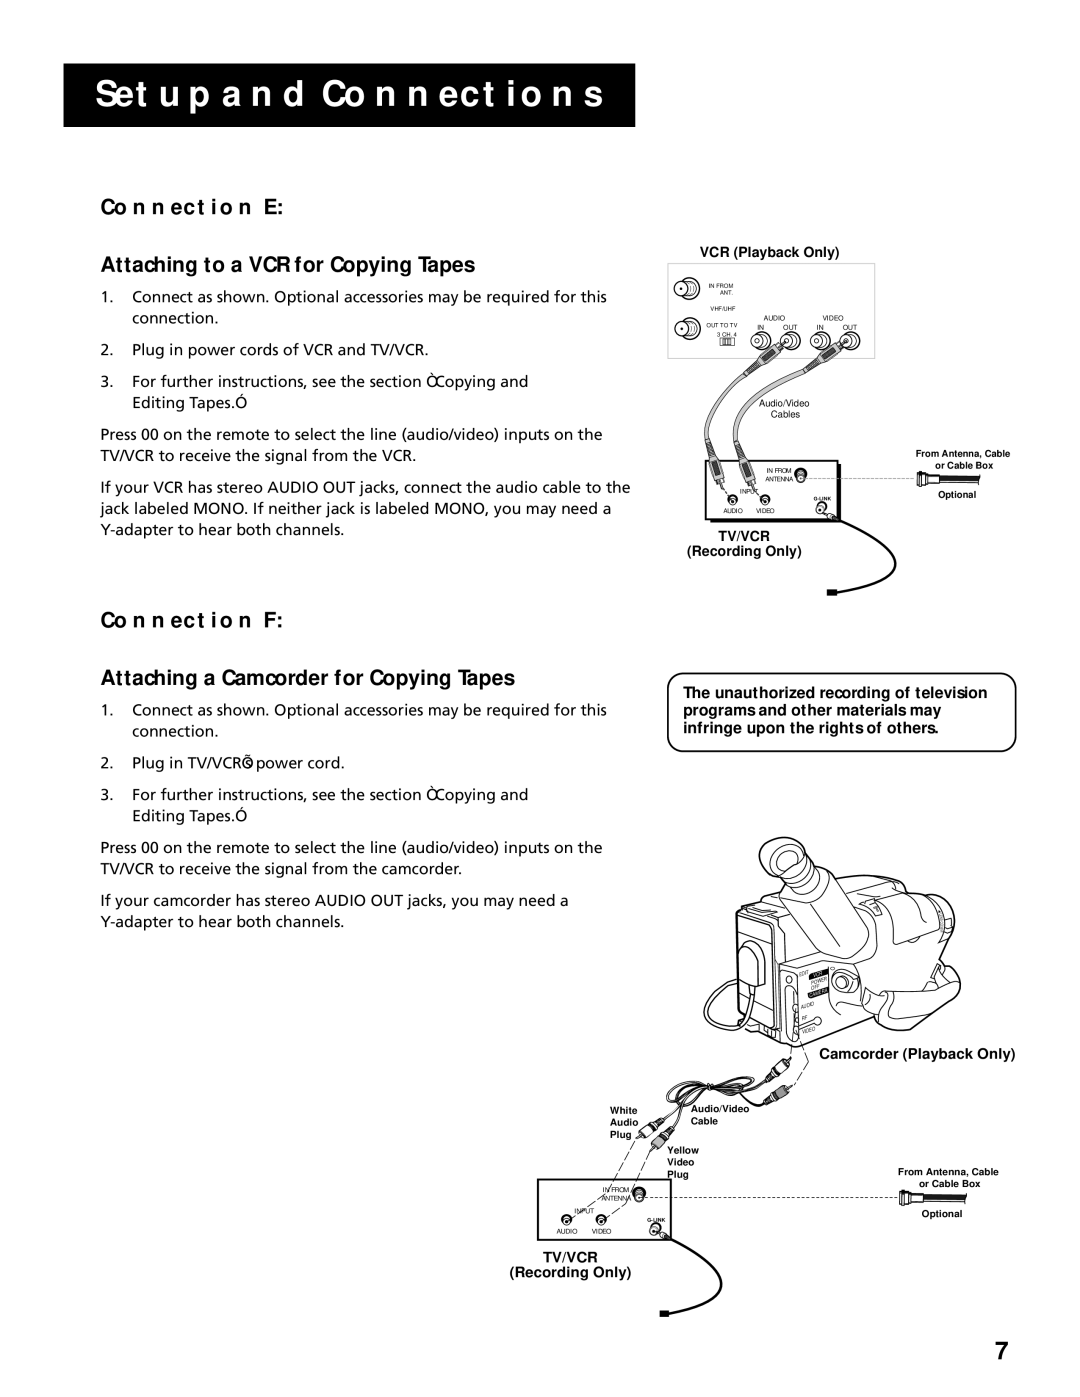
CONNECTION E:
Attaching to a VCR for Copying Tapes
1. | Connect as shown. Optional accessories may be required for this |
| connection. |
2. | Plug in power cords of VCR and TV/VCR. |
3. | For further instructions, see the section “Copying and |
VCR (Playback Only)
IN FROM |
|
|
|
|
ANT. |
|
|
|
|
VHF/UHF |
|
|
|
|
| AUDIO | VIDEO | ||
OUT TO TV | IN | OUT | IN | OUT |
3 CH. 4 |
|
|
|
|
Editing Tapes.” |
Press 00 on the remote to select the line (audio/video) inputs on the TV/VCR to receive the signal from the VCR.
If your VCR has stereo AUDIO OUT jacks, connect the audio cable to the jack labeled MONO. If neither jack is labeled MONO, you may need a
Audio/Video
Cables
IN FROM
ANTENNA
INPUT
AUDIO VIDEO
TV/VCR
(Recording Only)
From Antenna, Cable or Cable Box
Optional
CONNECTION F:
Attaching a Camcorder for Copying Tapes
1.Connect as shown. Optional accessories may be required for this connection.
2.Plug in TV/VCR’s power cord.
3.For further instructions, see the section “Copying and Editing Tapes.”
Press 00 on the remote to select the line (audio/video) inputs on the TV/VCR to receive the signal from the camcorder.
If your camcorder has stereo AUDIO OUT jacks, you may need a
The unauthorized recording of television programs and other materials may infringe upon the rights of others.
L
E
N
S
C
O
V
E
R
EDIT | VCR | |
| POW | ER |
| OFF |
|
| ERA | |
| CAM |
|
AUDIO |
| |
RF |
|
|
VIDEO |
| |
Camcorder (Playback Only)
White | Audio/Video |
Audio | Cable |
Plug |
|
Yellow |
|
Video | From Antenna, Cable |
Plug | |
IN FROM | or Cable Box |
| |
ANTENNA |
|
INPUT | Optional |
| |
AUDIO VIDEO |
|
TV/VCR
(Recording Only)
7
