Mounting Rear Foot
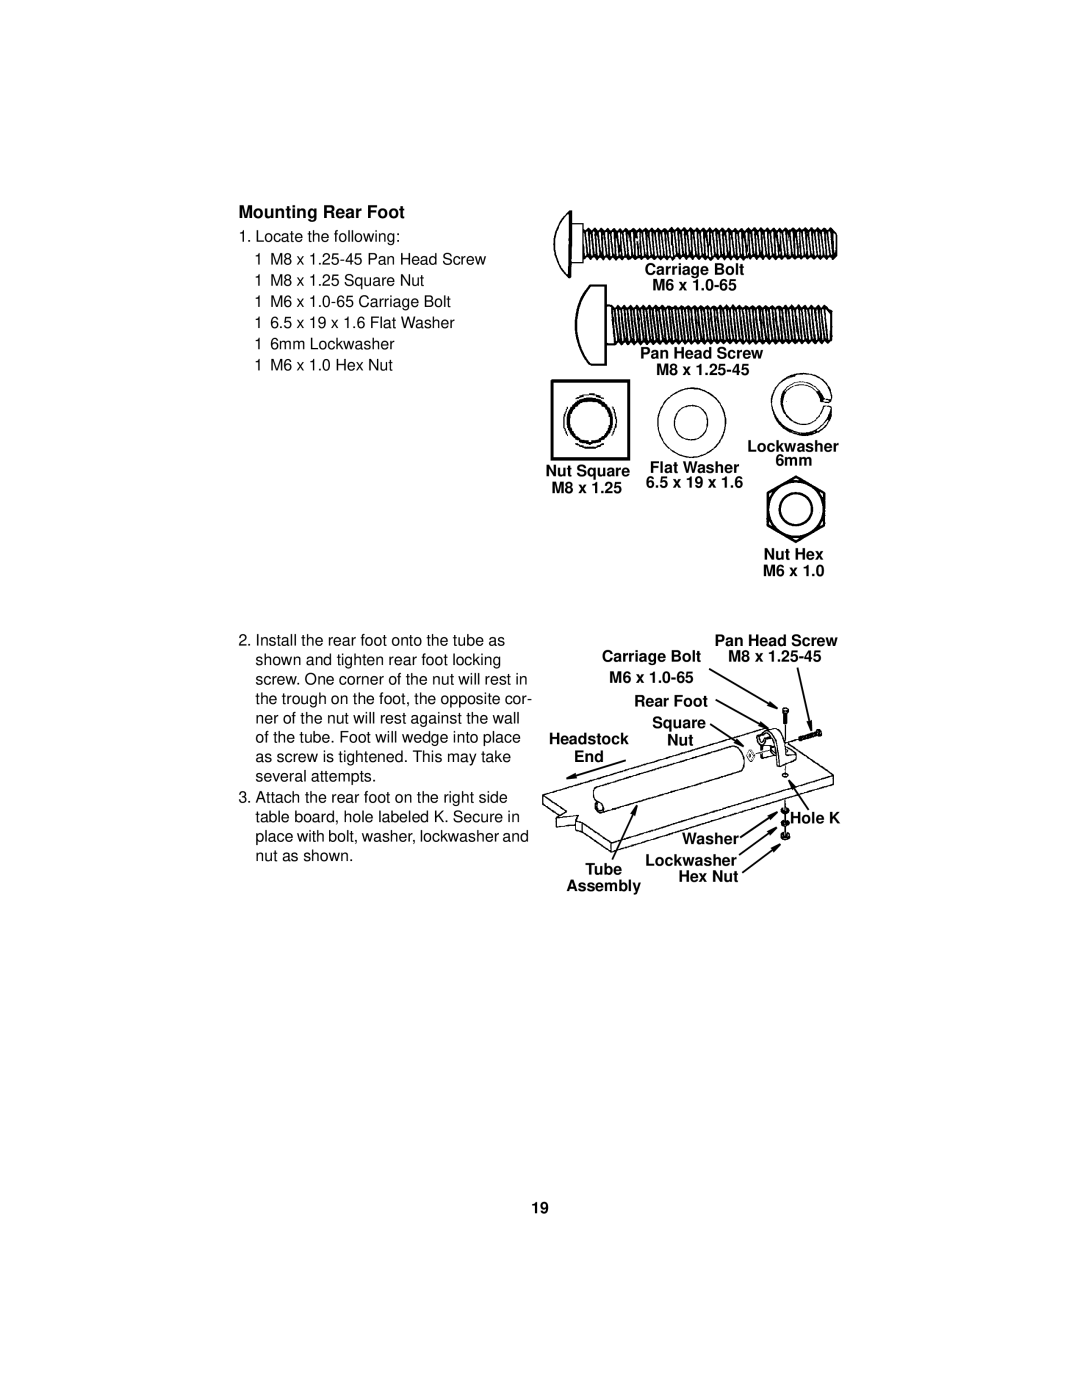
1. Locate the following: |
|
|
| ||
1 | M8 x | Carriage Bolt |
|
| |
1 | M8 x 1.25 Square Nut |
|
|
| |
| M6 x |
|
| ||
1 | M6 x |
|
|
|
|
1 | 6.5 x 19 x 1.6 Flat Washer |
|
|
|
|
1 | 6mm Lockwasher |
| Pan Head Screw |
|
|
1 | M6 x 1.0 Hex Nut |
|
|
| |
| M8 x |
|
| ||
|
|
| |||
|
|
|
|
|
|
|
|
| Lockwasher | ||
| Nut Square | Flat Washer | 6mm | ||
|
|
| |||
| M8 x 1.25 | 6.5 x 19 x 1.6 |
|
| |
|
|
|
| ||
Nut Hex
M6 x 1.0
2.Install the rear foot onto the tube as shown and tighten rear foot locking screw. One corner of the nut will rest in the trough on the foot, the opposite cor- ner of the nut will rest against the wall of the tube. Foot will wedge into place as screw is tightened. This may take several attempts.
3.Attach the rear foot on the right side table board, hole labeled K. Secure in place with bolt, washer, lockwasher and nut as shown.
Pan Head Screw
Carriage Bolt M8 x
M6 x
Rear Foot
Square
Headstock Nut
End
Hole K
Washer
Lockwasher
Tube Hex Nut
Assembly
19
