Spindle Turning
![]() WARNING: For your own safety, turn switch "OFF" and remove switch key before mounting work- piece in lathe.
WARNING: For your own safety, turn switch "OFF" and remove switch key before mounting work- piece in lathe.
If you have never done any amount of wood turning, we suggest that you prac- tice using the various wood turning tools. Start with a small spindle turning.
Be sure to study the "How To..." section of this manual. It explains and illustrates the correct use of the turning stools, the positioning of the tool rest and other infor- mation to help you gain experience.
1.Carefully inspect and select a piece of wood 2" x 2" x 12" and always use wood free of checks, splits, cracks or knots.
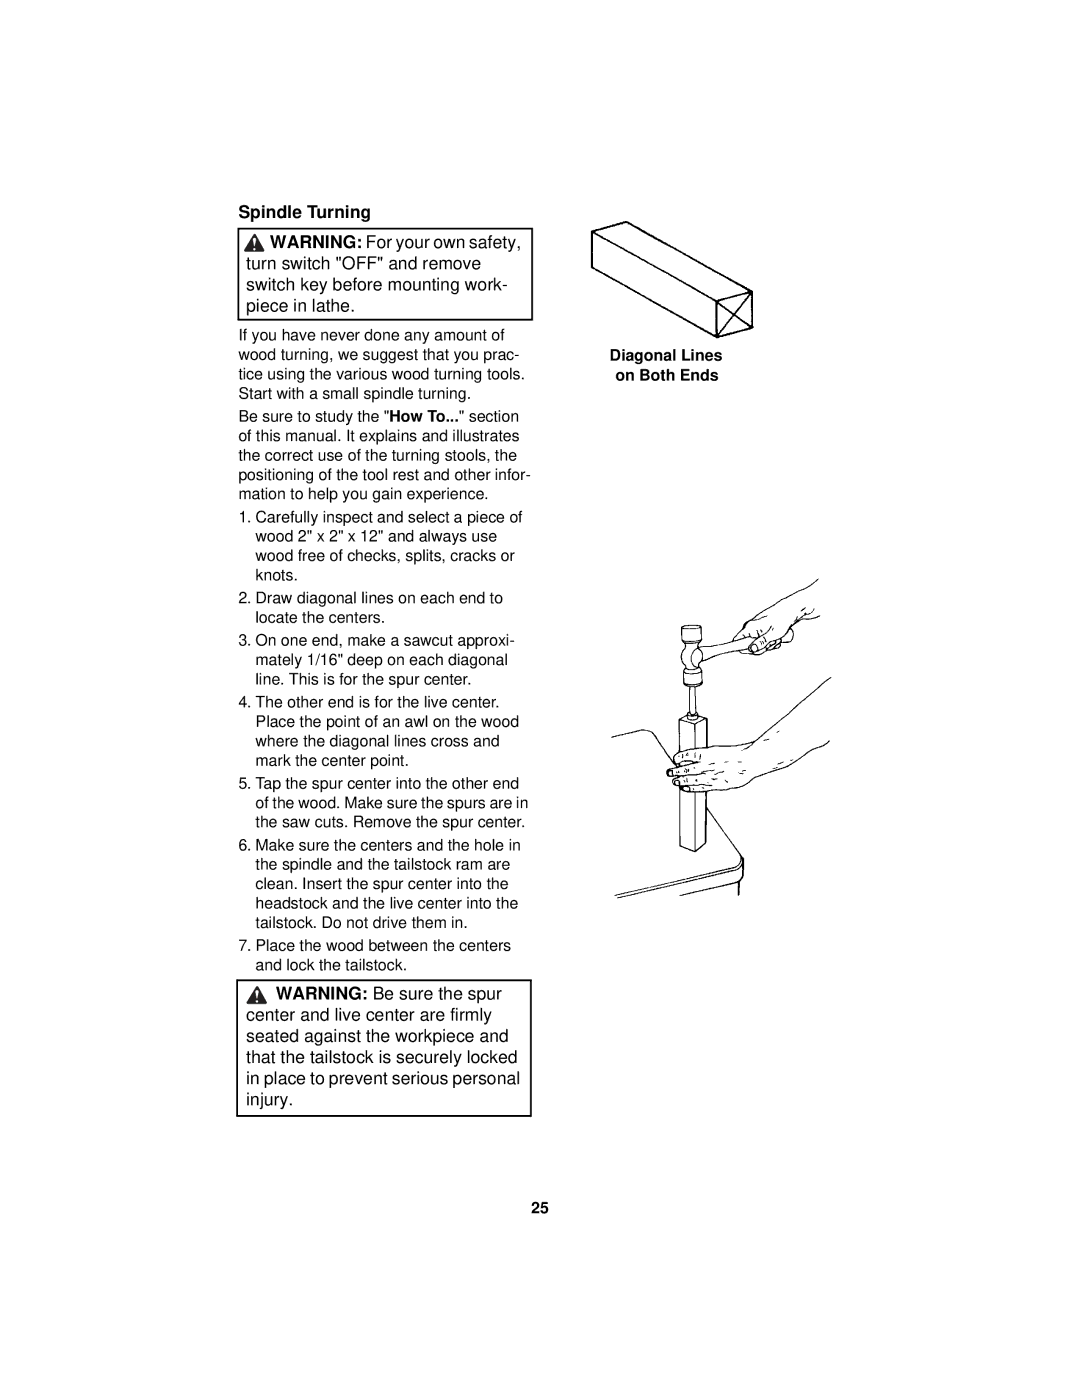
2.Draw diagonal lines on each end to locate the centers.
3.On one end, make a sawcut approxi- mately 1/16" deep on each diagonal line. This is for the spur center.
4.The other end is for the live center. Place the point of an awl on the wood where the diagonal lines cross and mark the center point.
5.Tap the spur center into the other end of the wood. Make sure the spurs are in the saw cuts. Remove the spur center.
6.Make sure the centers and the hole in the spindle and the tailstock ram are clean. Insert the spur center into the headstock and the live center into the tailstock. Do not drive them in.
7.Place the wood between the centers and lock the tailstock.
![]() WARNING: Be sure the spur center and live center are firmly seated against the workpiece and that the tailstock is securely locked in place to prevent serious personal injury.
WARNING: Be sure the spur center and live center are firmly seated against the workpiece and that the tailstock is securely locked in place to prevent serious personal injury.
Diagonal Lines on Both Ends
25
