Assembly (continued)
Spur and Cup Center Installation
1.From the loose parts package find the following:
1
1Spur Center
1Live Center
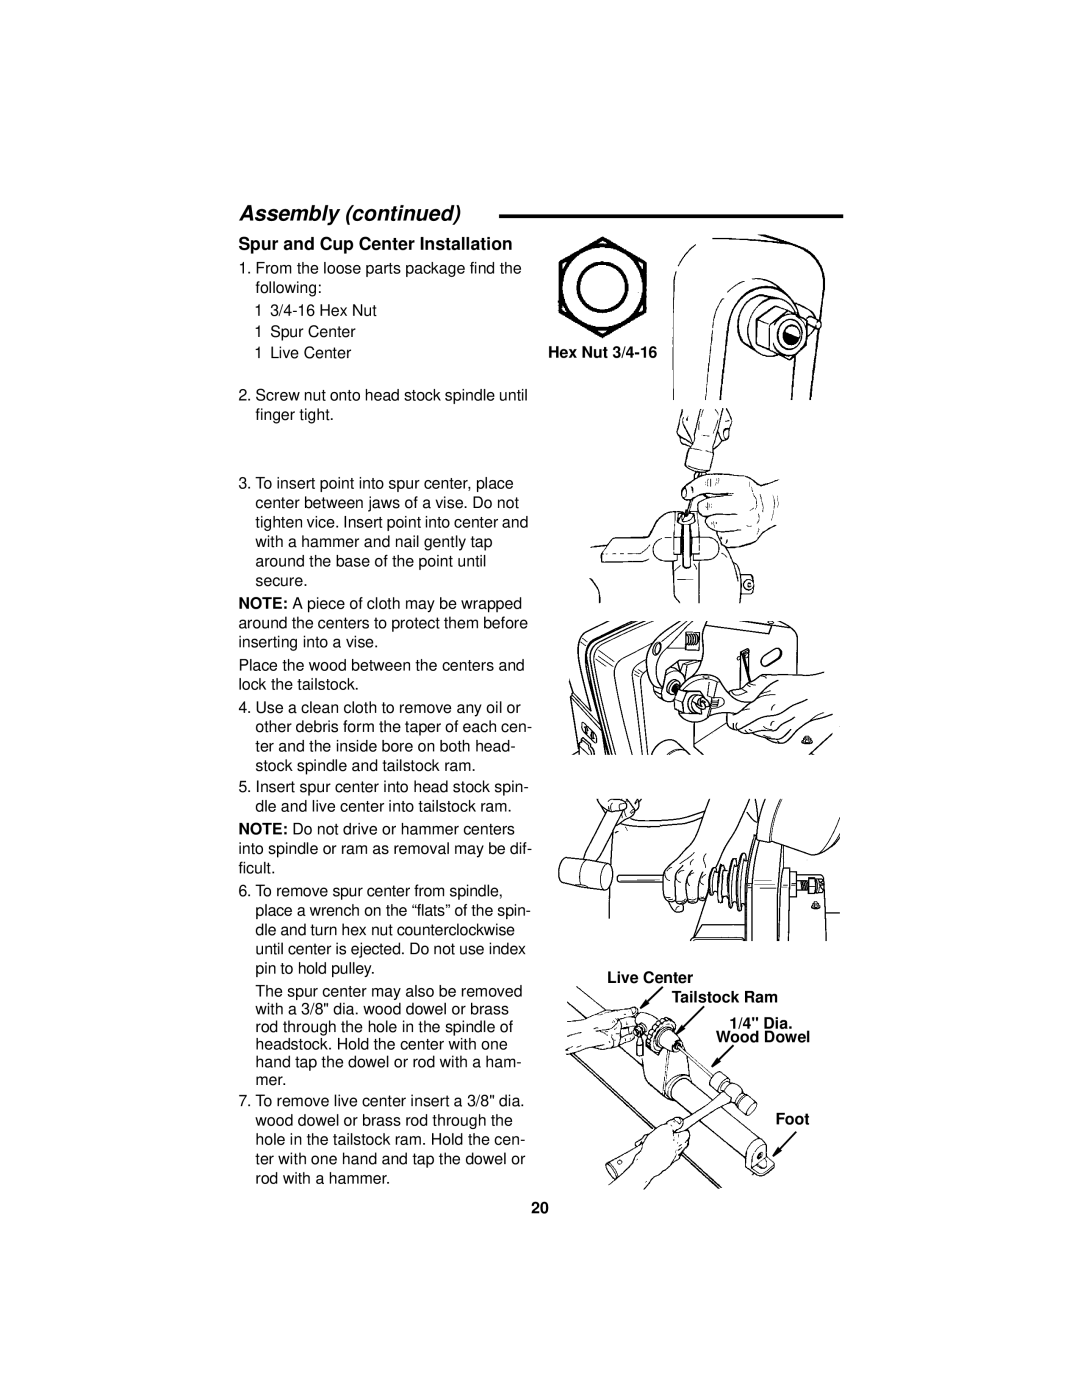
2.Screw nut onto head stock spindle until finger tight.
3.To insert point into spur center, place center between jaws of a vise. Do not tighten vice. Insert point into center and with a hammer and nail gently tap around the base of the point until secure.
NOTE: A piece of cloth may be wrapped around the centers to protect them before inserting into a vise.
Place the wood between the centers and lock the tailstock.
4.Use a clean cloth to remove any oil or other debris form the taper of each cen- ter and the inside bore on both head- stock spindle and tailstock ram.
5.Insert spur center into head stock spin- dle and live center into tailstock ram.
NOTE: Do not drive or hammer centers into spindle or ram as removal may be dif- ficult.
6.To remove spur center from spindle, place a wrench on the “flats” of the spin- dle and turn hex nut counterclockwise until center is ejected. Do not use index pin to hold pulley.
The spur center may also be removed with a 3/8" dia. wood dowel or brass rod through the hole in the spindle of headstock. Hold the center with one hand tap the dowel or rod with a ham- mer.
7.To remove live center insert a 3/8" dia. wood dowel or brass rod through the hole in the tailstock ram. Hold the cen- ter with one hand and tap the dowel or rod with a hammer.
Hex Nut 3/4-16
Live Center
Tailstock Ram
1/4" Dia.
Wood Dowel
Foot
20