Configuration options and action functions | Europa User Guide |
6.Configuration options and action functions
Setting the Jupiter 6’s base MIDI channel
With Europa, the Jupiter 6 has a settable base MIDI channel. Only later revisions of the Roland code allowed this. Unlike the Roland code, Europa will remember the base MIDI channel after the board is powered off.
When the Jupiter 6 is in either SPLIT mode, the lower patch is addressed by the base MIDI channel and the upper patch is addressed by the base MIDI channel + 1. If the Jupiter 6’s base MIDI channel is set to channel 16 and SPLIT mode is enabled, the upper patch is accessed on channel 1. The MIDI channels for upper and lower patches are not individually selectable.
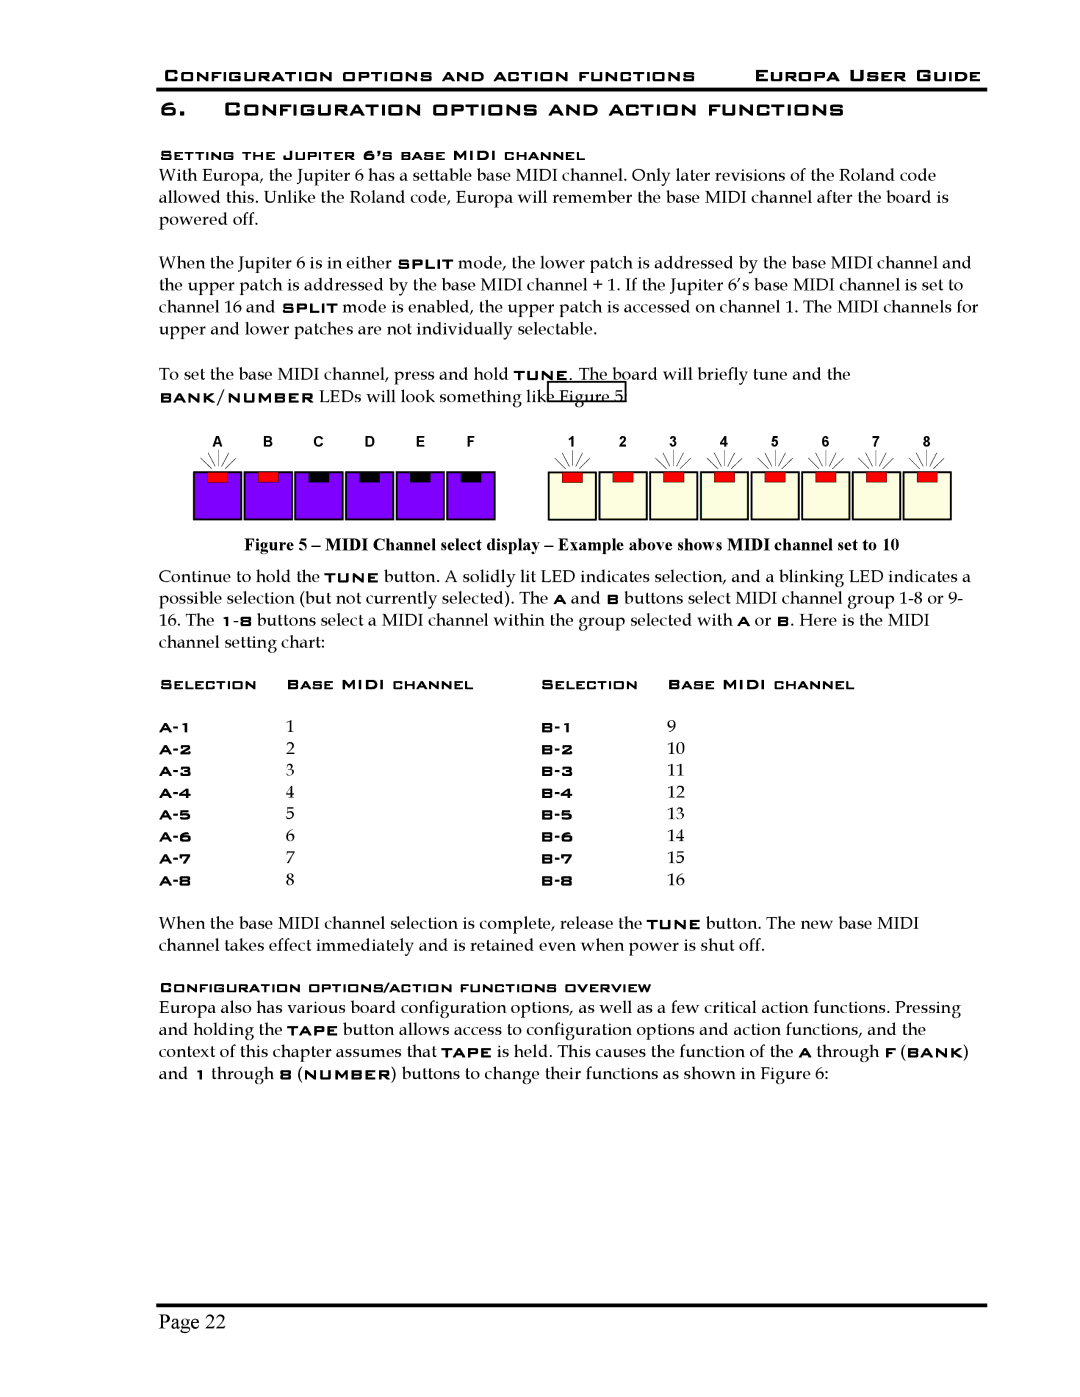
To set the base MIDI channel, press and hold TUNE. The board will briefly tune and the BANK/NUMBER LEDs will look something like Figure 5:
A |
| B |
| C |
| D |
| E |
| F | 1 |
| 2 |
| 3 |
| 4 |
| 5 |
| 6 |
| 7 |
| 8 |
| |||||||||||||||||
|
|
|
|
|
|
|
|
|
|
|
|
|
|
|
|
|
|
|
|
|
|
|
|
|
|
|
|
|
|
|
|
|
|
|
|
|
|
|
|
|
|
|
|
|
|
|
|
|
|
|
|
|
|
|
|
|
|
|
|
|
|
|
|
|
|
|
|
|
|
|
|
|
|
|
|
|
|
|
|
|
|
|
|
|
|
|
|
|
|
|
|
|
|
|
|
|
|
|
|
|
|
|
|
|
|
|
|
|
|
|
|
|
|
|
|
|
|
|
|
|
|
|
|
|
|
|
|
|
|
|
|
Figure 5 – MIDI Channel select display – Example above shows MIDI channel set to 10
Continue to hold the TUNE button. A solidly lit LED indicates selection, and a blinking LED indicates a possible selection (but not currently selected). The A and B buttons select MIDI channel group
16.The
Selection | Base MIDI channel | Selection | Base MIDI channel |
1 | 9 | ||
2 | 10 | ||
3 | 11 | ||
4 | 12 | ||
5 | 13 | ||
6 | 14 | ||
7 | 15 | ||
8 | 16 |
When the base MIDI channel selection is complete, release the TUNE button. The new base MIDI channel takes effect immediately and is retained even when power is shut off.
Configuration options/action functions overview
Europa also has various board configuration options, as well as a few critical action functions. Pressing and holding the TAPE button allows access to configuration options and action functions, and the context of this chapter assumes that TAPE is held. This causes the function of the A through F (BANK) and 1 through 8 (NUMBER) buttons to change their functions as shown in Figure 6:
Page 22