setup screen
To set the alarm input
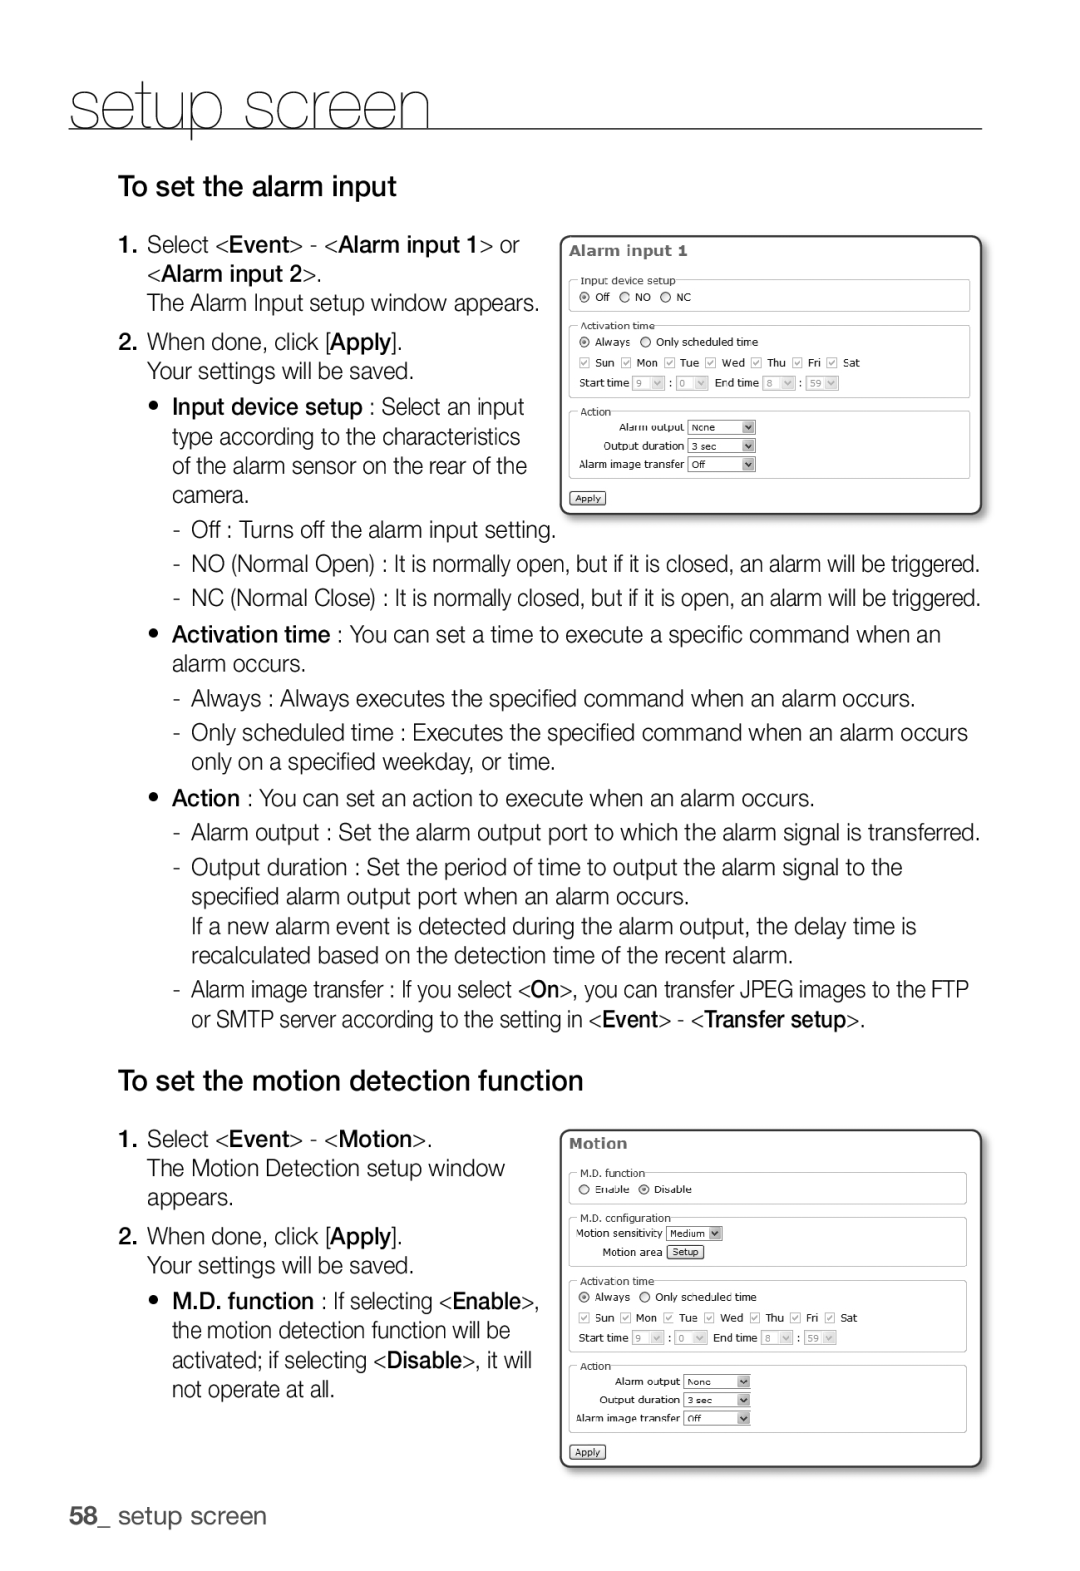
1.Select <Event> - <Alarm input 1> or <Alarm input 2>.
The Alarm Input setup window appears.
2.When done, click [Apply]. Your settings will be saved.
y Input device setup : Select an input type according to the characteristics of the alarm sensor on the rear of the camera.
-Off : Turns off the alarm input setting.
-NO (Normal Open) : It is normally open, but if it is closed, an alarm will be triggered.
-NC (Normal Close) : It is normally closed, but if it is open, an alarm will be triggered.
yActivation time : You can set a time to execute a specifi c command when an alarm occurs.
-Always : Always executes the specifi ed command when an alarm occurs.
-Only scheduled time : Executes the specifi ed command when an alarm occurs only on a specifi ed weekday, or time.
yAction : You can set an action to execute when an alarm occurs.
-Alarm output : Set the alarm output port to which the alarm signal is transferred.
-Output duration : Set the period of time to output the alarm signal to the specifi ed alarm output port when an alarm occurs.
If a new alarm event is detected during the alarm output, the delay time is recalculated based on the detection time of the recent alarm.
-Alarm image transfer : If you select <On>, you can transfer JPEG images to the FTP or SMTP server according to the setting in <Event> - <Transfer setup>.
To set the motion detection function
1.Select <Event> - <Motion>.
The Motion Detection setup window appears.
2.When done, click [Apply]. Your settings will be saved.
y M.D. function : If selecting <Enable>, the motion detection function will be activated; if selecting <Disable>, it will not operate at all.
58_ setup screen