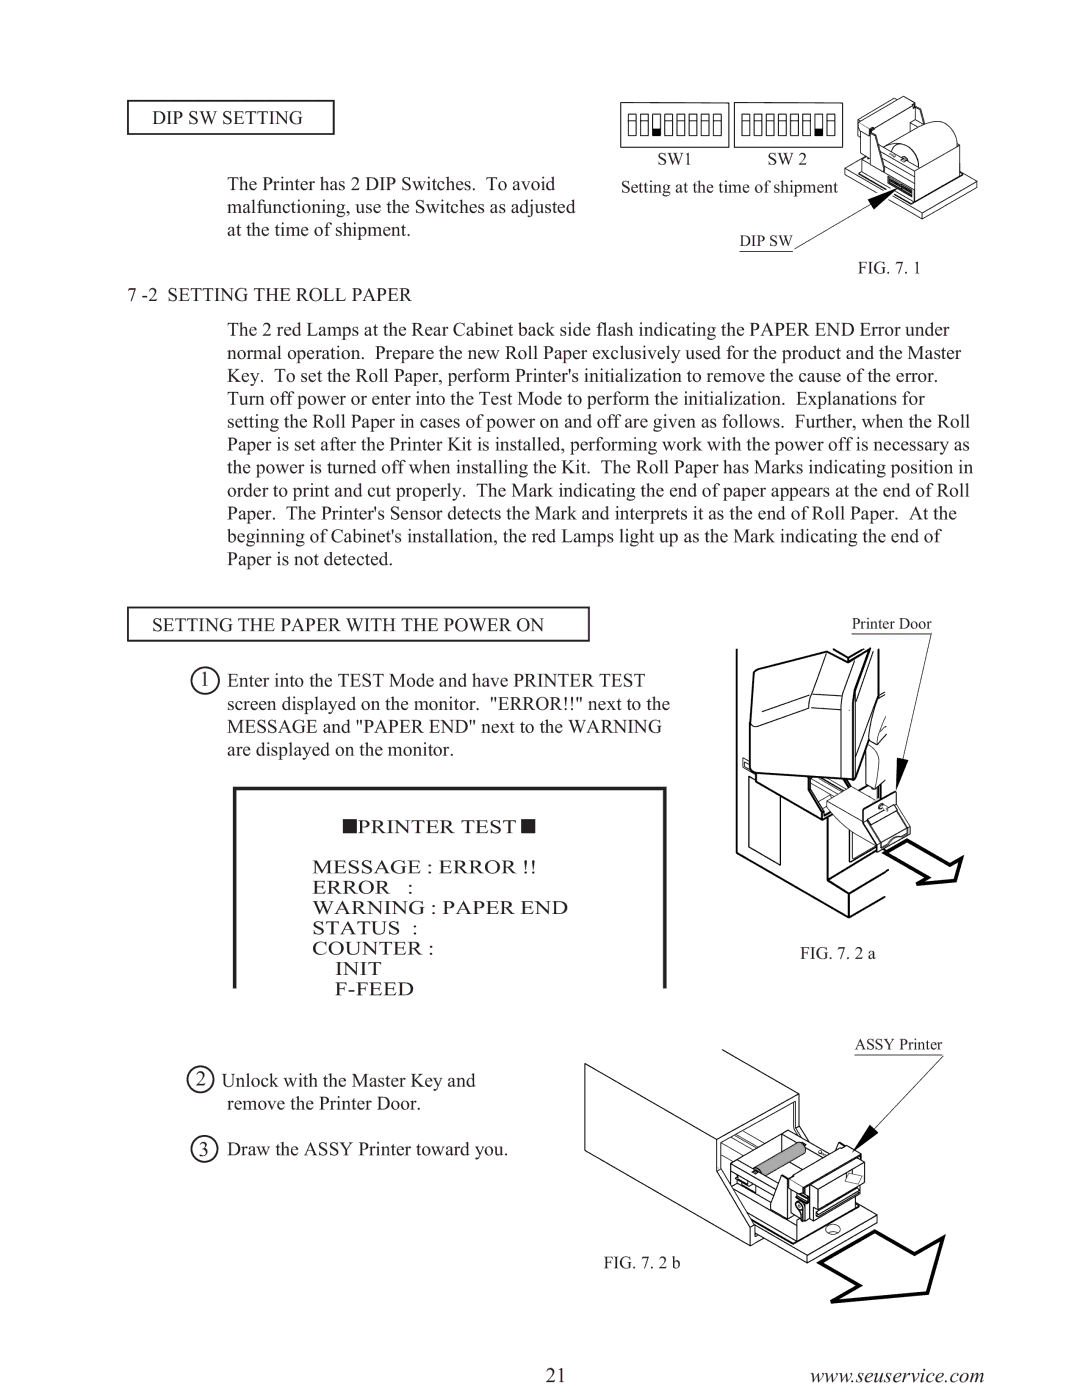
DIP SW SETTING
The Printer has 2 DIP Switches. To avoid malfunctioning, use the Switches as adjusted at the time of shipment.
SW1 | SW 2 |
Setting at the time of shipment
DIP SW
FIG. 7. 1
7 -2 SETTING THE ROLL PAPER
The 2 red Lamps at the Rear Cabinet back side flash indicating the PAPER END Error under normal operation. Prepare the new Roll Paper exclusively used for the product and the Master Key. To set the Roll Paper, perform Printer's initialization to remove the cause of the error.
Turn off power or enter into the Test Mode to perform the initialization. Explanations for setting the Roll Paper in cases of power on and off are given as follows. Further, when the Roll Paper is set after the Printer Kit is installed, performing work with the power off is necessary as the power is turned off when installing the Kit. The Roll Paper has Marks indicating position in order to print and cut properly. The Mark indicating the end of paper appears at the end of Roll Paper. The Printer's Sensor detects the Mark and interprets it as the end of Roll Paper. At the beginning of Cabinet's installation, the red Lamps light up as the Mark indicating the end of Paper is not detected.
SETTING THE PAPER WITH THE POWER ON
Printer Door
1Enter into the TEST Mode and have PRINTER TEST screen displayed on the monitor. "ERROR!!" next to the MESSAGE and "PAPER END" next to the WARNING are displayed on the monitor.

 PRINTER TEST
MESSAGE : ERROR !!
ERROR :
WARNING : PAPER END
STATUS :
COUNTER :
INIT
F-FEED
2Unlock with the Master Key and remove the Printer Door.
3Draw the ASSY Printer toward you.
FIG. 7. 2 a
ASSY Printer
FIG. 7. 2 b
21www.seuservice.com
