10Select and execute the INIT in the PRINTER TEST. The "PRINTER INIT!!" message flashes next to "MESSAGE" on the monitor and then goes off. The Printer's initialization is finished.
11Select and execute the "POSITION SET." "NOW PRINTING" message is displayed next to the "MESSAGE" on the monitor and then goes off. The Printer starts automatic feeding of the paper (AUTO LOADING) and then cuts the paper automatically. If the Paper tip position is appropriate, the automatic feeding's movement is slight and the paper cutting may not be done. Before executing the POSITION SET, the paper position can be adjusted by executing
12Exit from the TEST Mode.
13Push the ASSY PRINTER up to the point the PRINTER reaches the Securing Part in the innermost of the unit.
14Lock the Printer Door to secure.
![]() PRINTER TEST
PRINTER TEST ![]()
MESSAGE : PRINTER INIT! ERROR :
WARNING :
STATUS :
COUNTER :
![]() PRINTER TEST
PRINTER TEST ![]()
MESSAGE : NOW PRINT- ING
ERROR :
WARNING :
STATUS :
COUNTER : INIT
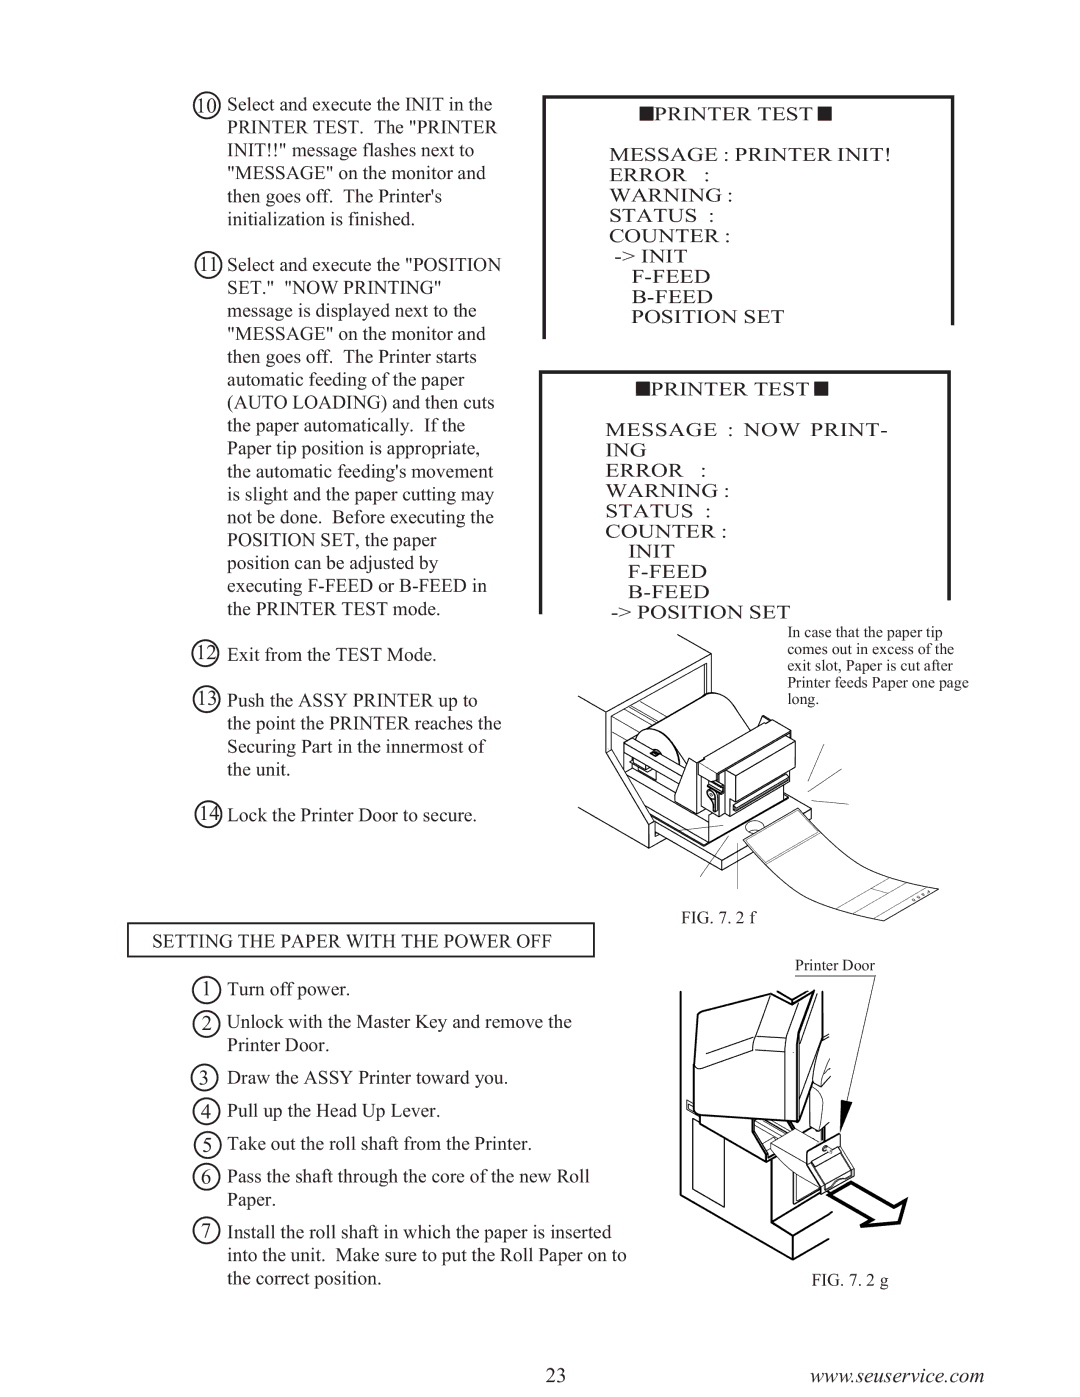
In case that the paper tip comes out in excess of the exit slot, Paper is cut after Printer feeds Paper one page long.
SETTING THE PAPER WITH THE POWER OFF
FIG. 7. 2 f
Printer Door
1 Turn off power.
2Unlock with the Master Key and remove the
Printer Door.
3 Draw the ASSY Printer toward you.
4 Pull up the Head Up Lever.
5 Take out the roll shaft from the Printer.
6 Pass the shaft through the core of the new Roll Paper.
7Install the roll shaft in which the paper is inserted into the unit. Make sure to put the Roll Paper on to
the correct position. | FIG. 7. 2 g |
23www.seuservice.com
