QUICK REFERENCE GUIDE
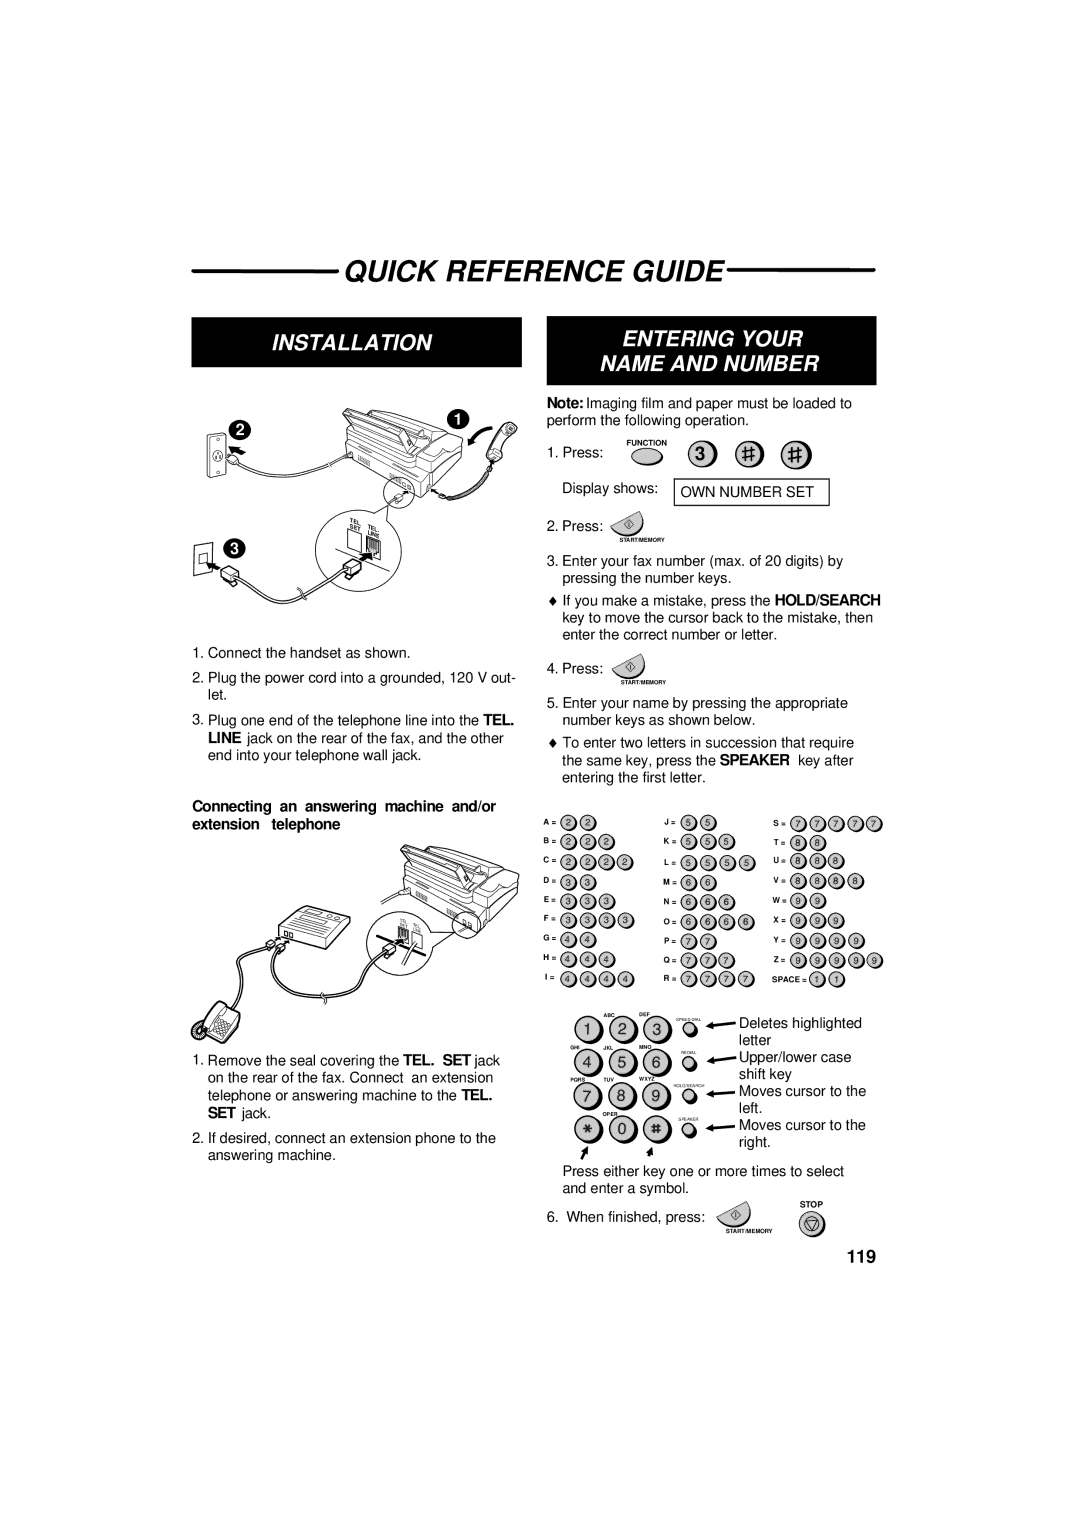
INSTALLATION
ENTERING YOUR NAME AND NUMBER
2
1
Note: Imaging film and paper must be loaded to perform the following operation.
FUNCTION | 3 |
1. Press: | |
Display shows: | OWN NUMBER SET |
TEL. | |
SET | TEL. |
| LINE |
3
1.Connect the handset as shown.
2.Plug the power cord into a grounded, 120 V out- let.
3.Plug one end of the telephone line into the TEL. LINE jack on the rear of the fax, and the other end into your telephone wall jack.
Connecting an answering machine and/or extension telephone
TEL. | |
SET | TEL. |
| LINE |
1.Remove the seal covering the TEL. SET jack on the rear of the fax. Connect an extension telephone or answering machine to the TEL.
SET jack.
2.If desired, connect an extension phone to the answering machine.
2. Press:
START/MEMORY
3.Enter your fax number (max. of 20 digits) by pressing the number keys.
♦If you make a mistake, press the HOLD/SEARCH key to move the cursor back to the mistake, then enter the correct number or letter.
4. Press:
START/MEMORY
5.Enter your name by pressing the appropriate number keys as shown below.
♦To enter two letters in succession that require the same key, press the SPEAKER key after entering the first letter.
A = | J = | S = |
B = | K = | T = |
C = | L = | U = |
D = | M = | V = |
E = | N = | W = |
F = | O = | X = |
G = | P = | Y = |
| ||
H = | Q = | Z = |
| ||
I = | R = | SPACE = |
| ABC | DEF | SPEED DIAL | Deletes highlighted | |
|
|
| |||
GHI | JKL | MNO |
| letter | |
REDIAL | Upper/lower case | ||||
|
|
| |||
|
|
|
| ||
PQRS | TUV | WXYZ |
| shift key | |
|
|
| HOLD/SEARCH | Moves cursor to the | |
|
|
|
| ||
| OPER |
|
| left. | |
|
|
| SPEAKER | Moves cursor to the | |
|
|
|
| ||
|
|
|
| right. |
Press either key one or more times to select and enter a symbol.
STOP
6. When finished, press:
START/MEMORY
119