Thor0 | Drn | Simple Recording Timer | ||||||
+\am \/,I?\,~ tr. /I.?,- thic. |
|
| i | iimrmediaie recording: | ||||
| ||||||||
UC” L”“” ““uyv L” UcIb L11113 | ti”lliJ1” ,\aA,ullly | Illilel | ,“I |
|
|
| ||
your | convenience. |
|
|
|
|
| Convement when having an unexpected visitor or | |
|
|
|
|
|
|
|
| telephone call |
|
|
|
|
|
|
| • | Delayed recording. |
Immediate Recording |
|
|
|
|
| Convenient when leaving the house or going to bed. | ||
|
|
|
|
|
| |||
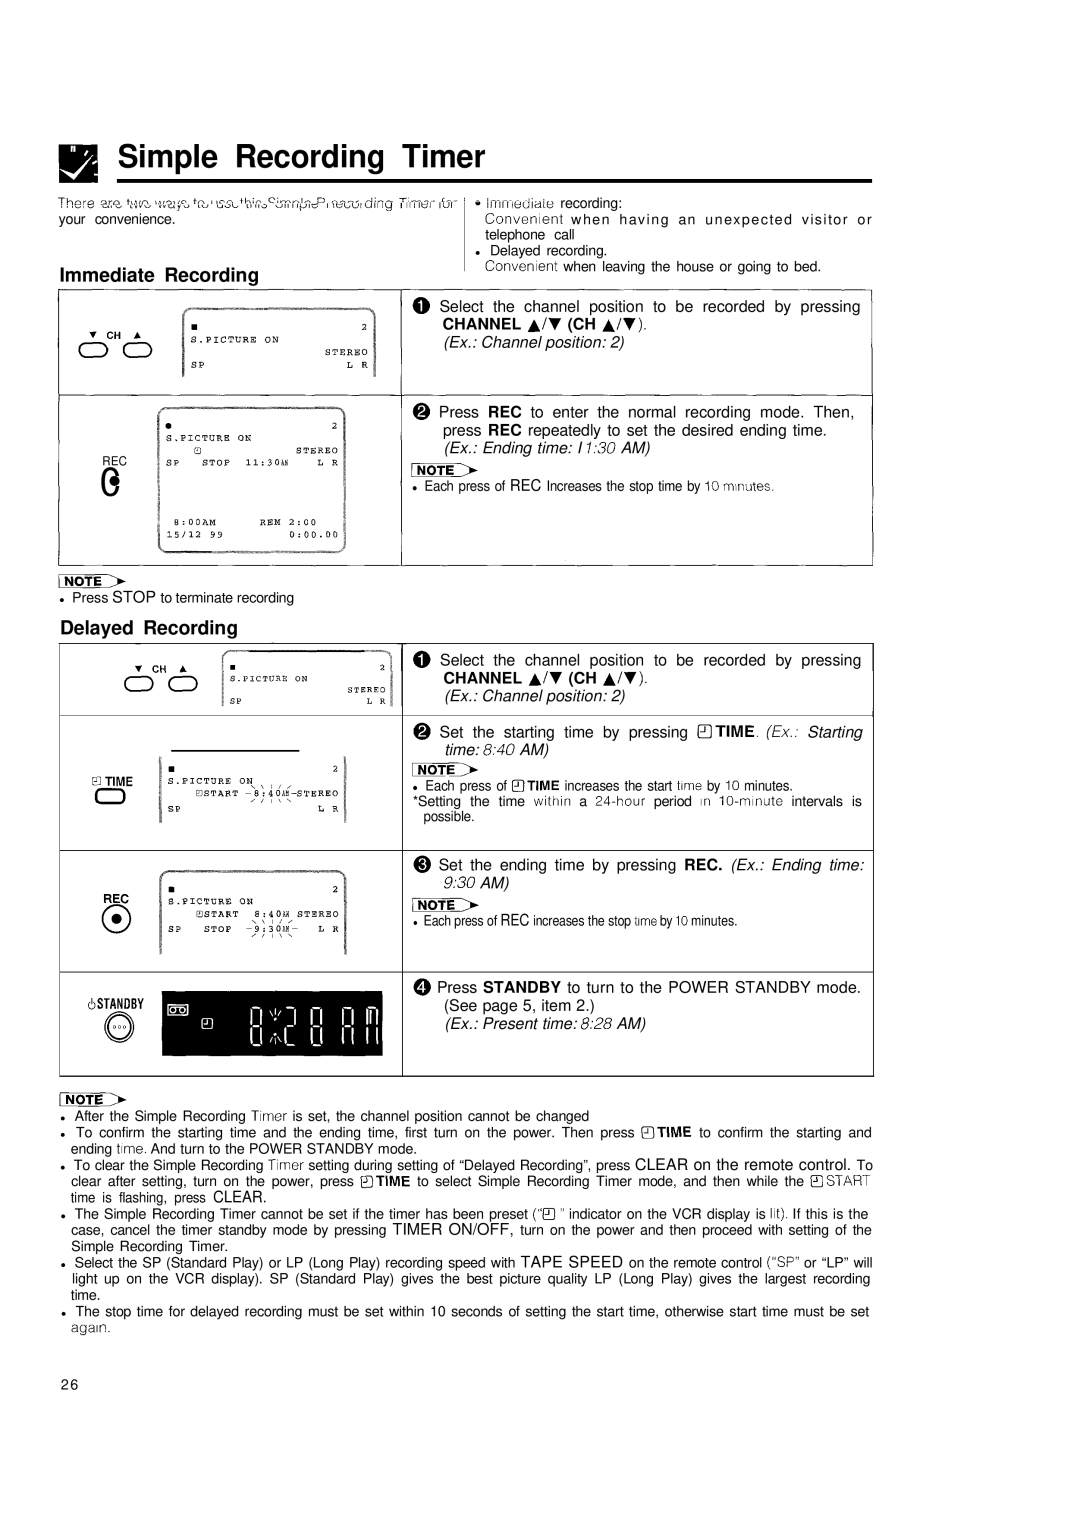
0 Select the channel position to be recorded by pressing
CHANNEL A/V (CH A./V).
REC
0
(Ex.: Channel position: 2)
@Press REC to enter the normal recording mode. Then, press REC repeatedly to set the desired ending time.
(Ex.: Ending time: I I:30 AM)
iNoTE
•Each press of REC Increases the stop time by 10 minutes.
•Press STOP to terminate recording
Delayed Recording
GTANDBY
0 Select the channel position to be recorded by pressing
CHANNEL A/V (CH A/V).
(Ex.: Channel position: 2)
@Set the starting time by pressing OTIME. (Ex.: Starting time: 8:40 AM)
NoTE>
•Each press of DTIME increases the start trme by IO minutes.
*Setting the time withrn a 24.hour period In
@Set the ending time by pressing REC. (Ex.: Ending time: 9:30 AM)
iNoTE
•Each press of REC increases the stop trme by 10 minutes.
@Press STANDBY to turn to the POWER STANDBY mode. (See page 5, item 2.)
(Ex.: Present time: 8:28 AM)
•After the Simple Recording Timer is set, the channel position cannot be changed
•To confirm the starting time and the ending time, first turn on the power. Then press OTIME to confirm the starting and
ending time. And turn to the POWER STANDBY mode.
•To clear the Simple Recording Timer setting during setting of “Delayed Recording”, pressCLEAR on the remote control. To clear after setting, turn on the power, press aTIME to select Simple Recording Timer mode, and then while the FISTART time is flashing, press CLEAR.
•The Simple Recording Timer cannot be set if the timer has been preset (“I3” indicator on the VCR display is lit). If this is the case, cancel the timer standby mode by pressing TIMER ON/OFF, turn on the power and then proceed with setting of the Simple Recording Timer.
•Select the SP (Standard Play) or LP (Long Play) recording speed with TAPE SPEED on the remote control (“SP”or “LP” will light up on the VCR display). SP (Standard Play) gives the best picture quality LP (Long Play) gives the largest recording time.
•The stop time for delayed recording must be set within 10 seconds of setting the start time, otherwise start time must be set agarn.
26
