9300 Series User’s Guide

Switchboard Case


Installation Instructions

CAUTION

Installation and maintenance of the switchboard meter should only be performed by qualified personnel who have appropriate training and experience with high voltage and high current devices.

If the switchboard case is included with your meter, draw the meter chassis out of the case to facilitate its installation into the mounting hole. Installing and setting up the switchboard meter is summarized in the following steps.

1.Review the unit’s dimensions and prepare a mounting hole for the switchboard case. If you are retrofitting your switchboard meter into an

existing case, you may have to drill or punch a 29mm (1.13”) round hole in the back of the case to accommodate communications, I/O, and/or auxiliary power wiring.

NOTE

For retrofitting S1 style switchboard cases, a pre-drilled backplate is included. To use it, remove the backplate from the old switchboard case and replace it with the supplied backplate.

2. Place the supplied 29mm (1.13”) nylon bushing into the drilled hole if desired. Refer to “Unit Dimensions” on page 161.

3.Place the switchboard case into the prepared mounting hole. Attach the mounting screws.

4.Wire the phase voltages and currents to the terminal posts on the rear of the case.

5. Read the warning label on the green captured-wire plug.

6.Connect any communications, I/O, and/or auxiliary power wiring to the meter.

For the P24 power supply option, ensure that the auxiliary power cable is powered off.

Pass all wiring through the switchboard case using the round hole in back.

Connect the communications and I/O wiring to the meter; for the P24 power supply option, also connect the auxiliary power cable to the meter’s power supply terminals.

Slide the meter chassis into position while feeding the excess wiring through the hole in the rear of the switchboard case, making sure none of the wires are pinched.

Secure the meter by locking the two chassis levers into position.

Wire any external communications and I/O; for the P24 power supply option, connect the other end of the auxiliary power cable to an external dedicated 20 to 60VDC source that is powered down.

7.Connect the ribbon cable to the back of the display on the case cover.

8.Energize the meter as follows:

For the P24 power supply option, power up the auxiliary power (20 to 60VDC) source.

Chapter 7 - Hardware Reference

Page 161

Page 161
Image 161
Siemens 9330, 9350, 9300 manual Installation Instructions

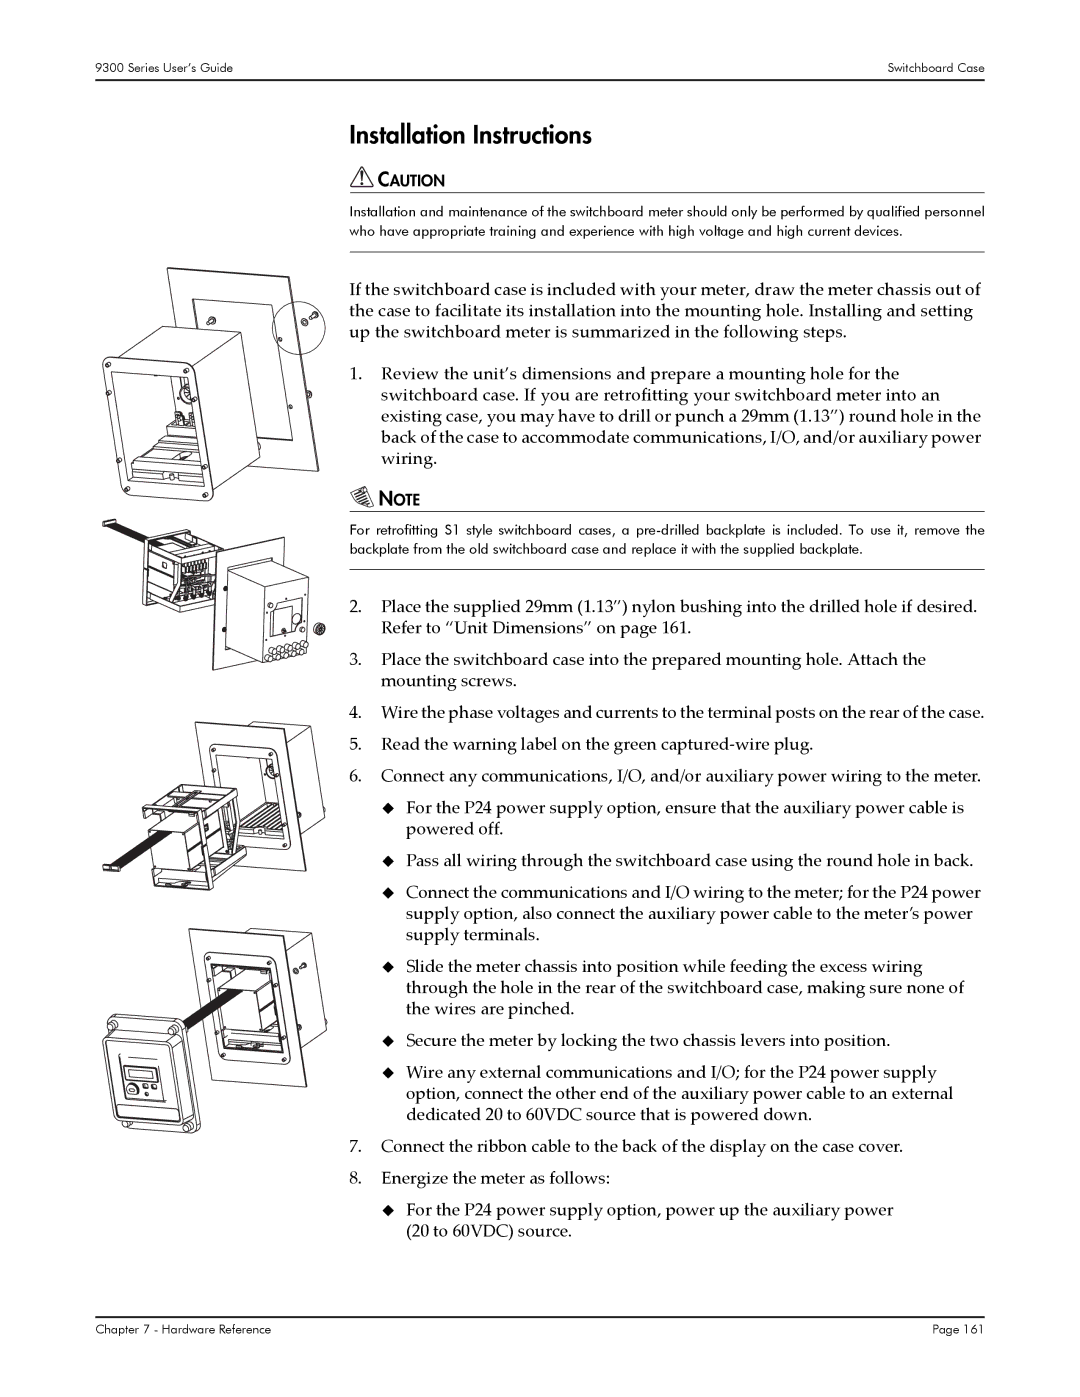
9300, 9350, 9330 specifications

Siemens has made significant advancements in the field of manufacturing and industrial automation with its range of products, particularly focusing on the Siemens 9330, 9350, and 9300 series. These models are designed to optimize performance, increase efficiency, and ensure reliability in various industrial applications.

The Siemens 9330 model is known for its robust construction and versatility. It supports a variety of communication protocols, making integration into existing systems easy. One of the key features of the 9330 is its high processing speed. This enables it to handle complex operations in real time, ensuring minimal downtime. Additionally, its modular design allows for easy expansion, catering to the specific needs of different industries.

The Siemens 9350 takes automation to the next level with advanced functionalities. It incorporates cutting-edge technologies such as AI-driven diagnostics and predictive maintenance features. These technologies gather data from various sensors, providing operators with valuable insights into machine performance. The 9350 also features enhanced security measures, ensuring data protection and minimizing risks associated with cyber threats. The blend of flexibility and reliability makes it suitable for critical applications across sectors like manufacturing and energy.

The Siemens 9300 series is designed for high-precision tasks, primarily focusing on automation in manufacturing environments. This series is equipped with sophisticated motion control capabilities, allowing for precise positioning and motion synchronization. Users benefit from its user-friendly interfaces and simplified programming, which streamline the setup process and reduce operational complexities. The energy-efficient design of the 9300 series contributes to reduced operational costs, aligning with modern sustainability goals.

In summary, the Siemens 9330, 9350, and 9300 series represent the pinnacle of industrial automation technology. Each model comes with unique features and capabilities tailored to specific requirements in the manufacturing landscape. The advancements in AI, energy efficiency, security, and modular design reflect Siemens' commitment to providing high-quality solutions that enhance productivity and reduce operational risks. Whether an enterprise is looking to upgrade existing systems or implement new technologies, these models from Siemens offer the potential for significant improvement in operational efficiency.