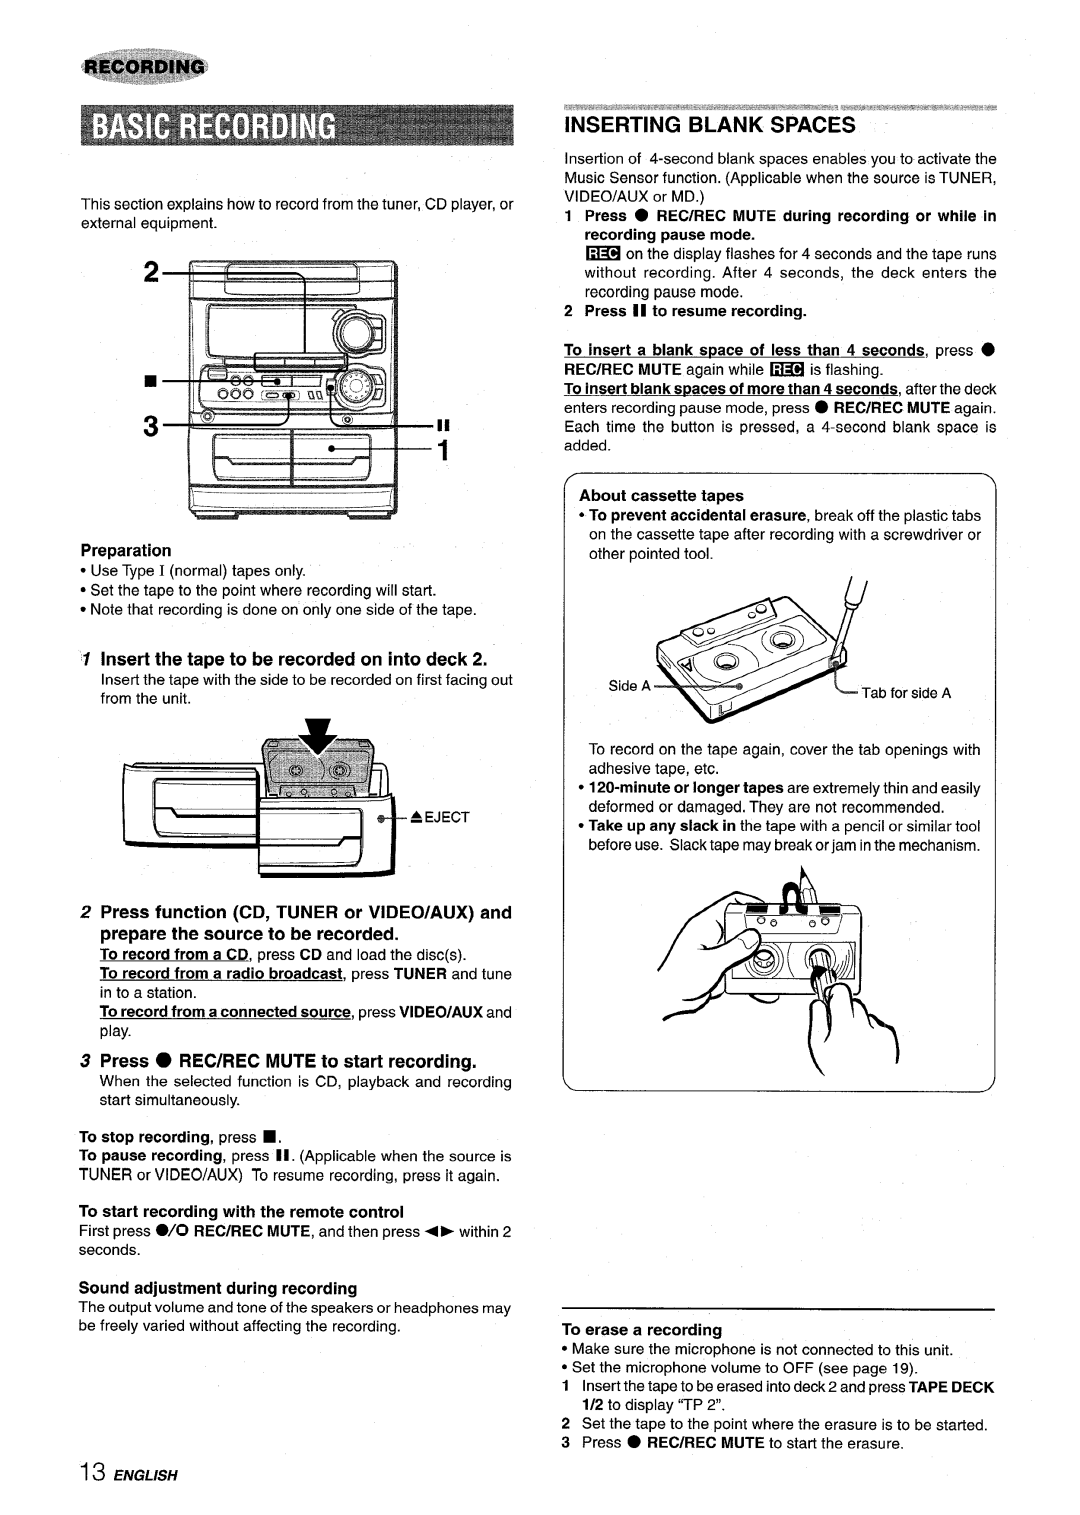
This section explains how to record from the tuner, CD player, or external equipment.

,11

1

,,____.-. 1

Preparation

Use Type I (normal) tapes only.

Set the tape to the point where recording will start.

Note that recording is done on only one side of the tape.

INSERTING BLANK SPACES

Insertion of 4-second blank spaces enables you to activate the Music Sensor function. (Applicable when the source is TUNER, VIDEO/AUX or MD.)

1 Press REC/REC MUTE during recording or while in recording pause mode.

~on the display flashes for 4 seconds and the tape runs without recording. After 4 seconds, the deck enters the recording pause mode.

2Press 11 to resume recording.

To insert a blank space of less than 4 seconds, press

REC/REC MUTE again while ~ is flashing.

To insert blank !Waces of more than 4 seconds, after the deck enters recording pause mode, press REC/REC MUTE again. Each time the button is pressed, a 4-second blank space is added.

About cassette tapes

~To prevent accidental erasure, break off the plastic tabs on the cassette tape after recording with a screwdriver or other pointed tool.

1 Insert the tape to be recorded on into deck 2.

Insert the tape with the side to be recorded on first facing out from the unit.

= EJECT

Side A

Tab for side A


To record on the tape again, cover the tab openings with adhesive tape, etc.

o120-minute or longer tapes are extremely thin and easily deformed or damaged, They are not recommended.

~Take up any slack in the tape with a pencil or similar tool before use. Slack tape may break or jam in the mechanism.

2 Press function (CD, TUNER or VIDEO/AUX) and prepare the source to be recorded.

To record from a CD, press CD and load the disc(s).

To record from a radio broadcast, press TUNER and tune

in to a station.

To record from a connected source, press VIDEO/AUX and

play.

3 Press REC/REC MUTE to start recording.

When the selected function is CD, playback and recording start simultaneously.

To stop recording, press ,

To pause recording, press II. (Applicable when the source is TUNER or VIDEO/AUX) To resume recording, press it again.

To start recording with the remote control

First press /0 REC/REC MUTE, and then press<> within 2 seconds.

Sound adjustment during recording

The output volume and tone of the speakers or headphones may be freely varied without affecting the recording.

)

To erase a recording

Make sure the microphone is not connected to this unit.

Set the microphone volume to OFF (see page 19).

1Insert the tape to be erased into deck 2 and press TAPE DECK 1/2 to display ‘(TP 2.

2Set the tape to the point where the erasure is to be started.

3Press REC/REC MUTE to start the erasure.

13 ENGLISH

Page 14
Image 14
Sony NSX-MT320, SX-MT321 manual Inserting Blank Spaces, Preparation, Insert the tape to be recorded on into deck

SX-MT321, NSX-MT320 specifications

The Sony SX-MT321 and NSX-MT320 are two advanced audio systems that showcase Sony's commitment to delivering high-quality sound and an immersive listening experience. Both models are designed for consumers seeking superior performance combined with modern design and user-friendly features.

The SX-MT321 is a compact stereo system that includes a CD player, FM/AM tuner, and USB connectivity, allowing users to explore various music sources. Its sleek design fits well in any home environment, while its adjustable equalizer ensures that listeners can customize their audio experience to suit their preferences. The system also supports MP3 playback, making it easier to enjoy digital music collections on CDs or USB drives.

On the other hand, the NSX-MT320 is designed with a more powerful amplifier and speaker system, providing an enhanced audio output for larger spaces. It features Bluetooth technology, enabling users to stream music wirelessly from their smartphones or tablets. This adds a layer of convenience and versatility, allowing users to enjoy their favorite tunes without the hassle of cords and cables.

Both models incorporate Sony's proprietary sound technologies. The SX-MT321 utilizes S-Master digital amplifier technology, which helps in delivering clear and dynamic sound reproduction. This technology enhances the audio quality of both digital and analog sources, bringing out the nuances and details in music recordings. The NSX-MT320 also includes multiple sound modes that can be adjusted according to the genre of music, delivering an optimized listening experience.

Connectivity is a strong point for both models. Aside from USB and Bluetooth options, they come equipped with auxiliary inputs and outputs for expanded compatibility with other devices, making them versatile audio centers for home entertainment. Additionally, the NSX-MT320 features a built-in subwoofer, enhancing low-frequency reproduction for a fuller bass response that many music enthusiasts appreciate.

In terms of user interface, both systems are designed with intuitive controls and clear displays, making operation seamless. The inclusion of remote control further simplifies navigation through various settings.

In summary, the Sony SX-MT321 and NSX-MT320 are exceptional audio systems that offer a blend of performance, features, and connectivity options. Whether you are looking for a compact and versatile stereo system or a powerful audio solution for larger spaces, these models provide an excellent listening experience suitable for various musical tastes and environments.