For Machines Mfg. Since 3/11 | O P E R A T I O N |
Thread Dial
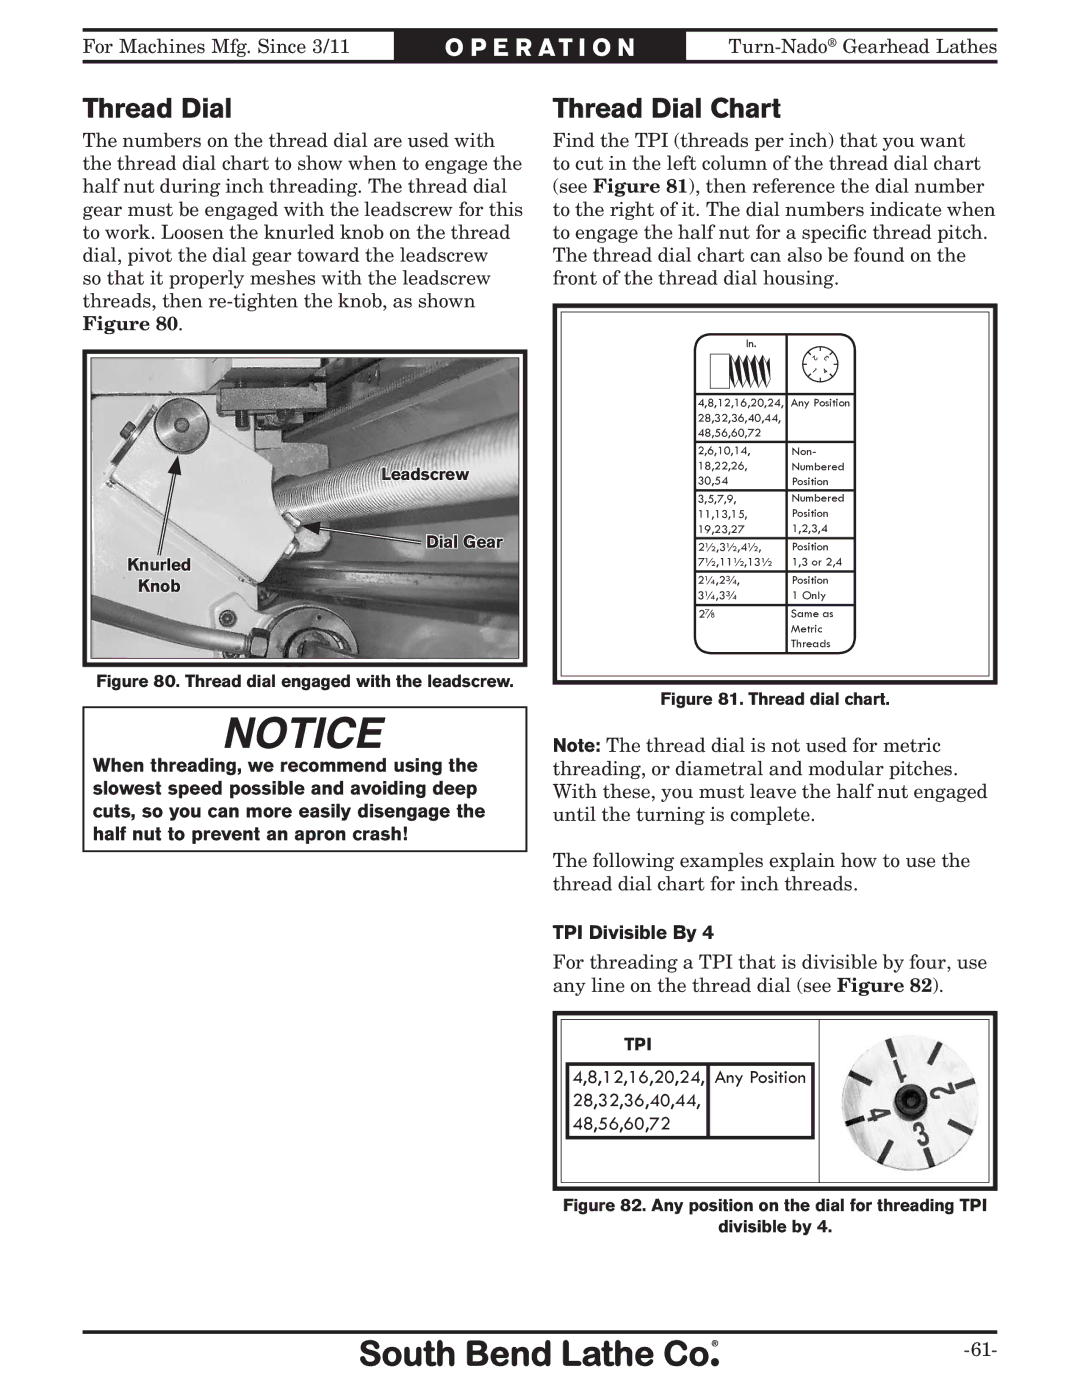
The numbers on the thread dial are used with the thread dial chart to show when to engage the half nut during inch threading. The thread dial gear must be engaged with the leadscrew for this to work. Loosen the knurled knob on the thread dial, pivot the dial gear toward the leadscrew so that it properly meshes with the leadscrew threads, then
Leadscrew
![]() Dial Gear
Dial Gear
Knurled
Knob
Figure 80.
 Thread dial engaged with the leadscrew.

Thread Dial Chart
Find the TPI (threads per inch) that you want to cut in the left column of the thread dial chart (see Figure 81), then reference the dial number to the right of it. The dial numbers indicate when to engage the half nut for a specific thread pitch. The thread dial chart can also be found on the front of the thread dial housing.
In. |
|
2 | 3 |
1 | 4 |
|
4,8,12,16,20,24, Any Position 28,32,36,40,44, 48,56,60,72
2,6,10,14, | Non- |
18,22,26, | Numbered |
30,54 | Position |
3,5,7,9, | Numbered |
11,13,15, | Position |
19,23,27 | 1,2,3,4 |
2½,3½,4½, | Position |
7½,11½,13½ | 1,3 or 2,4 |
2¼,2¾, | Position |
3¼,3¾ | 1 Only |
27∕8 | Same as |
| Metric |
| Threads |
Figure 81.
 Thread dial chart.
When threading, we recommend using the slowest speed possible and avoiding deep cuts, so you can more easily disengage the half nut to prevent an apron crash!
Note: The thread dial is not used for metric threading, or diametral and modular pitches. With these, you must leave the half nut engaged until the turning is complete.
The following examples explain how to use the thread dial chart for inch threads.
TPI Divisible By 4
For threading a TPI that is divisible by four, use any line on the thread dial (see Figure 82).
TPI
4,8,12,16,20,24, Any Position 28,32,36,40,44, 48,56,60,72