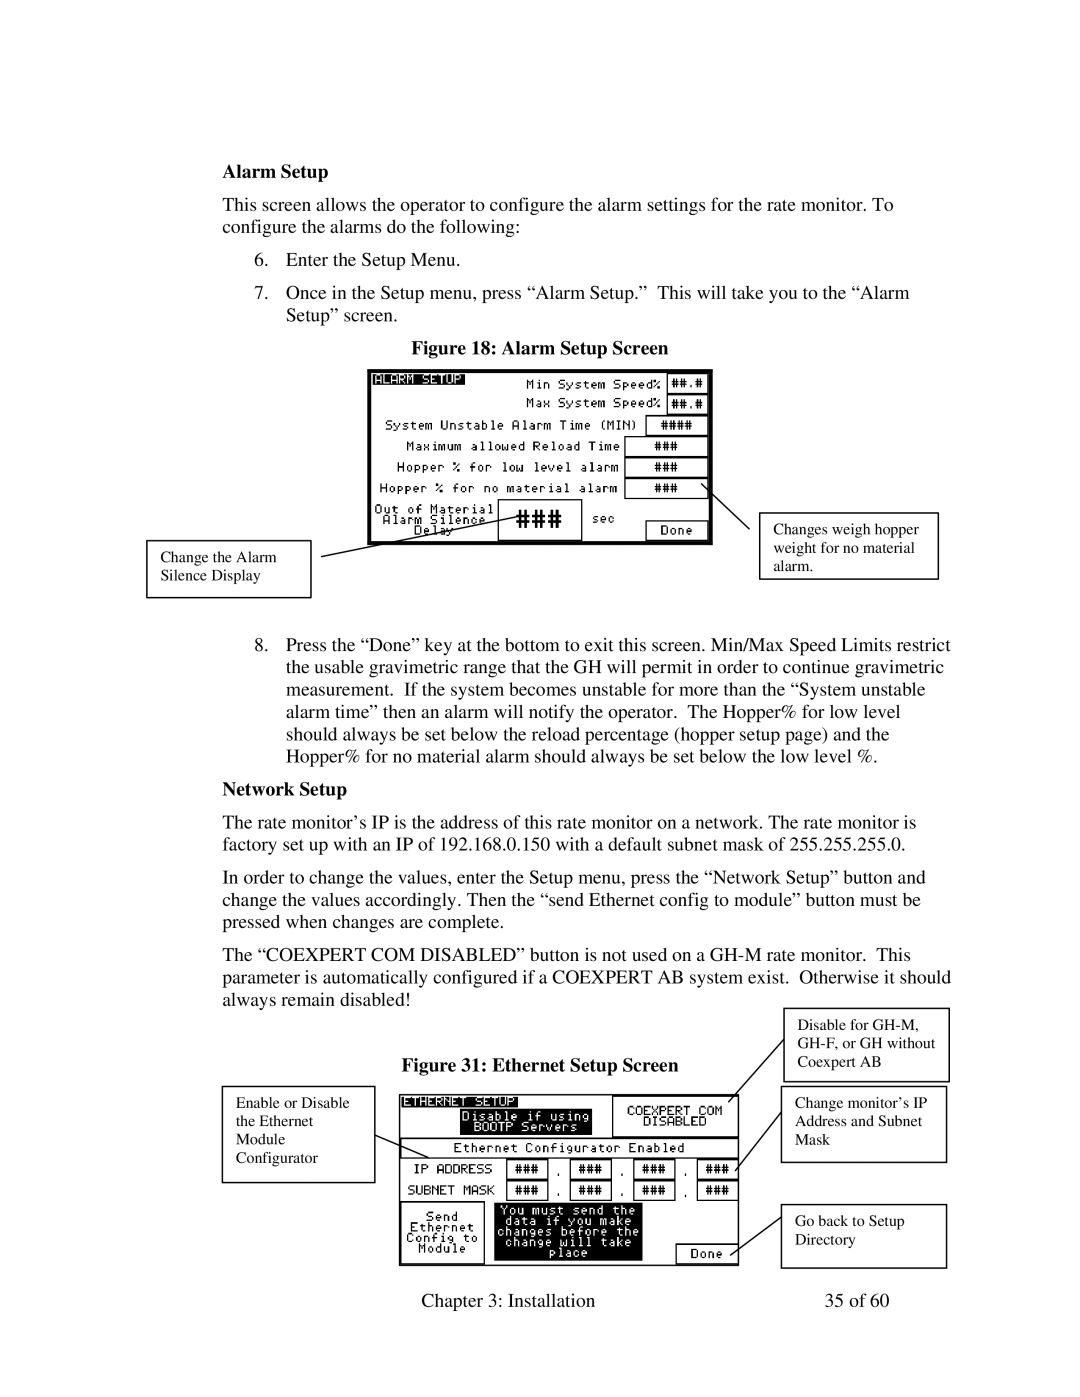
Alarm Setup
This screen allows the operator to configure the alarm settings for the rate monitor. To configure the alarms do the following:
6.Enter the Setup Menu.
7.Once in the Setup menu, press “Alarm Setup.” This will take you to the “Alarm Setup” screen.
Figure 18: Alarm Setup Screen
Changes weigh hopper weight for no material
Change the Alarmalarm. Silence Display
8.Press the “Done” key at the bottom to exit this screen. Min/Max Speed Limits restrict the usable gravimetric range that the GH will permit in order to continue gravimetric measurement. If the system becomes unstable for more than the “System unstable alarm time” then an alarm will notify the operator. The Hopper% for low level should always be set below the reload percentage (hopper setup page) and the Hopper% for no material alarm should always be set below the low level %.
Network Setup
The rate monitor’s IP is the address of this rate monitor on a network. The rate monitor is factory set up with an IP of 192.168.0.150 with a default subnet mask of 255.255.255.0.
In order to change the values, enter the Setup menu, press the “Network Setup” button and change the values accordingly. Then the “send Ethernet config to module” button must be pressed when changes are complete.
The “COEXPERT COM DISABLED” button is not used on a
Figure 31: Ethernet Setup Screen
Enable or Disable the Ethernet Module Configurator
Disable for
Change monitor’s IP Address and Subnet Mask
Go back to Setup Directory
Chapter 3: Installation | 35 of 60 |