CHAPTER 3
Remote Control
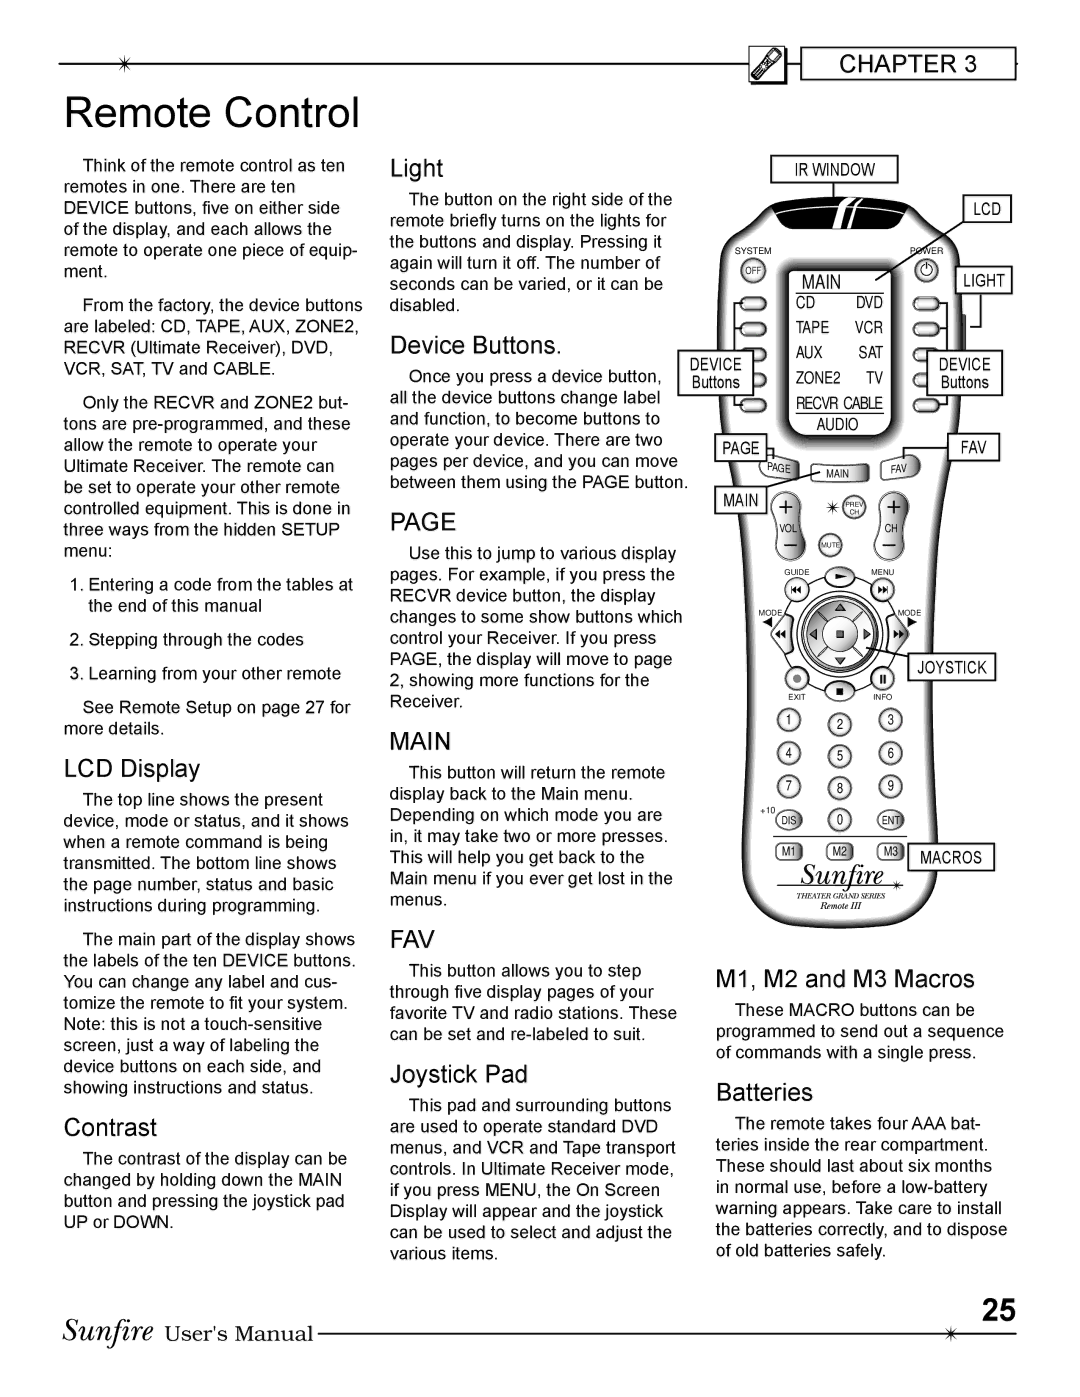
Think of the remote control as ten remotes in one. There are ten DEVICE buttons, Þve on either side of the display, and each allows the remote to operate one piece of equip- ment.
From the factory, the device buttons are labeled: CD, TAPE, AUX, ZONE2, RECVR (Ultimate Receiver), DVD, VCR, SAT, TV and CABLE.
Only the RECVR and ZONE2 but- tons are
1.Entering a code from the tables at the end of this manual
2.Stepping through the codes
3.Learning from your other remote
See Remote Setup on page 27 for
Light |
|
| IR WINDOW |
|
| |
The button on the right side of the |
|
|
|
|
| LCD |
remote brießy turns on the lights for |
|
|
|
|
| |
|
|
|
|
|
| |
the buttons and display. Pressing it | SYSTEM |
|
|
| POWER | |
again will turn it off. The number of |
|
|
| |||
OFF |
| MAIN |
|
| LIGHT | |
seconds can be varied, or it can be |
|
|
|
| ||
disabled. |
|
| CD | DVD |
|
|
Device Buttons. |
|
| TAPE | VCR |
|
|
DEVICE |
| AUX | SAT |
| DEVICE | |
Once you press a device button, |
| ZONE2 | TV |
| ||
Buttons |
|
| Buttons | |||
all the device buttons change label |
|
| RECVR CABLE |
|
| |
and function, to become buttons to |
|
| AUDIO |
|
| |
operate your device. There are two | PAGE |
|
|
|
| FAV |
pages per device, and you can move |
|
|
|
| ||
| PAGE | MAIN | FAV | |||
between them using the PAGE button. |
|
|
|
| ||
MAIN |
|
|
|
|
| |
PAGE | VOL | PREV | CH |
| ||
| CH |
| ||||
Use this to jump to various display |
|
| MUTE |
|
|
|
|
|
|
|
|
| |
pages. For example, if you press the |
| GUIDE | MENU |
| ||
|
|
| ||||
RECVR device button, the display |
|
|
|
|
|
|
changes to some show buttons which | MODE |
|
|
| MODE | |
|
|
|
| |||
control your Receiver. If you press |
|
|
|
|
|
|
PAGE, the display will move to page |
|
|
|
|
| JOYSTICK |
2, showing more functions for the |
|
|
|
|
| |
|
|
|
|
|
| |
Receiver. |
| EXIT | INFO |
| ||
more details.
LCD Display
The top line shows the present device, mode or status, and it shows when a remote command is being transmitted. The bottom line shows the page number, status and basic instructions during programming.
MAIN
This button will return the remote display back to the Main menu. Depending on which mode you are in, it may take two or more presses. This will help you get back to the Main menu if you ever get lost in the menus.
1 2 3
4 5 6
7 8 9
+10
DIS 0 ENT
M1 M2 M3
MACROS
The main part of the display shows the labels of the ten DEVICE buttons. You can change any label and cus- tomize the remote to Þt your system. Note: this is not a
Contrast
The contrast of the display can be changed by holding down the MAIN button and pressing the joystick pad UP or DOWN.
FAV
This button allows you to step through Þve display pages of your favorite TV and radio stations. These can be set and
Joystick Pad
This pad and surrounding buttons are used to operate standard DVD menus, and VCR and Tape transport controls. In Ultimate Receiver mode, if you press MENU, the On Screen Display will appear and the joystick can be used to select and adjust the various items.
M1, M2 and M3 Macros
These MACRO buttons can be programmed to send out a sequence of commands with a single press.
Batteries
The remote takes four AAA bat- teries inside the rear compartment. These should last about six months in normal use, before a
25
User's Manual