CHAPTER 1
Quick Start Guide
We hope that the following details will help you get started using your Ultimate Receiver.
1.Take care to read and follow the safety instructions on pages ![]() ).
).
2.Add batteries to the remote control.
3.Connect your source equipment and speakers to the Receiver. See the hookup diagrams on pages 15- 24.
Make sure that all of your equip- ment remains unplugged from the AC mains until you have made all the connections.
4.In your DVD player's Audio menu, set the digital output to Bitstream. If this is not set correctly, the Receiver cannot decode the digital information for 5.1 surround sound playback.
5.The Receiver has a bass manage- ment system which allows the bass from each speaker to be redirected to a subwoofer. Larger speakers can play the full frequency range, and smaller speakers such as satellite types can have their bass redirected. See page 42 for more details.
Make a note of which speak- ers you would like to play the full frequency range (Large) and those which will have the bass redirected (Small). Also make a note of the approximate distance of each speaker from your listening posi- tion.
The lower (Aux) pair of speaker outputs can be used for powering surround back,
6.Turn on the Receiver, then your TV and other source equipment.
8
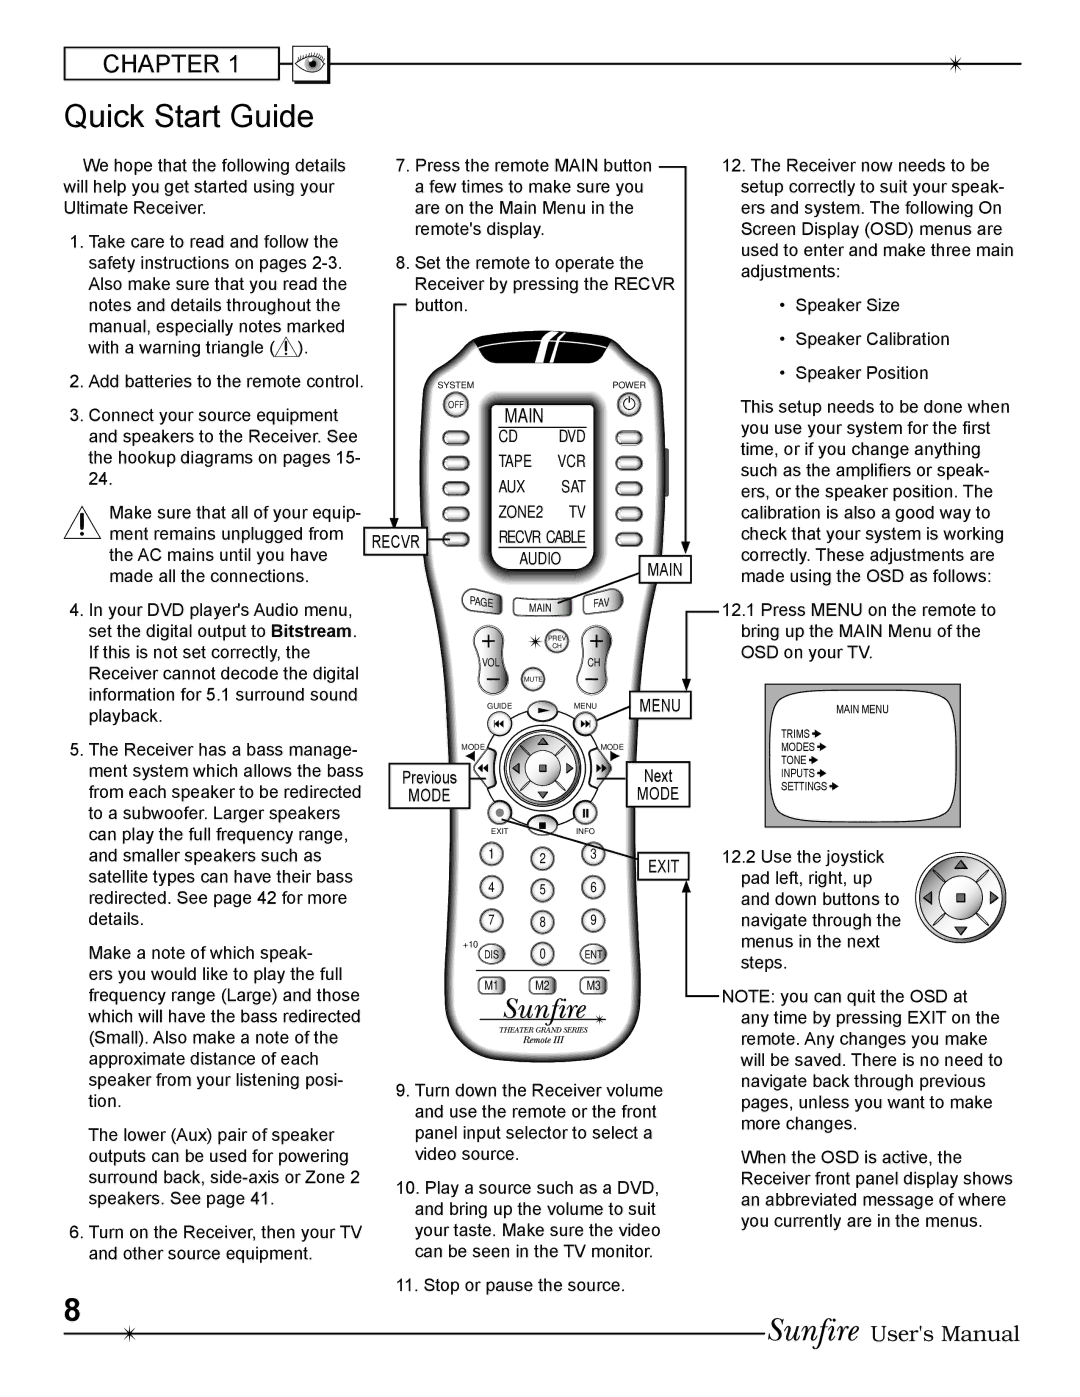
7.Press the remote MAIN button a few times to make sure you are on the Main Menu in the remote's display.
8.Set the remote to operate the Receiver by pressing the RECVR button.
SYSTEM |
|
|
| POWER |
OFF | MAIN |
|
| |
|
|
| ||
| CD |
| DVD |
|
| TAPE | VCR |
| |
| AUX | SAT |
| |
| ZONE2 | TV |
| |
RECVR | RECVR CABLE |
| ||
|
| AUDIO | MAIN | |
|
|
|
| |
PAGE |
| MAIN | FAV |
|
|
|
|
| |
|
| PREV |
| |
|
|
| CH |
|
VOL |
| CH |
| |
|
| MUTE |
|
|
GUIDE |
| MENU | MENU | |
MODE |
|
| MODE | |
Previous |
|
|
| Next |
MODE |
|
|
| MODE |
EXIT |
| INFO |
| |
1 |
| 2 | 3 | EXIT |
|
|
| ||
|
|
|
| |
4 |
| 5 | 6 |
|
7 |
| 8 | 9 |
|
+10 |
| 0 |
|
|
DIS | ENT |
| ||
M1 |
| M2 | M3 |
|
9.Turn down the Receiver volume and use the remote or the front panel input selector to select a video source.
10.Play a source such as a DVD, and bring up the volume to suit your taste. Make sure the video can be seen in the TV monitor.
11.Stop or pause the source.
12.The Receiver now needs to be setup correctly to suit your speak- ers and system. The following On Screen Display (OSD) menus are used to enter and make three main adjustments:
•Speaker Size
•Speaker Calibration
•Speaker Position
This setup needs to be done when you use your system for the Þrst time, or if you change anything such as the ampliÞers or speak- ers, or the speaker position. The calibration is also a good way to check that your system is working correctly. These adjustments are made using the OSD as follows:
12.1Press MENU on the remote to bring up the MAIN Menu of the OSD on your TV.
MAIN MENU
TRIMS ![]()
MODES ![]()
TONE ![]()
INPUTS ![]()
SETTINGS ![]()
12.2Use the joystick pad left, right, up
and down buttons to navigate through the menus in the next steps.
NOTE: you can quit the OSD at any time by pressing EXIT on the remote. Any changes you make will be saved. There is no need to navigate back through previous pages, unless you want to make more changes.
When the OSD is active, the Receiver front panel display shows an abbreviated message of where you currently are in the menus.
User's Manual