Profile series with Codec C60 | Administrator Guide |
Contentsontents
IntroductiIntroduction
GettingGeGetti startstartedtarted
AboutAbout tthe menuss
The setSettingsings menumenu
TheS ttingsSettingsLibrarylibrary
Camerasa eras
AppenAppendicesic
ContactContact us
Initial configurations
Before you can start making calls with the system you will need to set the IP address, add the system to the network and check if the date and time settings needs to be adjusted. When starting up the system the first time the menu password is not set. But, when done it is recommended to set a menu password to get access to the Advanced configuration menu.
Password protection of the Advanced menu
If a menu password has been set you will be asked to enter a password to get access to the Advanced menu. By default, the menu password is not set when starting up the system for the first time.
After having finished the initial configurations it is recommended to define an menu password.
1 | Waking up the system |
If no menu on screen, press Home ( ) on the remote control to show | |
the menu on screen. |
If the system does not show any menu on screen:
1.Make sure the monitor has been turned on
2.Make sure the remote control has the batteries installed
3.Make sure the codec has been turned on
4.If the system has just been turned on, wait a few minutes to allow the system to startup
|
|
|
2 | Verify IP address settings | |
| ||
| How to go to the System Information page to verify the IP address: | |
| 1. | Navigate to Settings > System Information to open the System |
|
| information page. |
| 2. | When the IP address is automatically assigned from a DHCP server, the |
|
| network IP address of the codec is shown on the System Information |
|
| page. |
| 3. | Press Home ( ) to exit. |
|
|
|
|
|
|
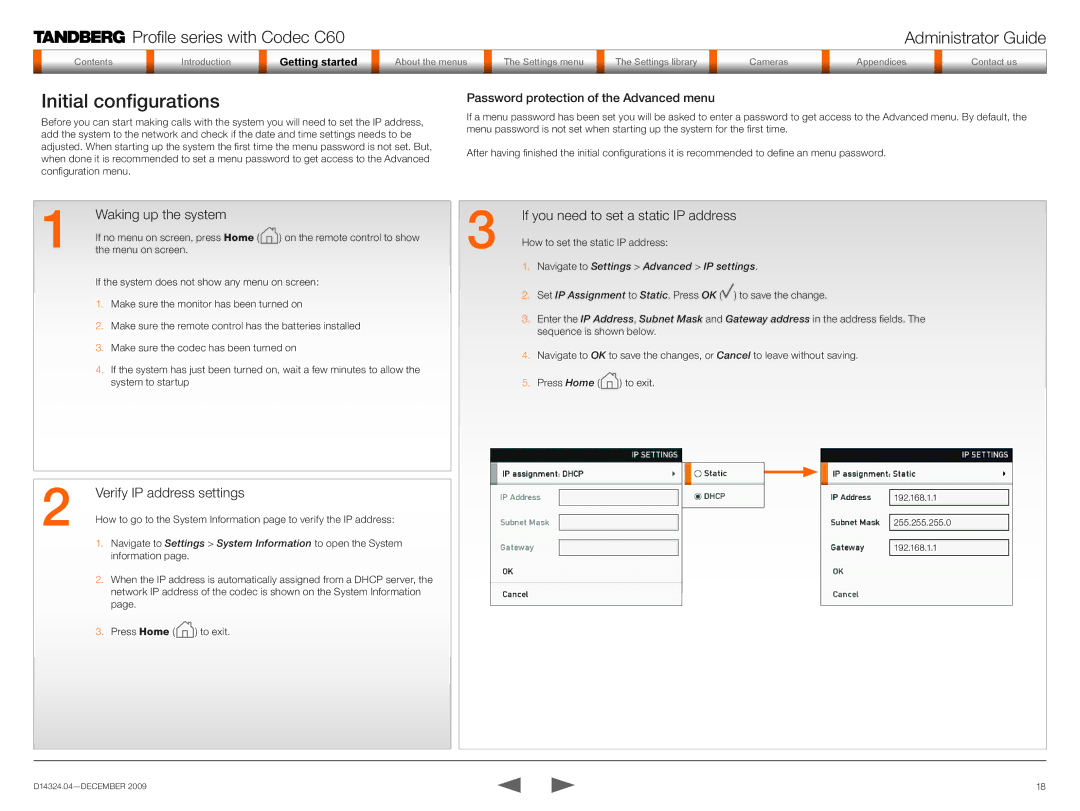
3 | If you need to set a static IP address | |
| ||
| How to set the static IP address: | |
| 1. | Navigate to Settings > Advanced > IP settings. |
| 2. | Set IP Assignment to Static. Press OK ( ) to save the change. |
| 3. | Enter the IP Address, Subnet Mask and Gateway address in the address fields. The |
|
| sequence is shown below. |
| 4. | Navigate to OK to save the changes, or Cancel to leave without saving. |
| 5. | Press Home ( ) to exit. |
192.168.1.1
255.255.255.0
192.168.1.1
18 |