Video Processor 1 Board
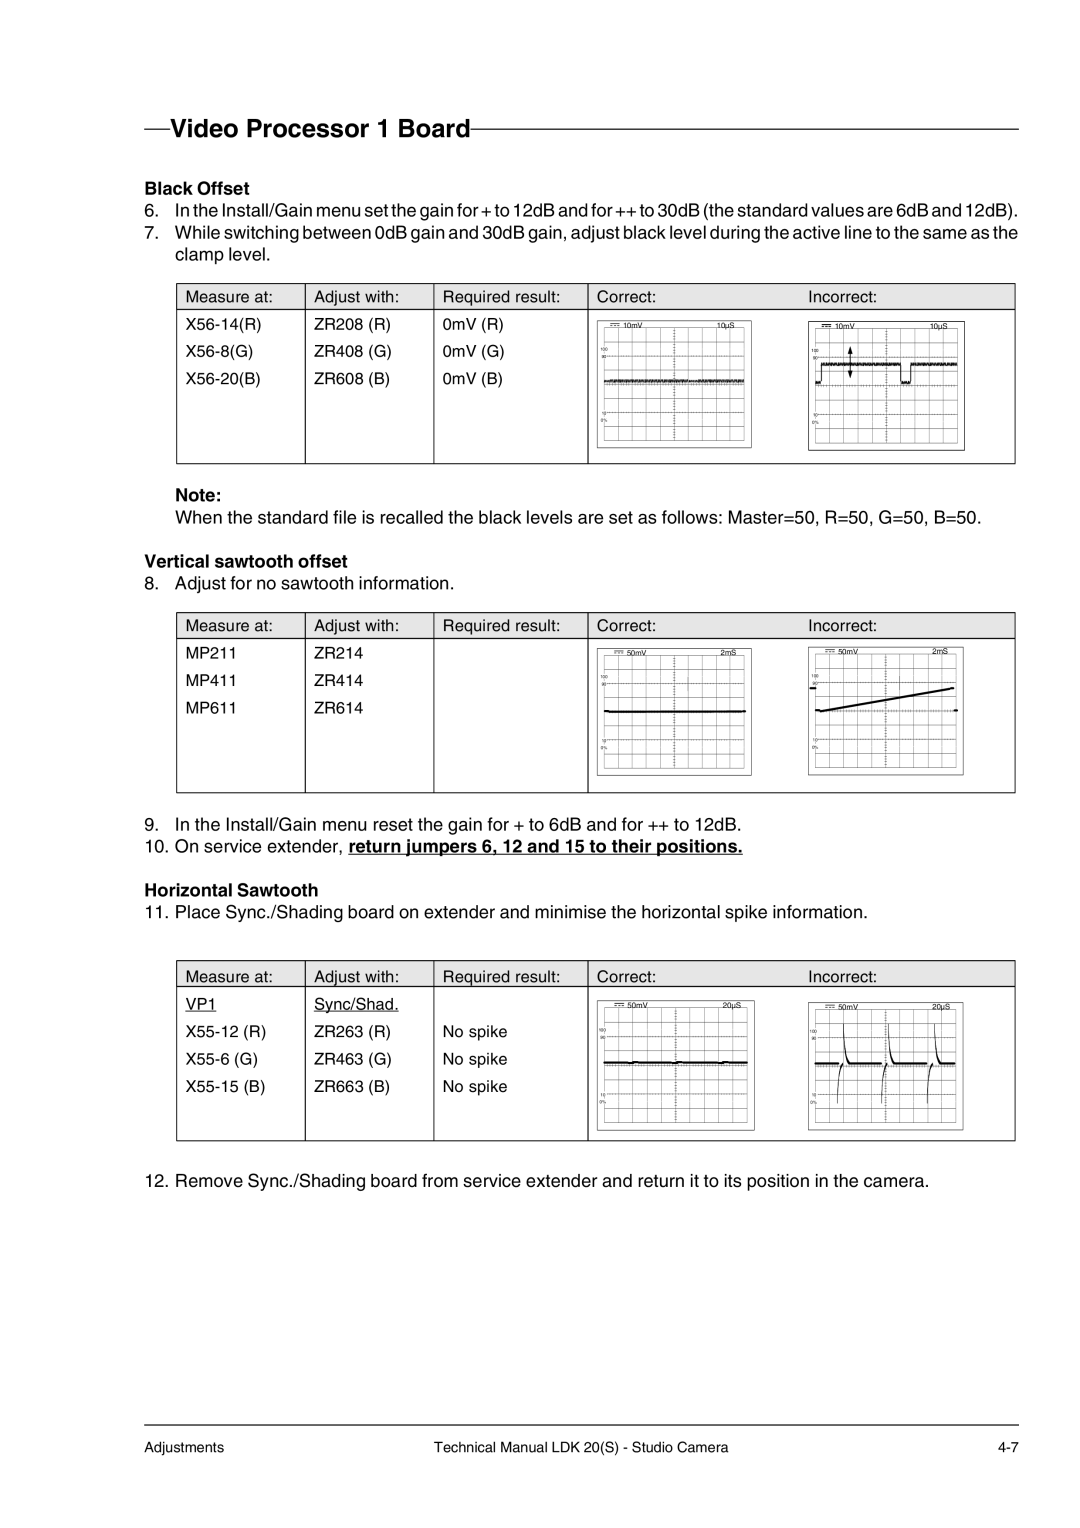
Black Offset
6.In the Install/Gain menu set the gain for + to 12dB and for ++ to 30dB (the standard values are 6dB and 12dB).
7.While switching between 0dB gain and 30dB gain, adjust black level during the active line to the same as the clamp level.
Measure at:
Adjust with:
ZR208 (R)
ZR408 (G)
ZR608 (B)
Required result:
0mV (R)
0mV (G)
0mV (B)
Correct: |
|
10mV | 10µS |
100 |
|
90 |
|
10 |
|
0% |
|
Incorrect: |
|
10mV | 10µS |
100 |
|
90 |
|
10 |
|
0% |
|
Note:
When the standard file is recalled the black levels are set as follows: Master=50, R=50, G=50, B=50.
Vertical sawtooth offset
8. Adjust for no sawtooth information.
Measure at: | Adjust with: | Required result: |
MP211 | ZR214 |
|
MP411 | ZR414 |
|
MP611 | ZR614 |
|
|
|
|
Correct:
50mV2mS
100
90
10
0%
Incorrect: |
|
50mV | 2mS |
100 |
|
90 |
|
10 |
|
0% |
|
9.In the Install/Gain menu reset the gain for + to 6dB and for ++ to 12dB.
10.On service extender, return jumpers 6, 12 and 15 to their positions.
Horizontal Sawtooth
11. Place Sync./Shading board on extender and minimise the horizontal spike information.
Measure at:
VP1
Adjust with:
Sync/Shad.
ZR263 (R)
ZR463 (G)
ZR663 (B)
Required result:
No spike
No spike
No spike
Correct:
50mV
100
90
10
0%
20µS
Incorrect: |
|
50mV | 20µS |
100 |
|
90 |
|
10 |
|
0% |
|
12. Remove Sync./Shading board from service extender and return it to its position in the camera.
Adjustments | Technical Manual LDK 20(S) - Studio Camera |
