ASSEMBLY
DECK MOUNTING
Check that all grease zerks have been installed in the draft beams pivot arm, left linkage arm, right linkage arm, and cylinder mounting ears.
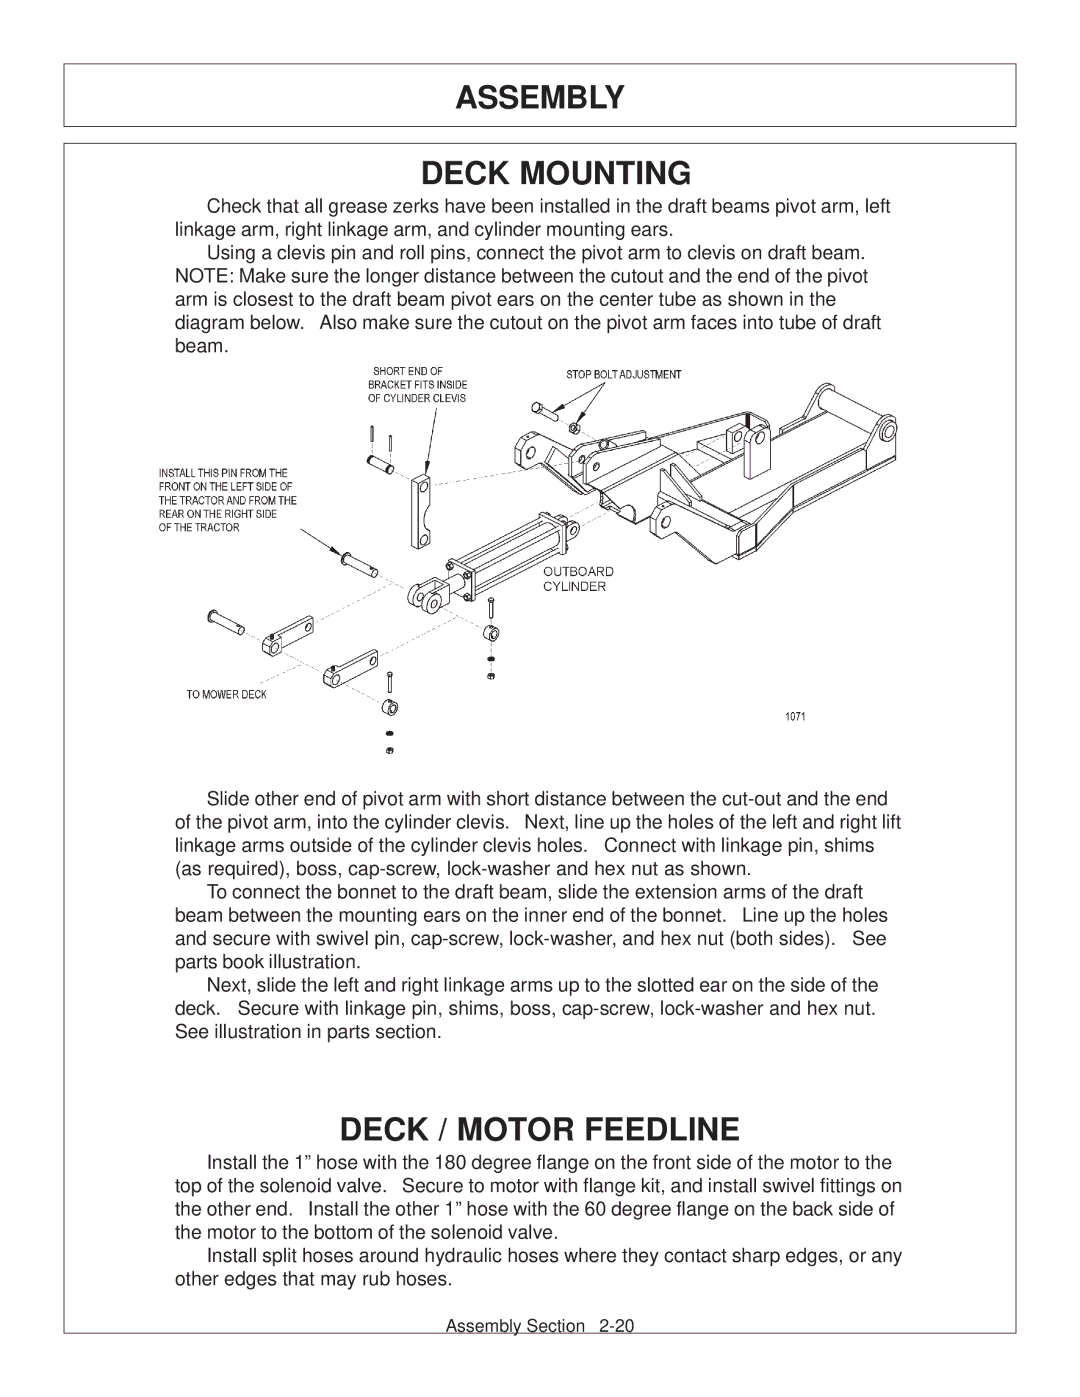
Using a clevis pin and roll pins, connect the pivot arm to clevis on draft beam. NOTE: Make sure the longer distance between the cutout and the end of the pivot arm is closest to the draft beam pivot ears on the center tube as shown in the diagram below. Also make sure the cutout on the pivot arm faces into tube of draft beam.
Slide other end of pivot arm with short distance between the
To connect the bonnet to the draft beam, slide the extension arms of the draft beam between the mounting ears on the inner end of the bonnet. Line up the holes and secure with swivel pin,
Next, slide the left and right linkage arms up to the slotted ear on the side of the deck. Secure with linkage pin, shims, boss,
DECK / MOTOR FEEDLINE
Install the 1” hose with the 180 degree flange on the front side of the motor to the top of the solenoid valve. Secure to motor with flange kit, and install swivel fittings on the other end. Install the other 1” hose with the 60 degree flange on the back side of the motor to the bottom of the solenoid valve.
Install split hoses around hydraulic hoses where they contact sharp edges, or any other edges that may rub hoses.
Assembly Section