2. PRINTER SETUP | ENGLISH VERSION |
2.7 Loading the Media
2.7Loading the Media (Cont.)
10.Lower the Print Head Block until it stops.
11.After loading the media, it may be necessary to set the Media Sensors used to detect the print start position for label or tag printing.
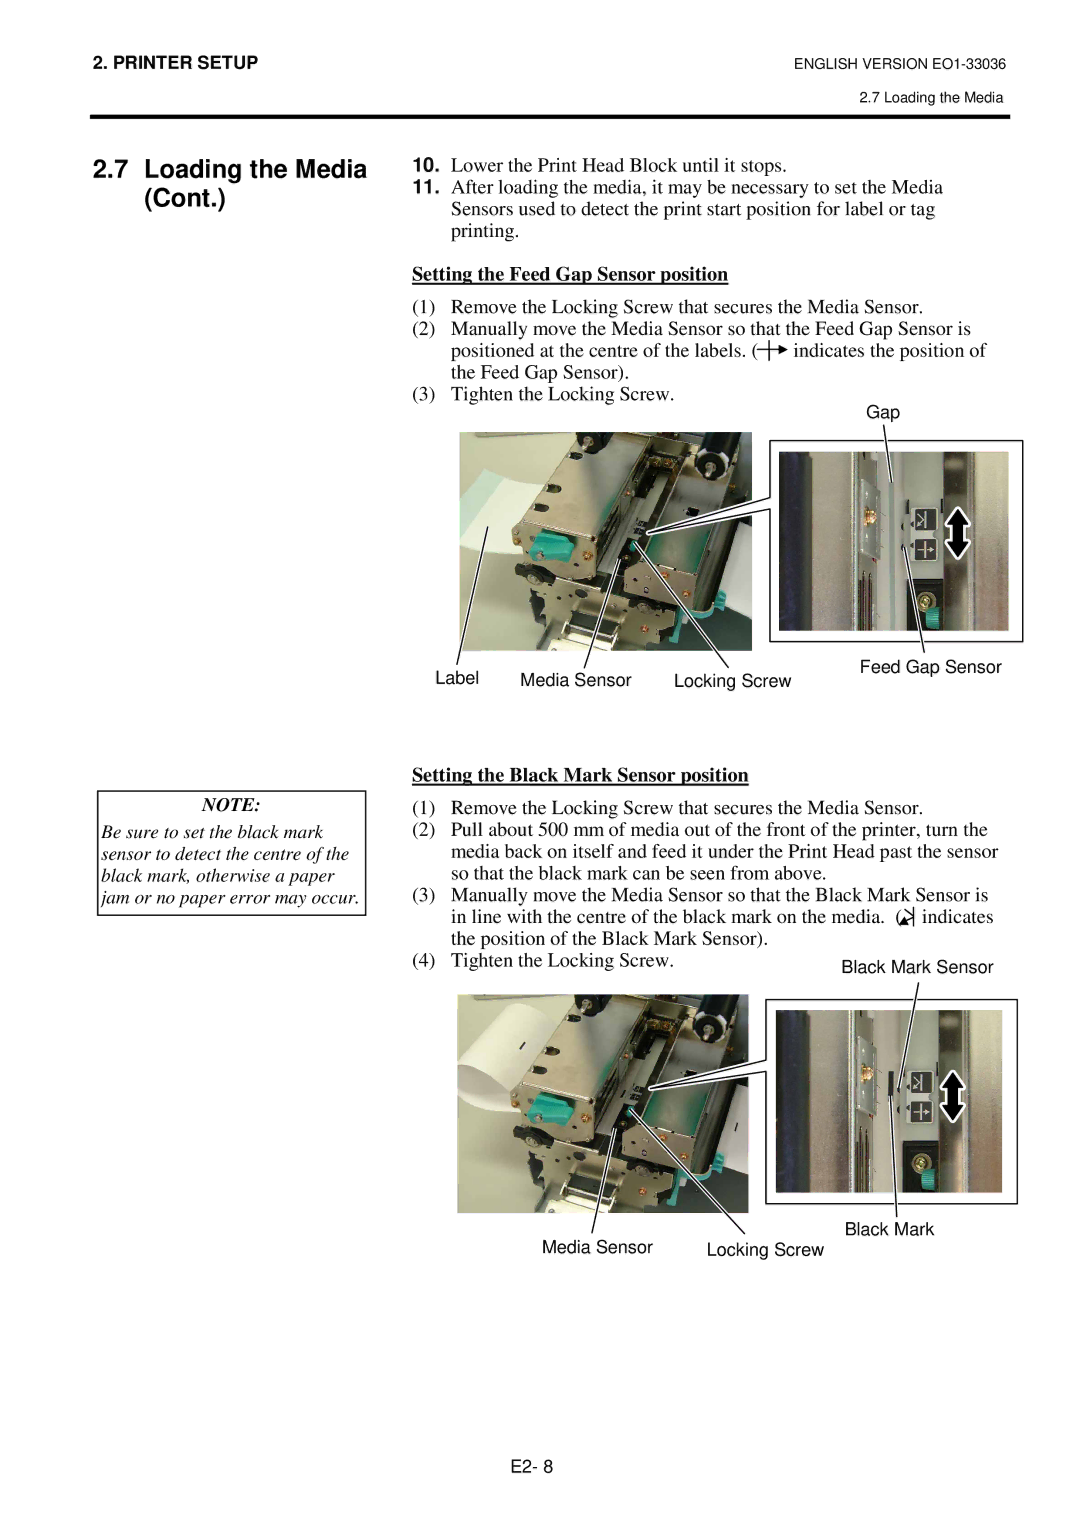
Setting the Feed Gap Sensor position
(1)Remove the Locking Screw that secures the Media Sensor.
(2)Manually move the Media Sensor so that the Feed Gap Sensor is
positioned at the centre of the labels. (![]() indicates the position of the Feed Gap Sensor).
indicates the position of the Feed Gap Sensor).
(3)Tighten the Locking Screw.
Gap
NOTE:
Be sure to set the black mark sensor to detect the centre of the black mark, otherwise a paper jam or no paper error may occur.
Label | Media Sensor | Feed Gap Sensor |
Locking Screw |
Setting the Black Mark Sensor position
(1)Remove the Locking Screw that secures the Media Sensor.
(2)Pull about 500 mm of media out of the front of the printer, turn the media back on itself and feed it under the Print Head past the sensor so that the black mark can be seen from above.
(3)Manually move the Media Sensor so that the Black Mark Sensor is in line with the centre of the black mark on the media. (![]() indicates the position of the Black Mark Sensor).
indicates the position of the Black Mark Sensor).
(4) Tighten the Locking Screw.
Media Sensor | Locking Screw |
E2- 8