8. REMOVAL AND REPLACEMENT OF RECEIPT/LABEL
8. REMOVAL AND REPLACEMENT OF RECEIPT/LABEL
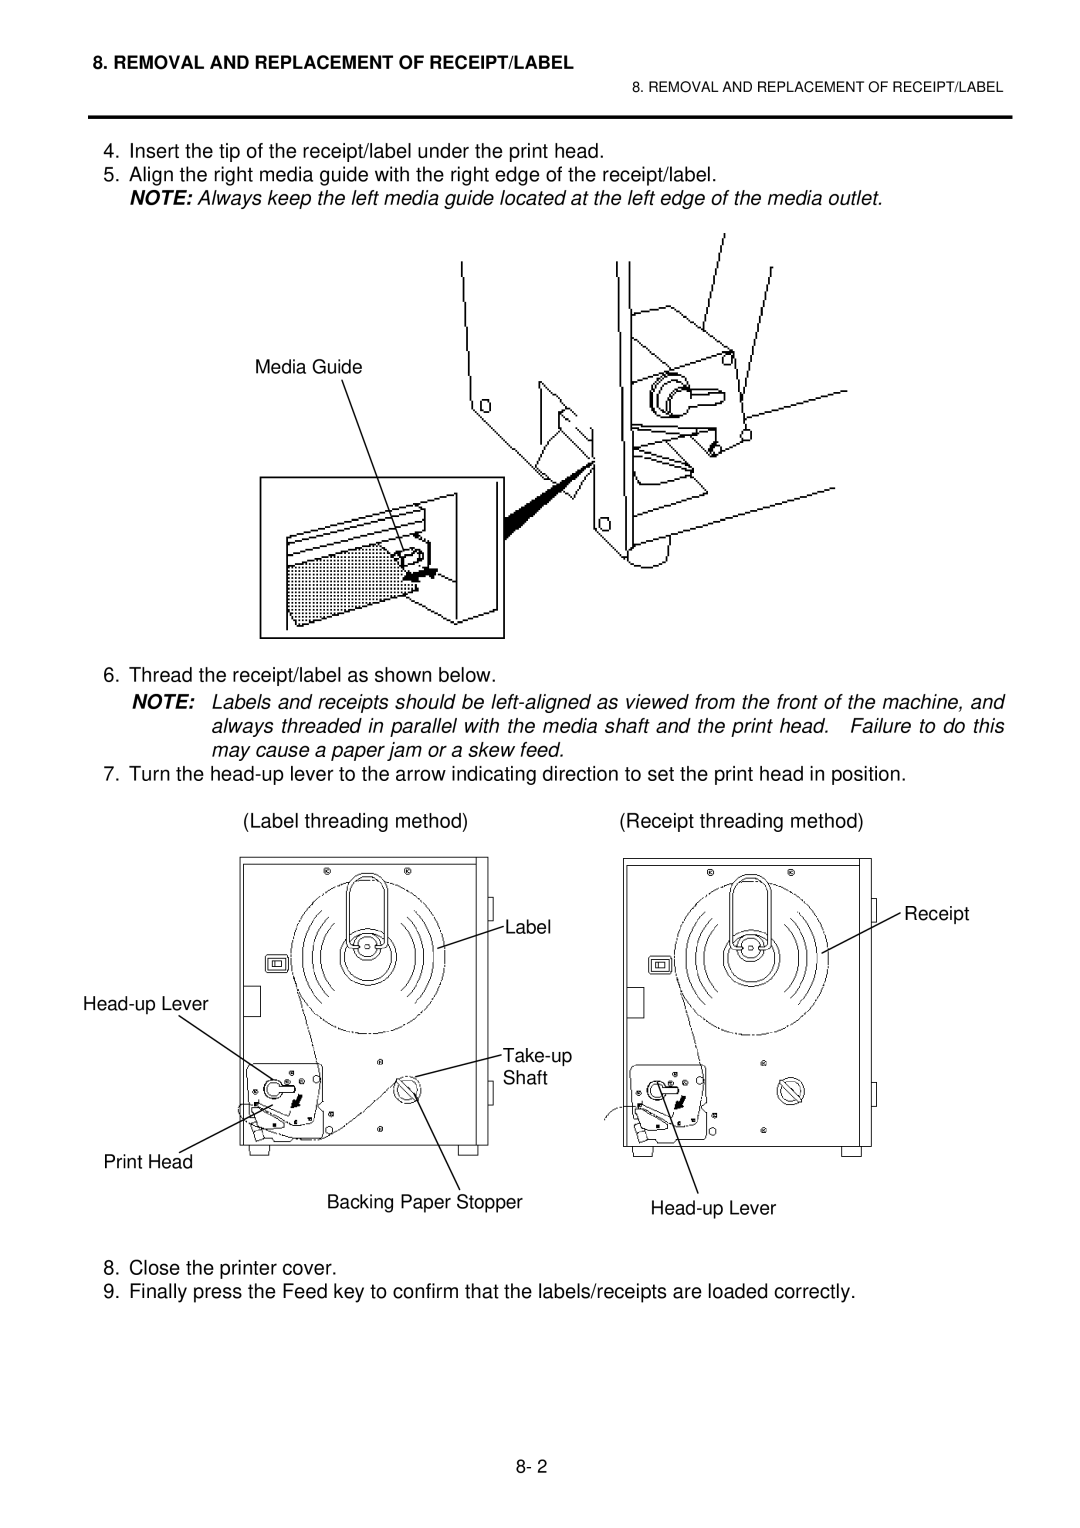
4.Insert the tip of the receipt/label under the print head.
5.Align the right media guide with the right edge of the receipt/label.
NOTE: Always keep the left media guide located at the left edge of the media outlet.
Media Guide
6. Thread the receipt/label as shown below.
NOTE: Labels and receipts should be
7. Turn the
(Label threading method) | (Receipt threading method) |
![]() Label
Label
Receipt
Shaft
Print Head
Backing Paper Stopper | |
|
8.Close the printer cover.
9.Finally press the Feed key to confirm that the labels/receipts are loaded correctly.
8- 2