62
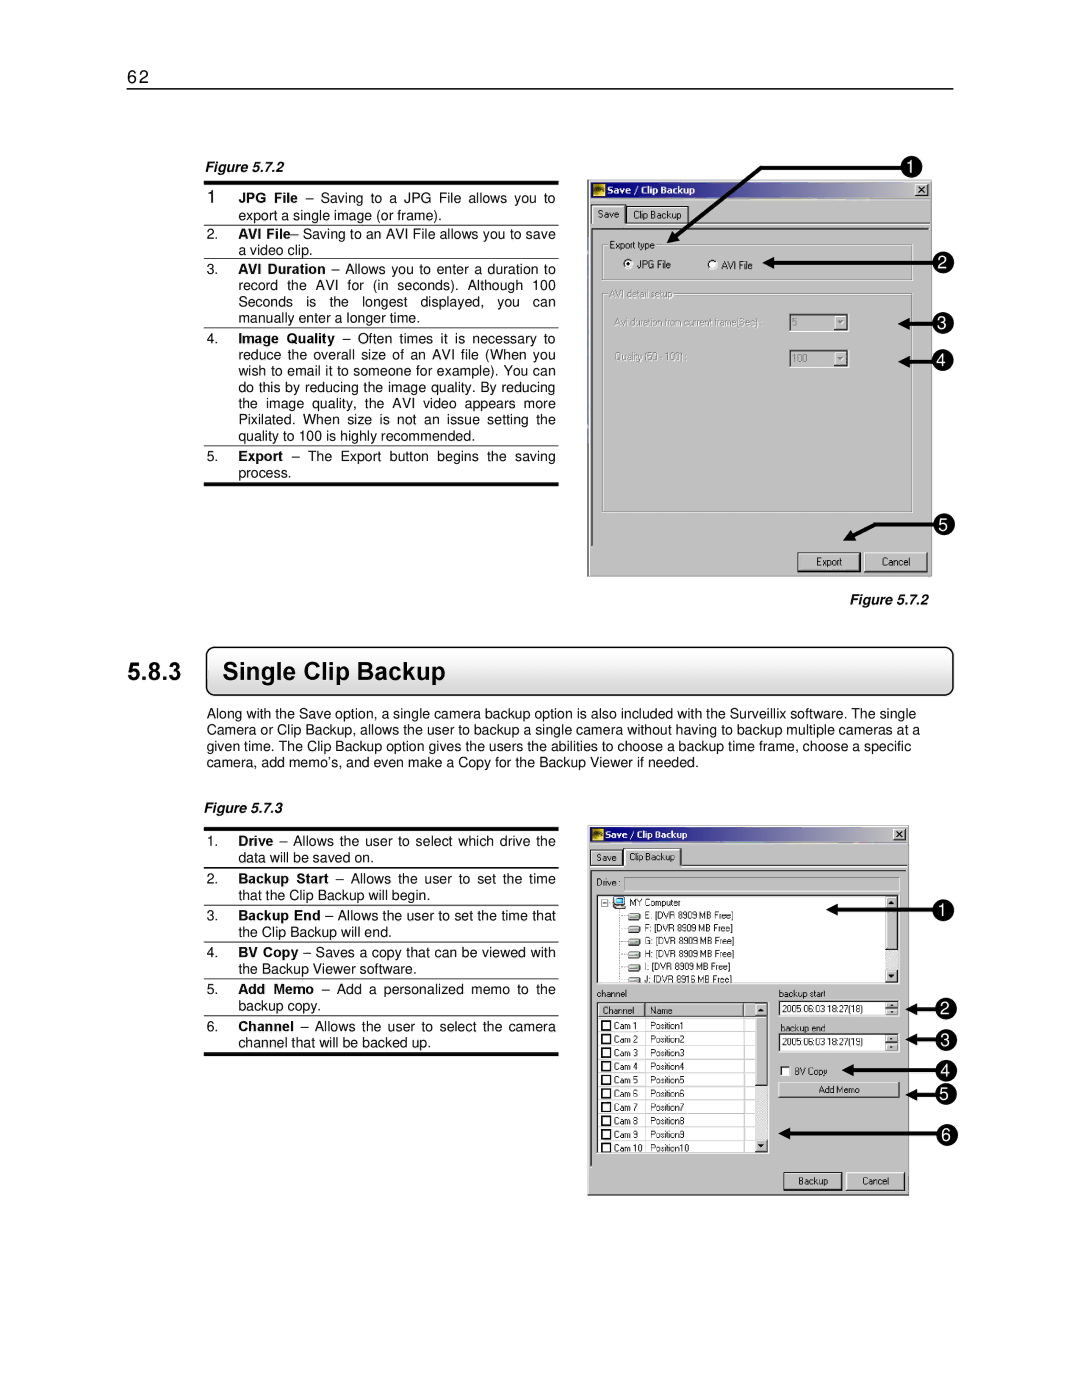
Figure 5.7.2
1JPG File – Saving to a JPG File allows you to export a single image (or frame).
2.AVI File– Saving to an AVI File allows you to save a video clip.
3.AVI Duration – Allows you to enter a duration to record the AVI for (in seconds). Although 100 Seconds is the longest displayed, you can manually enter a longer time.
4.Image Quality – Often times it is necessary to reduce the overall size of an AVI file (When you wish to email it to someone for example). You can do this by reducing the image quality. By reducing the image quality, the AVI video appears more Pixilated. When size is not an issue setting the quality to 100 is highly recommended.
5.Export – The Export button begins the saving process.
5.8.3Single Clip Backup
1
![]() 2
2
![]() 3
3
![]() 4
4
5
Figure 5.7.2
Along with the Save option, a single camera backup option is also included with the Surveillix software. The single Camera or Clip Backup, allows the user to backup a single camera without having to backup multiple cameras at a given time. The Clip Backup option gives the users the abilities to choose a backup time frame, choose a specific camera, add memo’s, and even make a Copy for the Backup Viewer if needed.
Figure 5.7.3
1.Drive – Allows the user to select which drive the data will be saved on.
2.Backup Start – Allows the user to set the time that the Clip Backup will begin.
3.Backup End – Allows the user to set the time that the Clip Backup will end.
4.BV Copy – Saves a copy that can be viewed with the Backup Viewer software.
5.Add Memo – Add a personalized memo to the backup copy.
6.Channel – Allows the user to select the camera channel that will be backed up.
![]() 1
1
![]() 2
2
![]() 3
3
![]() 4
4 ![]() 5
5
![]() 6
6