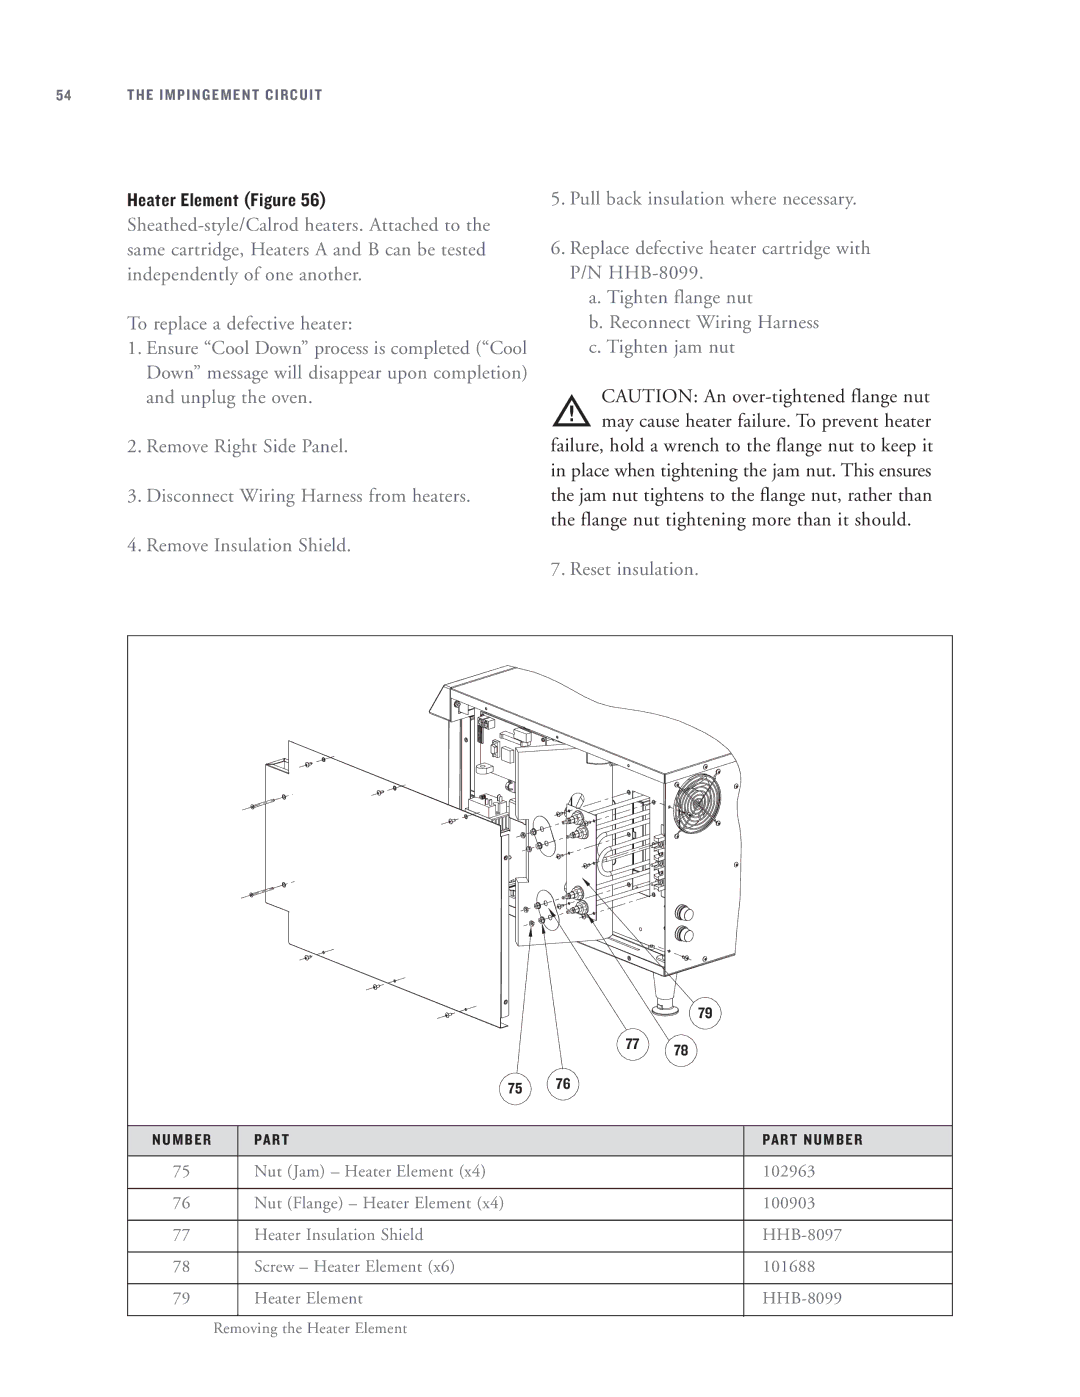
HHB-8041, HHB-8099, HHB-8085, HHB-8097, HHB-8115 specifications
Turbo Chef Technologies is renowned for its pioneering advancements in cooking technology, with a range of innovative commercial ovens designed for efficiency and precision. Among its popular models are the HHB-8136, HHB-8029, HHB-8028, HHB-8134, and HHB-8115, each catering to the unique needs of fast-paced food service environments.The HHB-8136 is known for its superior cooking speed and versatility. Leveraging Turbo Chef's patented rapid-cook technology, this model utilizes high-speed impingement and a unique airflow system to deliver rapid, even cooking results. Its spacious interior accommodates large dishes, making it ideal for busy kitchens that require quick turnaround times.
The HHB-8029 is another standout model, featuring advanced digital controls that allow for precise temperature adjustments and programmable cooking settings. This flexibility enables chefs to achieve consistent culinary outcomes, regardless of the dish being prepared. With a robust construction and high-capacity, it is designed to withstand the rigors of commercial use while delivering exceptional performance.
The HHB-8028 is designed with energy efficiency in mind, incorporating features that minimize energy consumption while maximizing cooking output. This makes it an eco-conscious choice for establishments looking to reduce their carbon footprint without compromising on performance.
Meanwhile, the HHB-8134 emphasizes smart technology, with an intuitive interface that simplifies operation. Its smart diagnostics system alerts users to maintenance needs, enhancing longevity and reducing downtime. This model also includes multiple cooking modes, accommodating everything from baking to toasting, making it a versatile addition to any kitchen.
The HHB-8115 focuses on compact design without sacrificing power. Ideal for establishments with limited space, it integrates Turbo Chef's innovative cooking technologies into a smaller footprint. With a user-friendly interface and robust cooking capabilities, this model proves that size does not dictate performance.
Overall, Turbo Chef Technologies' ovens—HHB-8136, HHB-8029, HHB-8028, HHB-8134, and HHB-8115—highlight a commitment to innovation, efficiency, and high-quality cooking. These models combine cutting-edge technology with practical features to support chefs in a dynamic restaurant environment, ensuring exceptional food quality and operational efficiency. Whether for rapid cooking, energy efficiency, or smart technology integration, Turbo Chef delivers unmatched solutions tailored to the evolving needs of the culinary industry.

