|
| Take Apart |
|
|
| Display Assembly - 30 | |||
|
|
|
|
|
|
|
|
|
|
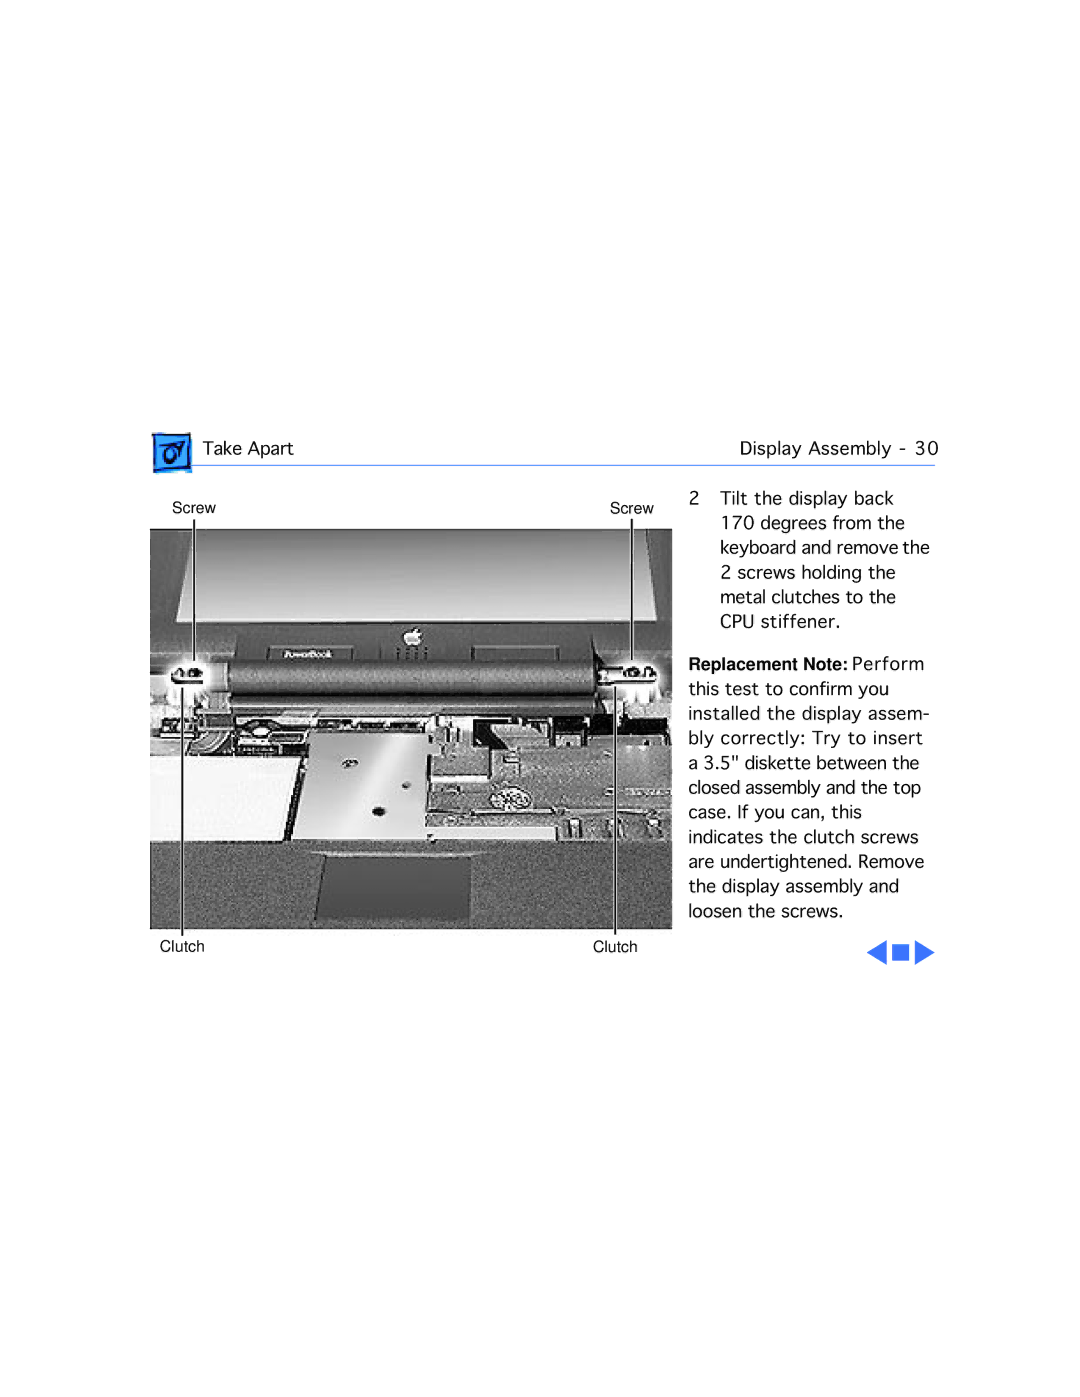
Screw | Screw | 2 Tilt the display back | |||||||
|
|
|
|
|
| 170 degrees from the | |||
|
|
|
|
|
| ||||
|
|
|
|
|
| keyboard and remove the | |||
|
|
|
|
|
| 2 screws holding the | |||
|
|
|
|
|
| metal clutches to the | |||
|
|
|
|
|
| CPU stiffener. | |||
|
|
|
|
|
| Replacement Note: Perform | |||
|
|
|
|
|
| ||||
|
|
|
|
|
| this test to confirm you | |||
|
|
|
|
|
| ||||
|
|
|
|
|
| installed the display assem- | |||
|
|
|
|
|
| bly correctly: Try to insert | |||
|
|
|
|
|
| a 3.5" diskette between the | |||
|
|
|
|
|
| closed assembly and the top | |||
|
|
|
|
|
| case. If you can, this | |||
|
|
|
|
|
| indicates the clutch screws | |||
|
|
|
|
|
| are undertightened. Remove | |||
|
|
|
|
|
| the display assembly and | |||
|
|
|
|
|
| loosen the screws. | |||
Clutch | Clutch |
|
|
|
| ||||
|
|
|
| ||||||
|
|
|
|
|
|
|
|
|
|
