Sony DSR-200 Adjusting the white balance, Selecting the appropriate mode, 3200K indoor mode

Page 59

Adjusting the white balance

White balance is the adjustment to make white subjects look white and to obtain a more natural color balance. You can obtain better results by adjusting the white balance manually when lighting conditions change quickly or when recording outdoors, e.g. neon signs, fireworks.

Selecting the appropriate mode

[a]

[b]

·


[c]

[d]

Advanced operations

·one-push white balance mode

Shooting with lighting condition on the subject set and with the white balance set in a particular condition
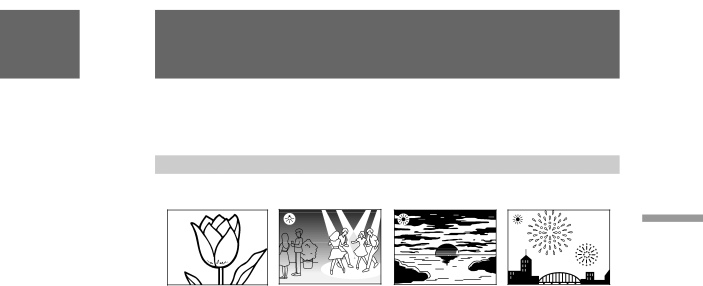
Monochromatic subject or background [a]

e(3200K) indoor mode

Lighting conditions change quickly [b]

A bright place such as a photography studio

Under sodium or mercury lamps

w(5800K) outdoor mode

Under a color matching fluorescent lamp

Recording a sunset/sunrise, just after sunset, just before sunrise [c], neon signs, or fireworks [d]

59

DSR-200 U/C 3-858-622-22(1). E

Image 59
Contents Digital Camcorder For the customers in Canada For the customers in the U.S.ATable of contents Before you begin Using this manualPrecaution on copyright Precautions on digital camcorder care4A/V connecting cable 1 p Checking supplied accessoriesWireless Remote Commander 1 p.11 CR2025 Lithium Battery 1 pIdentifying the parts @ Grip @ª Microphone holder attaching point @£ Tally lamp p@¢ Contr knob p Identifying the parts » ¼Á ª£ ¢ ¤ ¼AUDIO Mode switch p¢MONITOR Level dial p Headphones jack p ¤l Lanc jackTally lamp/Rear Remote Commander sensor p Audio DUB button p *£ Video controls pRemote Commander To avoid damage from possible battery leakage To prepare the Remote CommanderTo use the Remote Commander Menu About the ID of the Remote CommanderRemote Commander Sensors Remote control directionViewfinder Manual focusing indicator pAttaching the shoulder strap Display windowTo remove the digital camcorder from the tripod Attaching optional accessoriesAttaching digital camcorder to the tripod adaptor Attaching the external microphone with XLR connector Attaching optional accessoriesChecking the remaining battery indicator c Attaching the battery adaptorTo remove the battery adaptor a To remove the battery pack bTo remove the viewfinder Attaching the viewfinderGetting started Charging time Charging and installing the battery packCharging the battery pack To remove the battery pack Charging and installing the battery packBattery life Installing the battery pack Inserting a cassette To prevent accidental erasure To eject the cassetteBasic operations Camera recordingTo focus the viewfinder lens c When ND on flashes in the viewfinderTo stop recording momentarily a To finish recording bTo record through an external microphone Camera recordingTo change the directionality of the built-in microphone To monitor the sound while recordingTo select Fs 48k a or Fs 32k b recording mode Zooming speed Variable speed zooming Using the zoom featureWhen you shoot a subject using a telephoto zoom Hints for better shooting Release Lock Hints for better shootingTo begin re-recording Checking the recorded pictureTo stop playback If you connect directly to a monitor Connections for playbackTo connect to a TV without Video/Audio input jacks If your monitor is already connected to a VCRIf your monitor or VCR has a BNC jack If your monitor or VCR is a monaural typePlaying back a tape Using the Remote CommanderVarious playback modes Advanced operations Using alternative power sourcesUsing the house current To remove the adaptor Charging the attached battery packVTR Changing the mode settingsItems for both Camcorder and VTR modes Selecting the mode setting of each itemItems for Camcorder mode only About Frame REC and INT REC setting Changing the mode settingsItems for VTR mode only When Digital Mode is set to OverlapFade-in and fade-out When fading in aWhen fading out b To cancel the fade-in/fade-out functionOverlapping two pictures To cancel the overlap functionTo use a flash To use the remote commander to take a photoPhoto recording To stop interval recording To cancel interval recordingInterval recording Cut recording To cancel cut recordingTo focus manually Selecting automatic or manual modeRelation of aperture, shutter speed and gain When to adjust aperture, shutter speed, and gain manuallyShooting dark environments adjust gain manually Settings for each itemWhen to use manual focus Focusing manuallyShooting with auto focusing momentarily Focusing manuallyTo record a very distant subject Focusing manuallyTo return to autofocus mode About the depth of focus field Adjusting the apertureTo return to automatic aperture mode To return to automatic shutter speed mode Adjusting the shutter speedSlow Shtr Subject Shutter speed Adjusting the shutter speed To select the Best Shutter Speed To use the AGC Limit function Adjusting the gainTo return to automatic gain mode To adjust the G gain Preset menu item Adjusting the gain3200K indoor mode Adjusting the white balanceSelecting the appropriate mode · one-push white balance modeTo return to automatic white balance mode Adjusting the white balanceAdjusting white balance manually Shooting when the lighting condition changes When ND OFF flashes in the viewfinder Using the ND filterWhen ND on flashes in the viewfinder Using the zebra pattern Built-in microphone Adjusting the recording soundSelecting and setting audio mode LINE/MIC switches setting and recording soundChecking the recording level Adjusting the recording level automaticallyTo reduce wind noise of the built-in microphone Adjusting the recording soundTo attenuate the recording level To activate the Steady Shot function again Releasing the Steady Shot functionAdjusts Adjustment value Making a custom presetTo check the custom preset settings To turn off custom presetTo turn on custom preset again To restore the standard settingsMode Searching the recorded pictureIf your tape has blank portions between pictures To stop searchingDisplaying recording data When bars ------ appearRecorder with DV Editing onto another tapeBefore editing To connect the VCR without DV in jackTo stop editing Editing onto another tapeStarting editing To use an additional microphone Audio dubbingMaking connections To use additional audio line in aTo stop recording To adjust the volumeAudio dubbing RecordingAdditional information Changing the lithium battery in the digital camcorderChanging the lithium battery Changing the lithium battery in the digital camcorderYear changes as follows Resetting the date and timeTo correct the date and time setting To check the preset date and timeCompatibility on playback Compatibility of Dvcam and DV formatsDifferences between Dvcam and DV formats Dvcam and DV cassettesLimitations on editing Compatibility on editing using DV connectorsUsable cassettes Copyright signalWhen to replace the battery pack Tips for using the battery packPreparing the battery pack Tips for using the battery pack Inside the digital camcorder Maintenance information and precautionsHow to prevent moisture condensation Moisture condensationVideo head cleaning Maintenance information and precautionsOn Handling Tapes PrecautionsRemoving dust from inside the viewfinder Digital camcorder operationOthers AC power adaptorDigital camcorder care ChargingDifference in color systems Using your digital camcorder abroadPower sources Operation PowerTrouble check Digital camcorderWind Others Trouble checkPicture When the Charge lamp does not flash again AC power adaptorWhen the Charge lamp flashes Symptom Corrective ActionsLens SpecificationsSome other trouble has occurred Battery is weak or deadTape is near the end Tape has run outK, L Y, Z