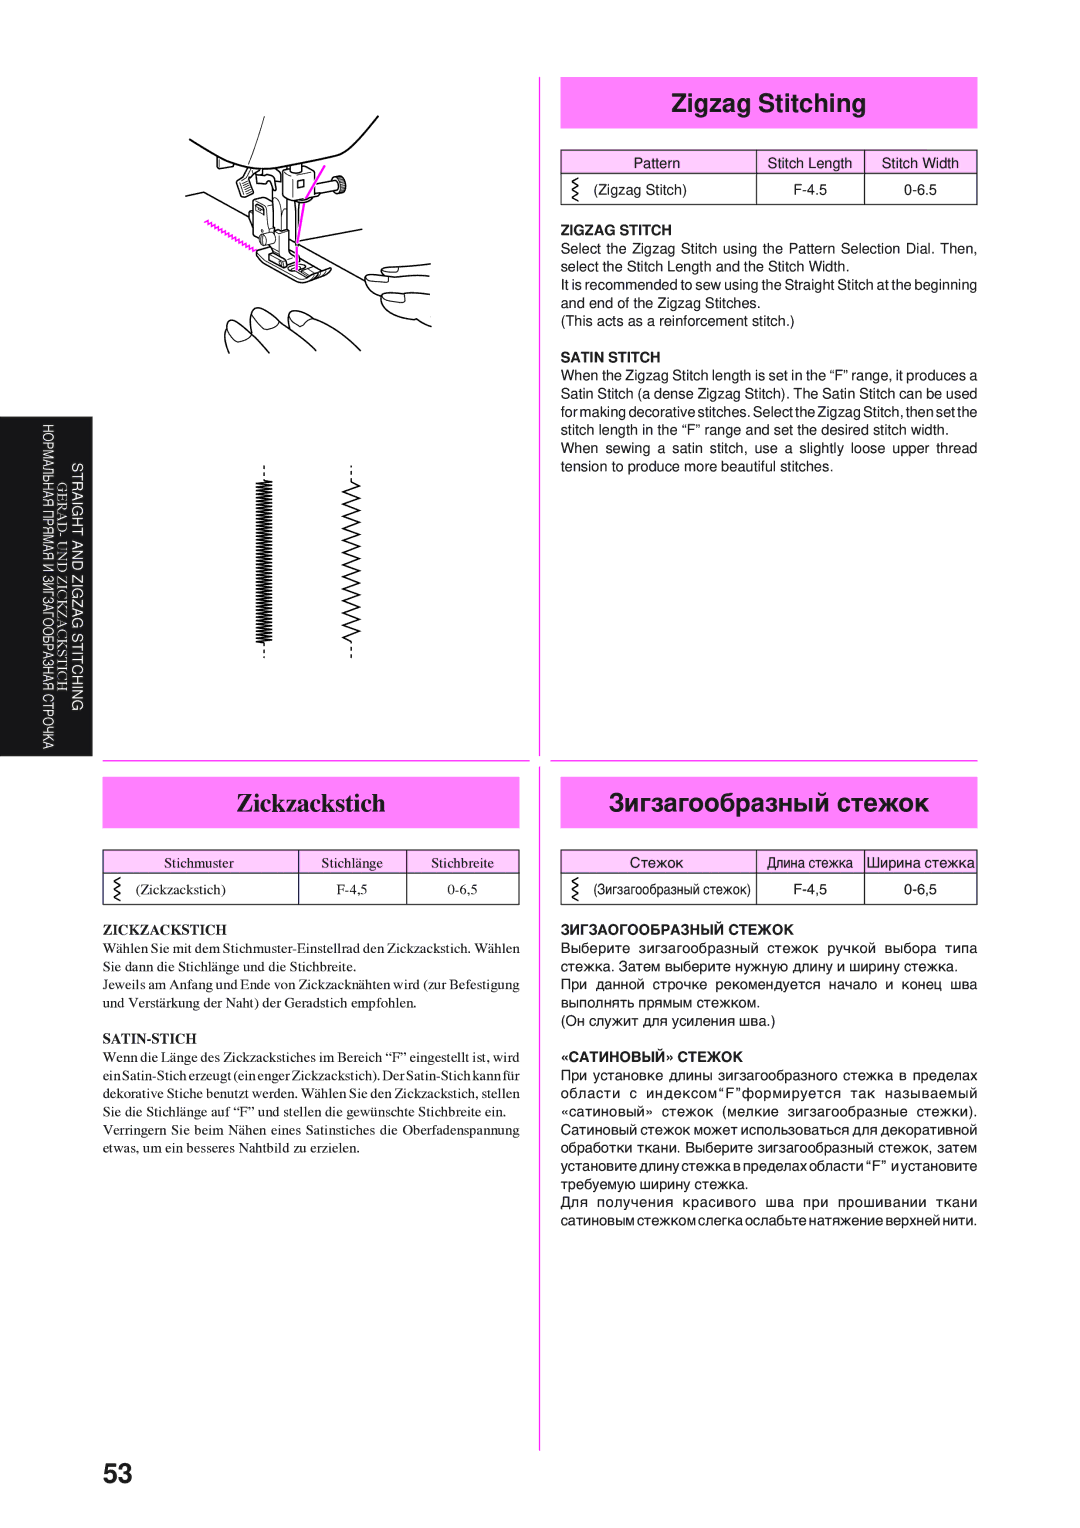
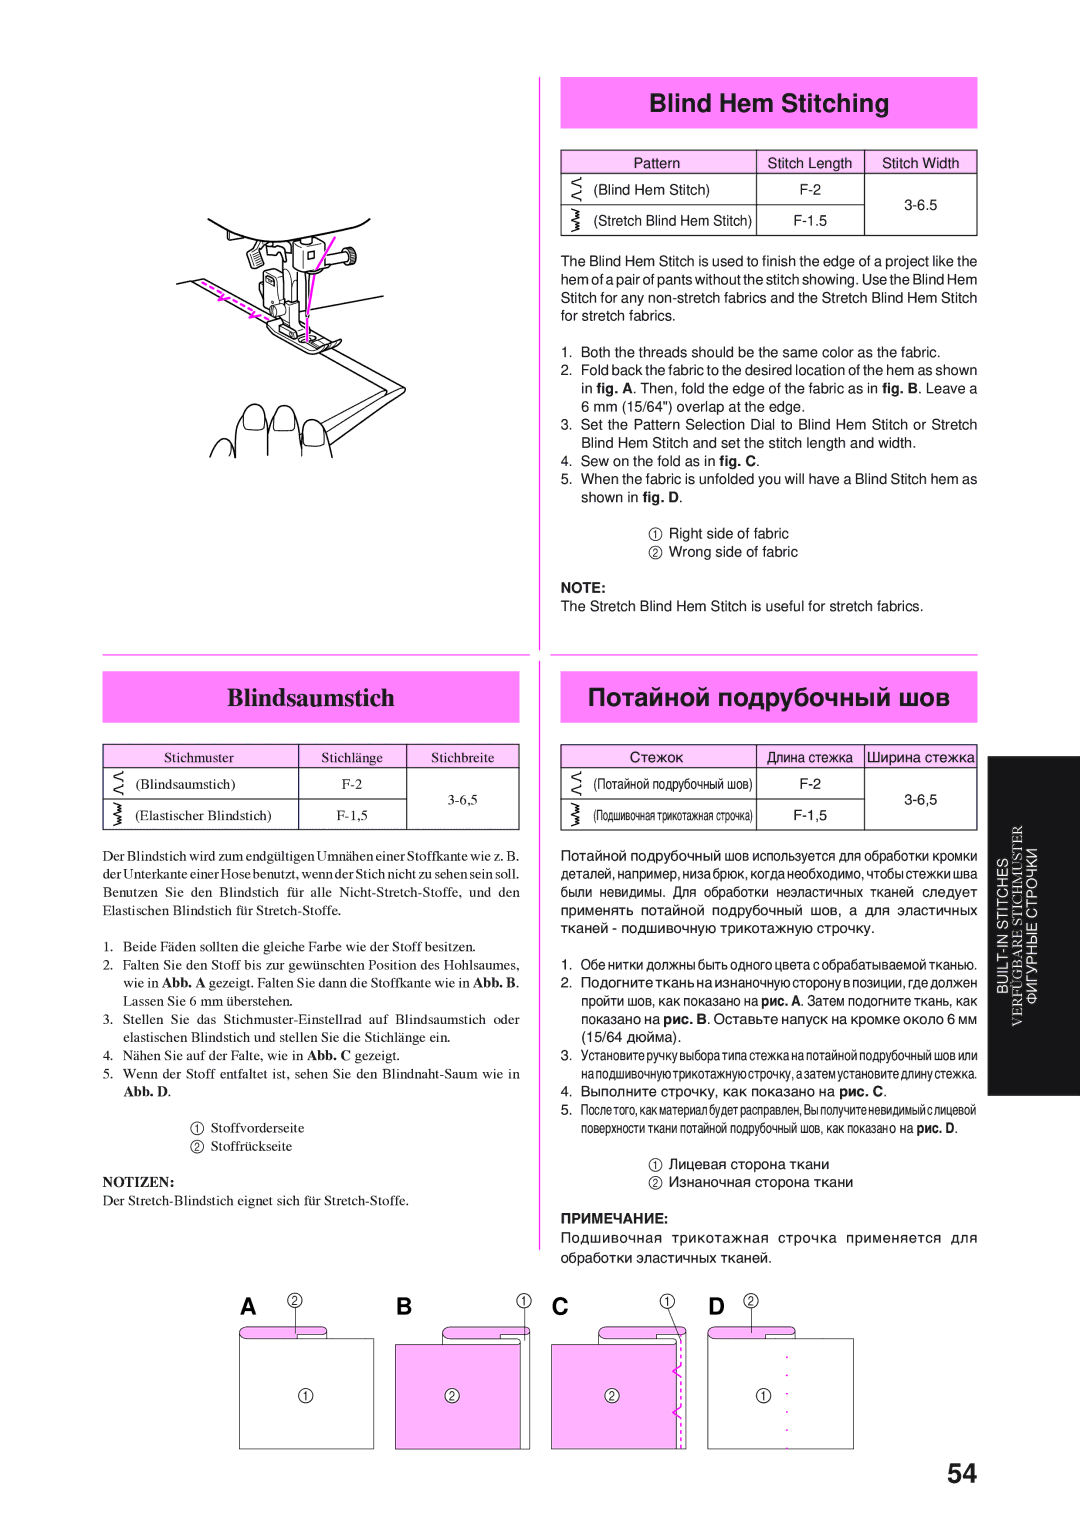
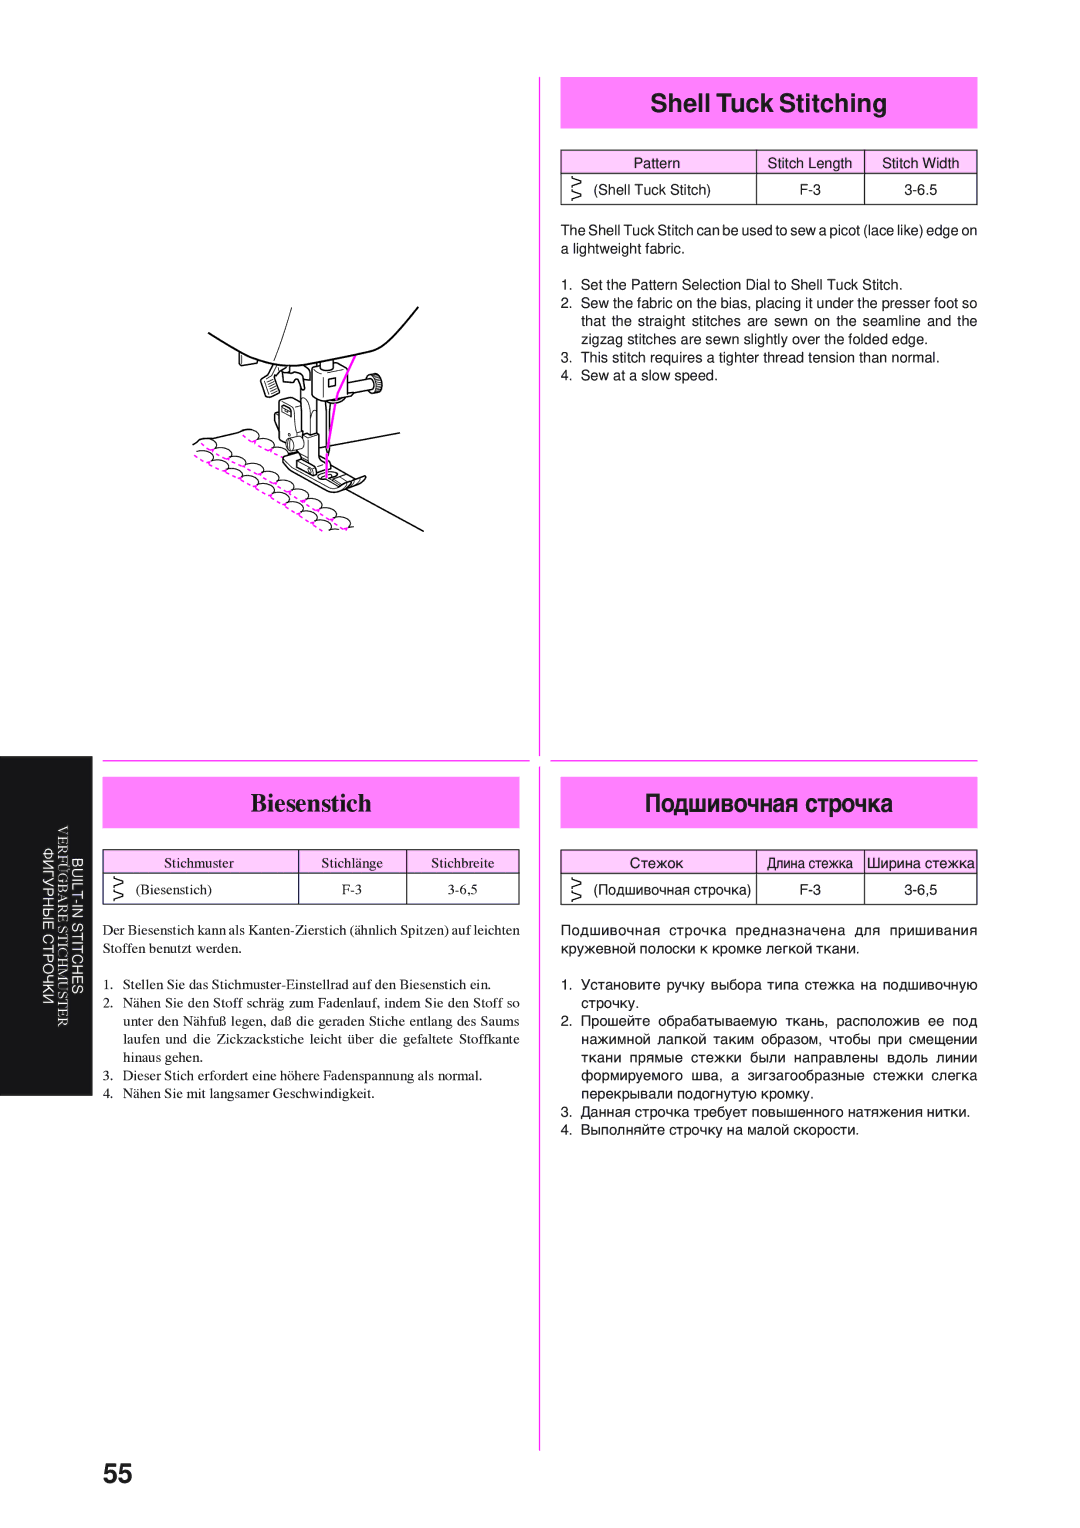
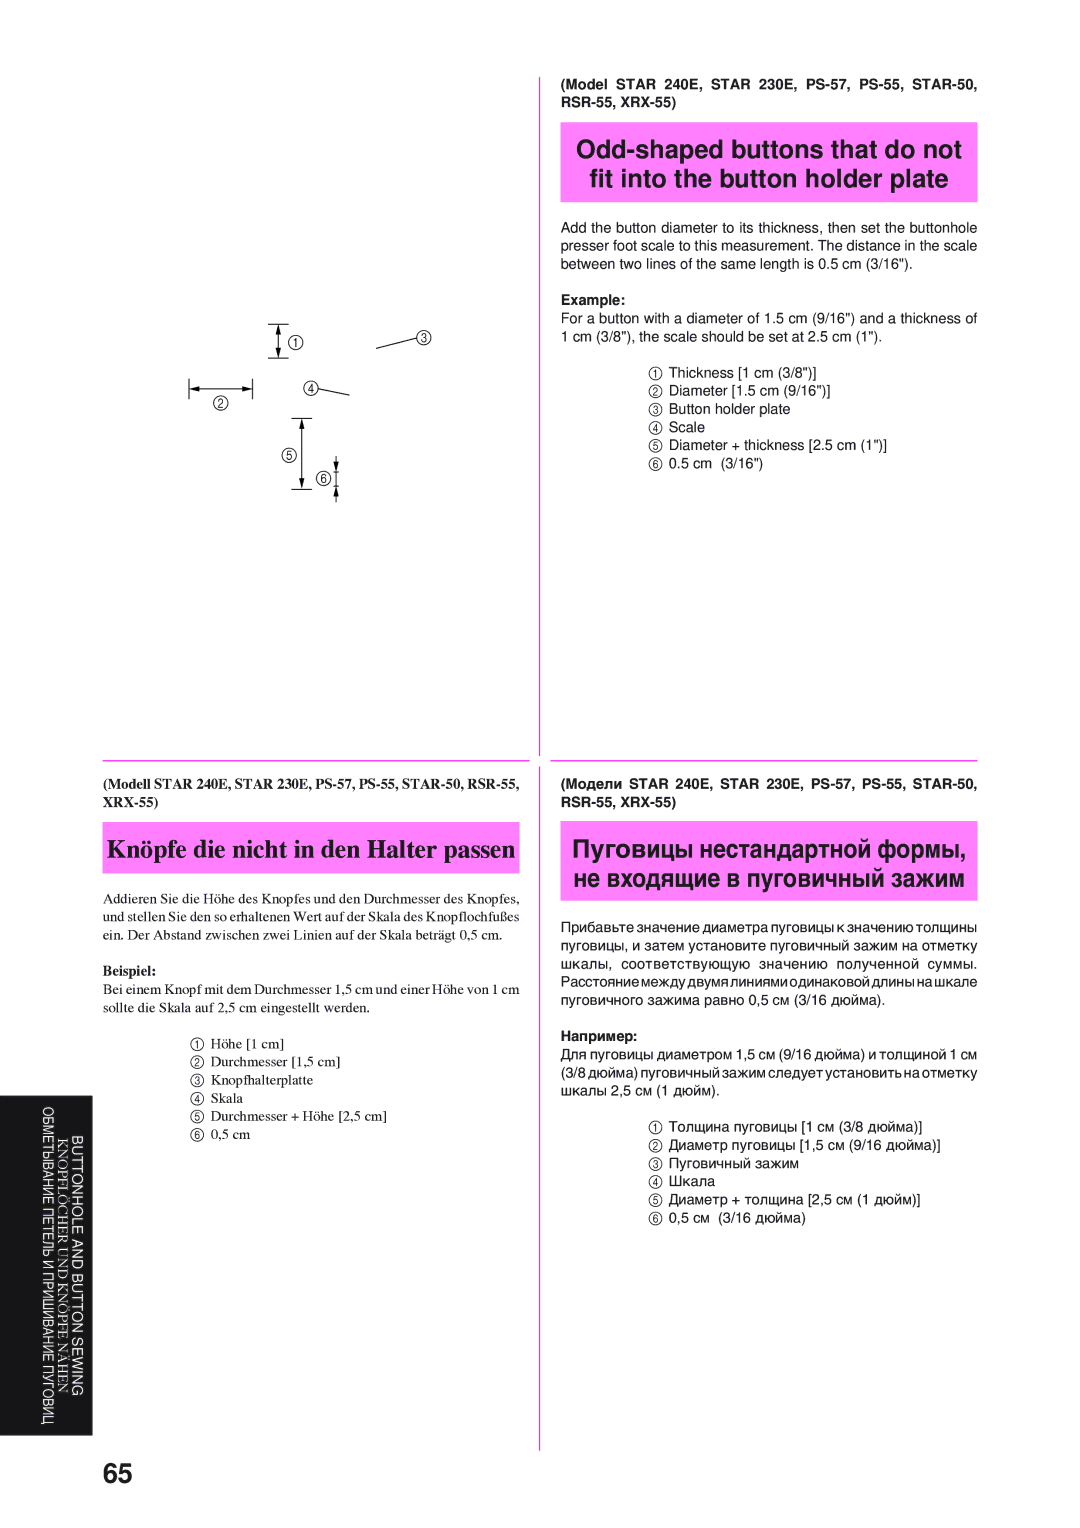
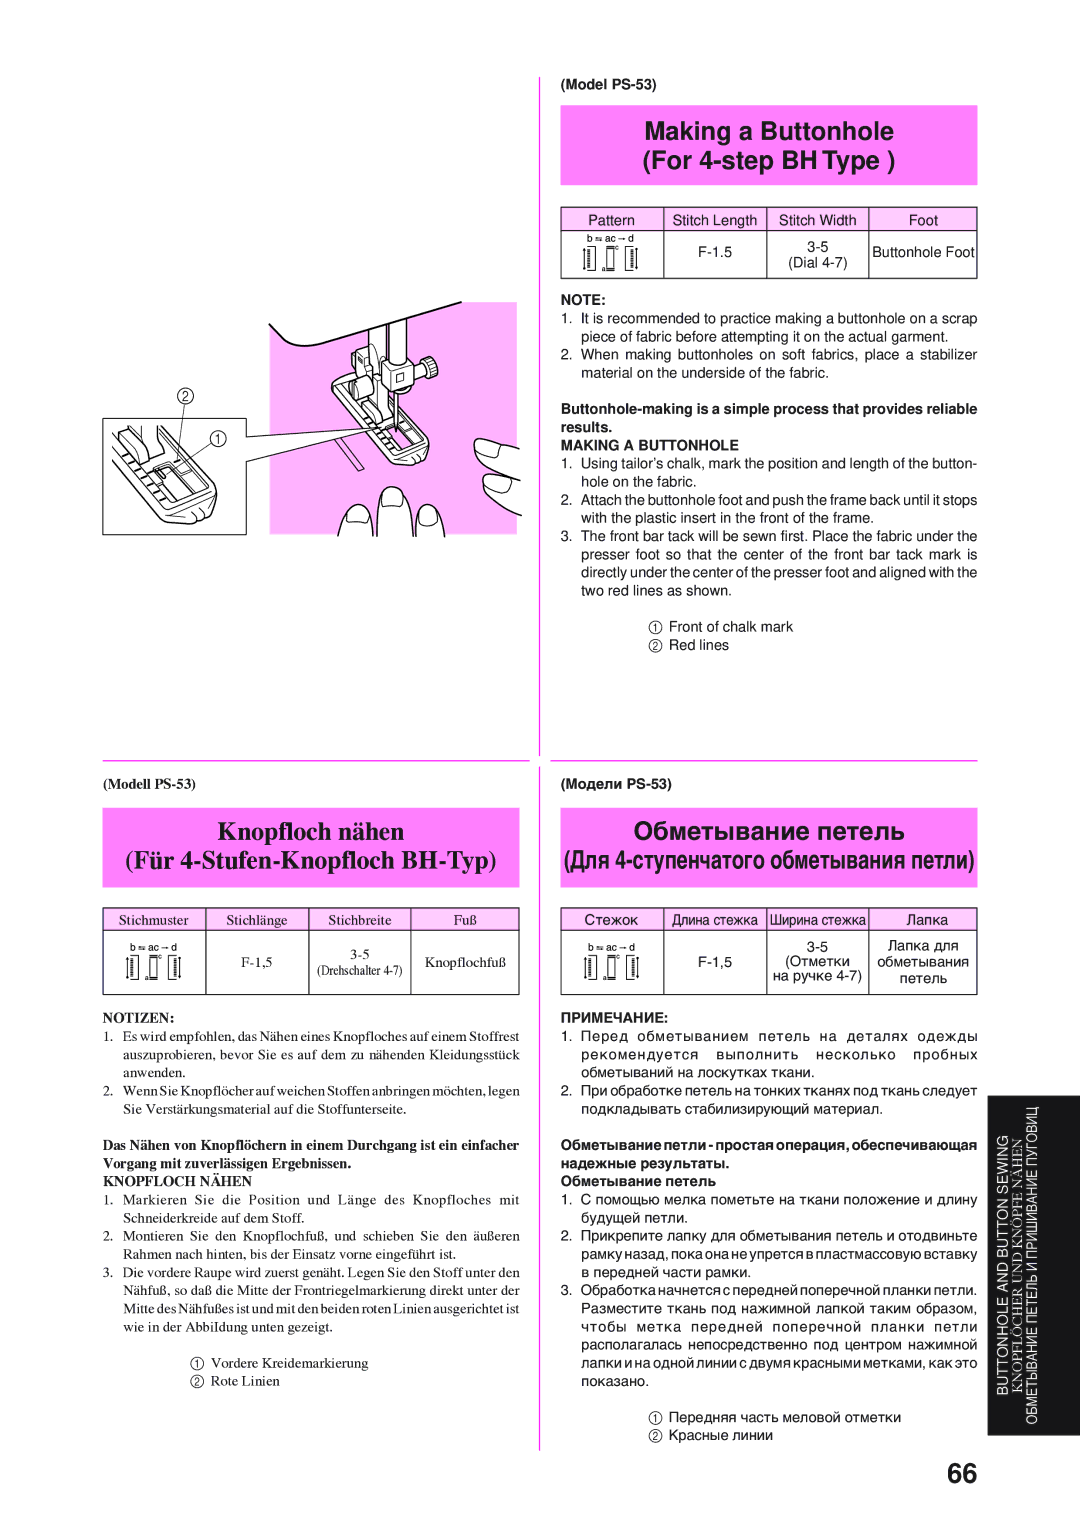
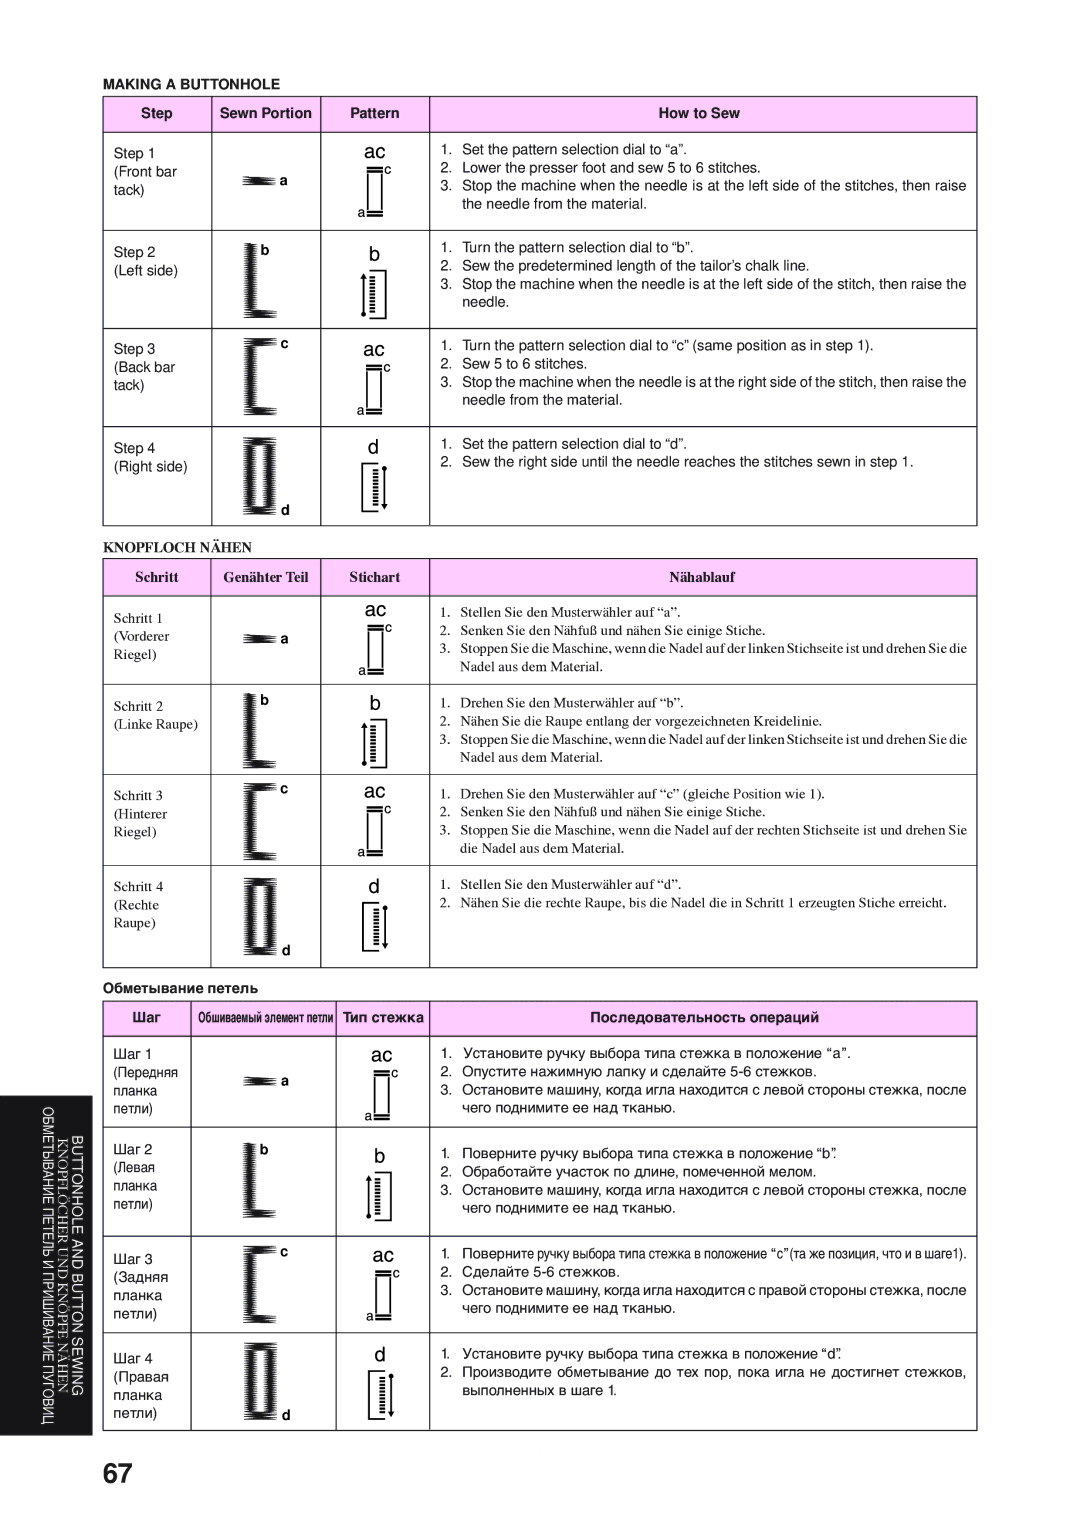
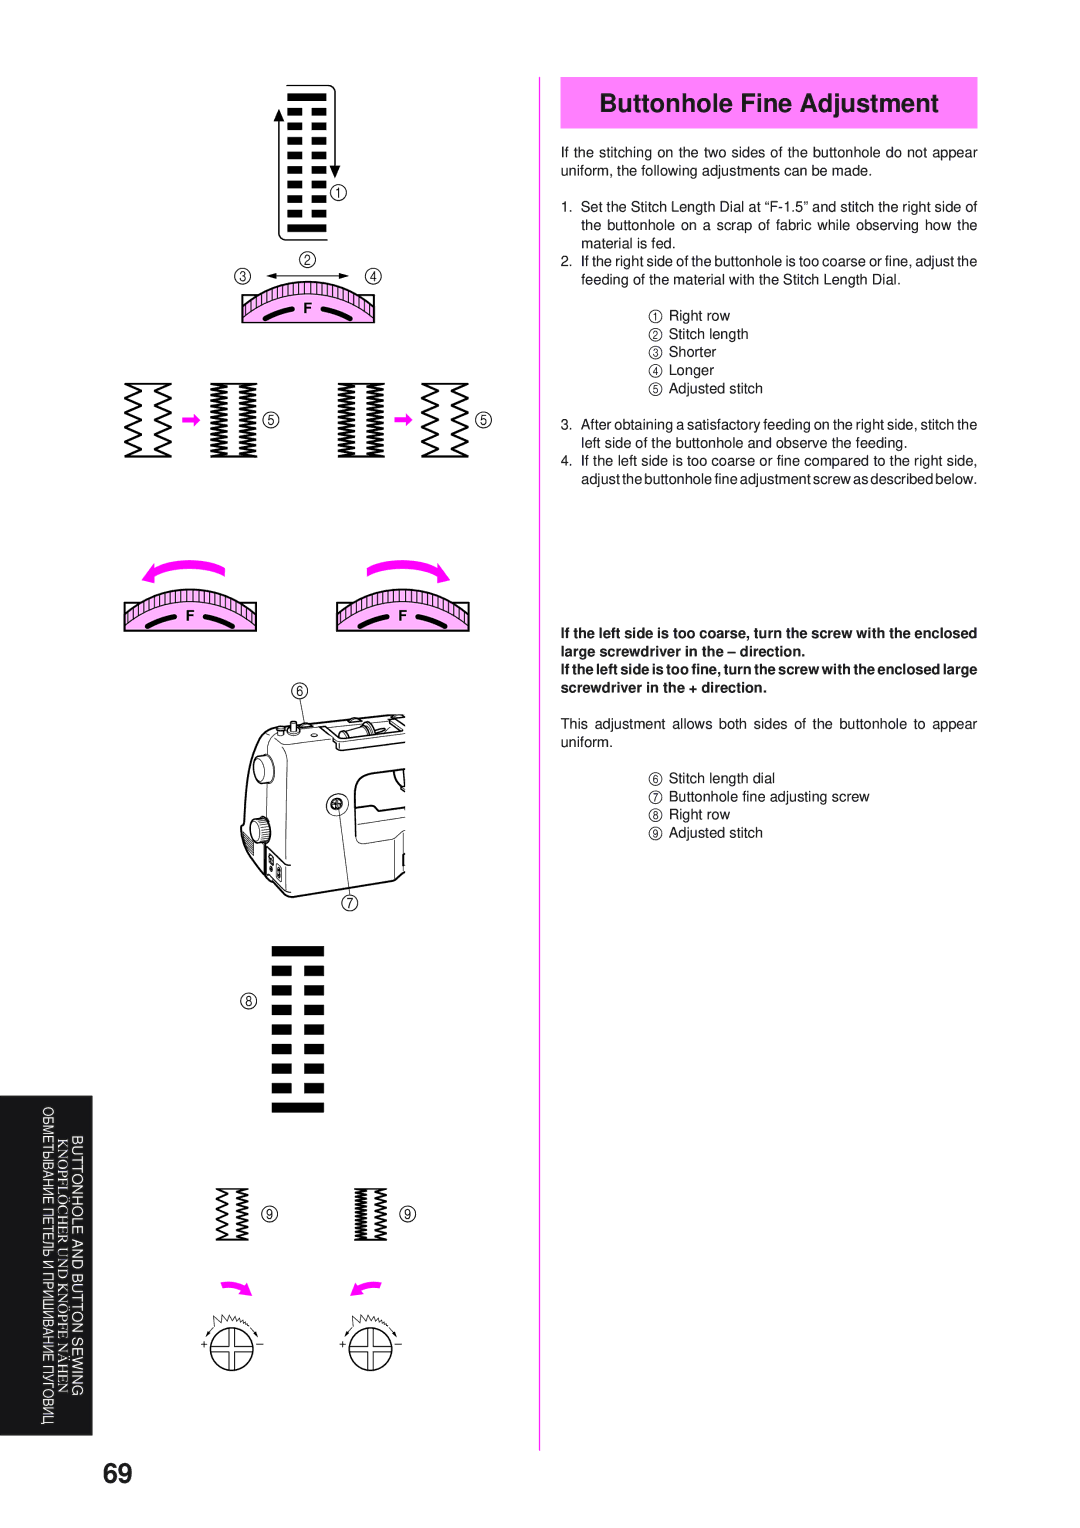
Brother XRX-55, STAR-230E, STAR-240E, STAR-50 Elastikstich, Elastic Stitching, Эластичная строчка

Page 68

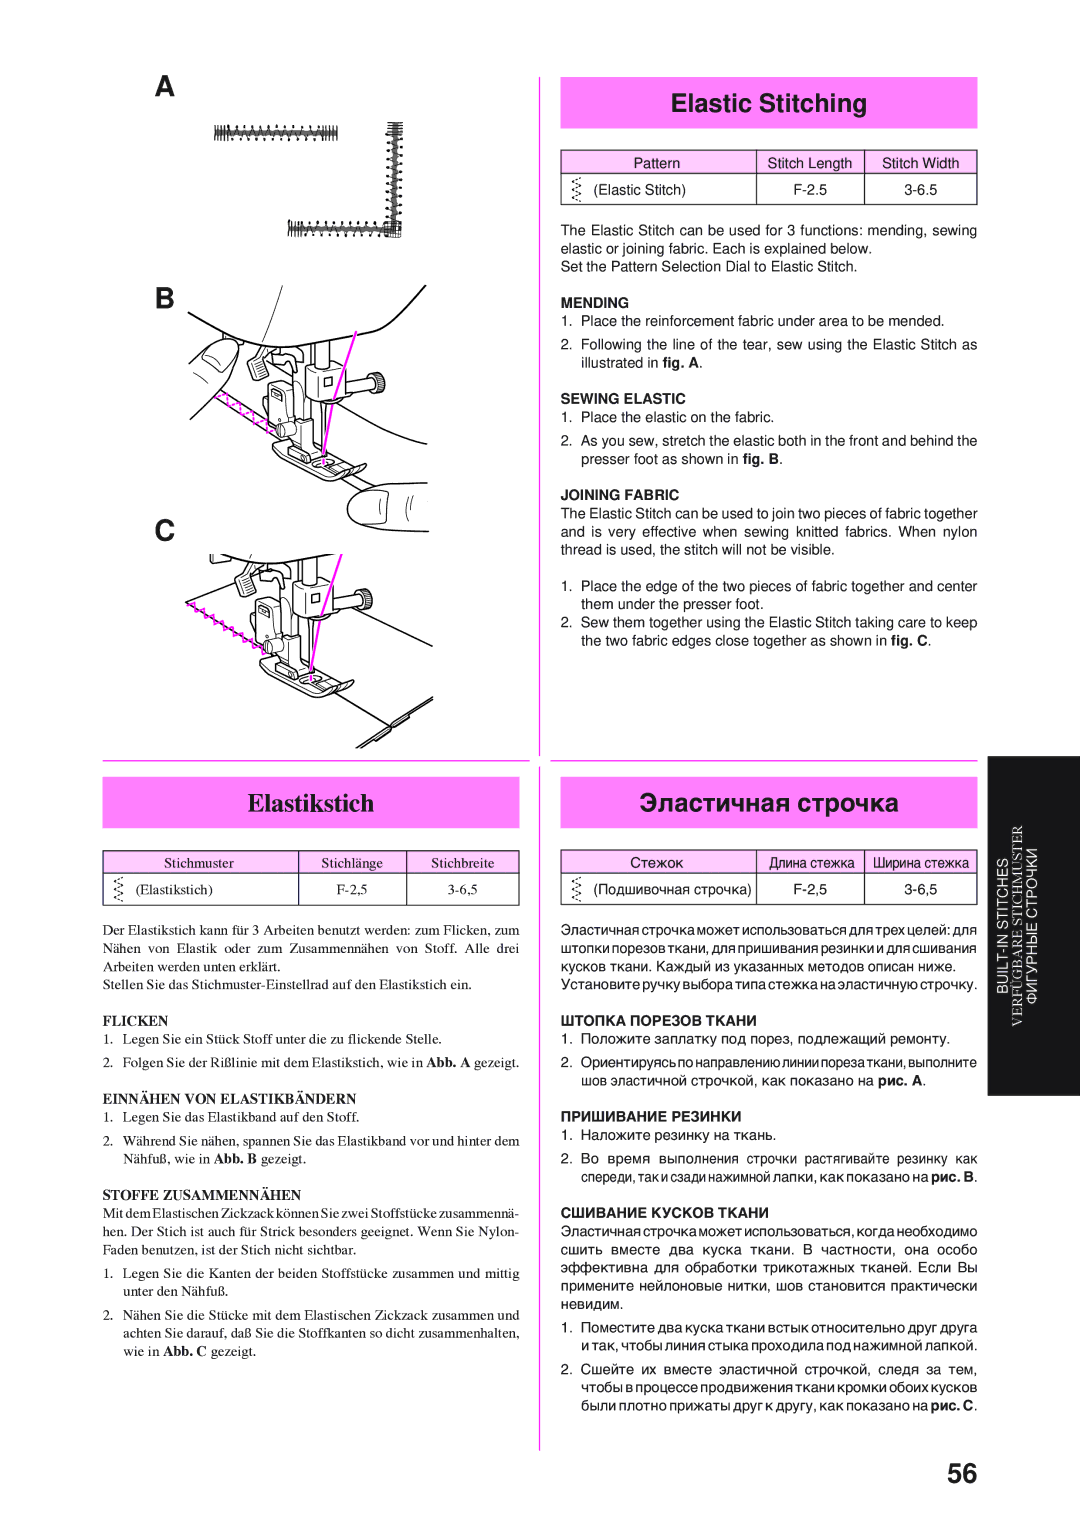
A

B

C

Elastikstich

Stichmuster

Stichlänge

Stichbreite

(Elastikstich)

F-2,5

3-6,5


Der Elastikstich kann für 3 Arbeiten benutzt werden: zum Flicken, zum Nähen von Elastik oder zum Zusammennähen von Stoff. Alle drei Arbeiten werden unten erklärt.

Stellen Sie das Stichmuster-Einstellrad auf den Elastikstich ein.

FLICKEN

1.Legen Sie ein Stück Stoff unter die zu flickende Stelle.

2.Folgen Sie der Rißlinie mit dem Elastikstich, wie in Abb. A gezeigt.

EINNÄHEN VON ELASTIKBÄNDERN

1.Legen Sie das Elastikband auf den Stoff.

2.Während Sie nähen, spannen Sie das Elastikband vor und hinter dem Nähfuß, wie in Abb. B gezeigt.

STOFFE ZUSAMMENNÄHEN

Mit dem Elastischen Zickzack können Sie zwei Stoffstücke zusammennä- hen. Der Stich ist auch für Strick besonders geeignet. Wenn Sie Nylon- Faden benutzen, ist der Stich nicht sichtbar.

1.Legen Sie die Kanten der beiden Stoffstücke zusammen und mittig unter den Nähfuß.

2.Nähen Sie die Stücke mit dem Elastischen Zickzack zusammen und achten Sie darauf, daß Sie die Stoffkanten so dicht zusammenhalten, wie in Abb. C gezeigt.

Elastic Stitching

Pattern

Stitch Length

Stitch Width

(Elastic Stitch)

F-2.5

3-6.5


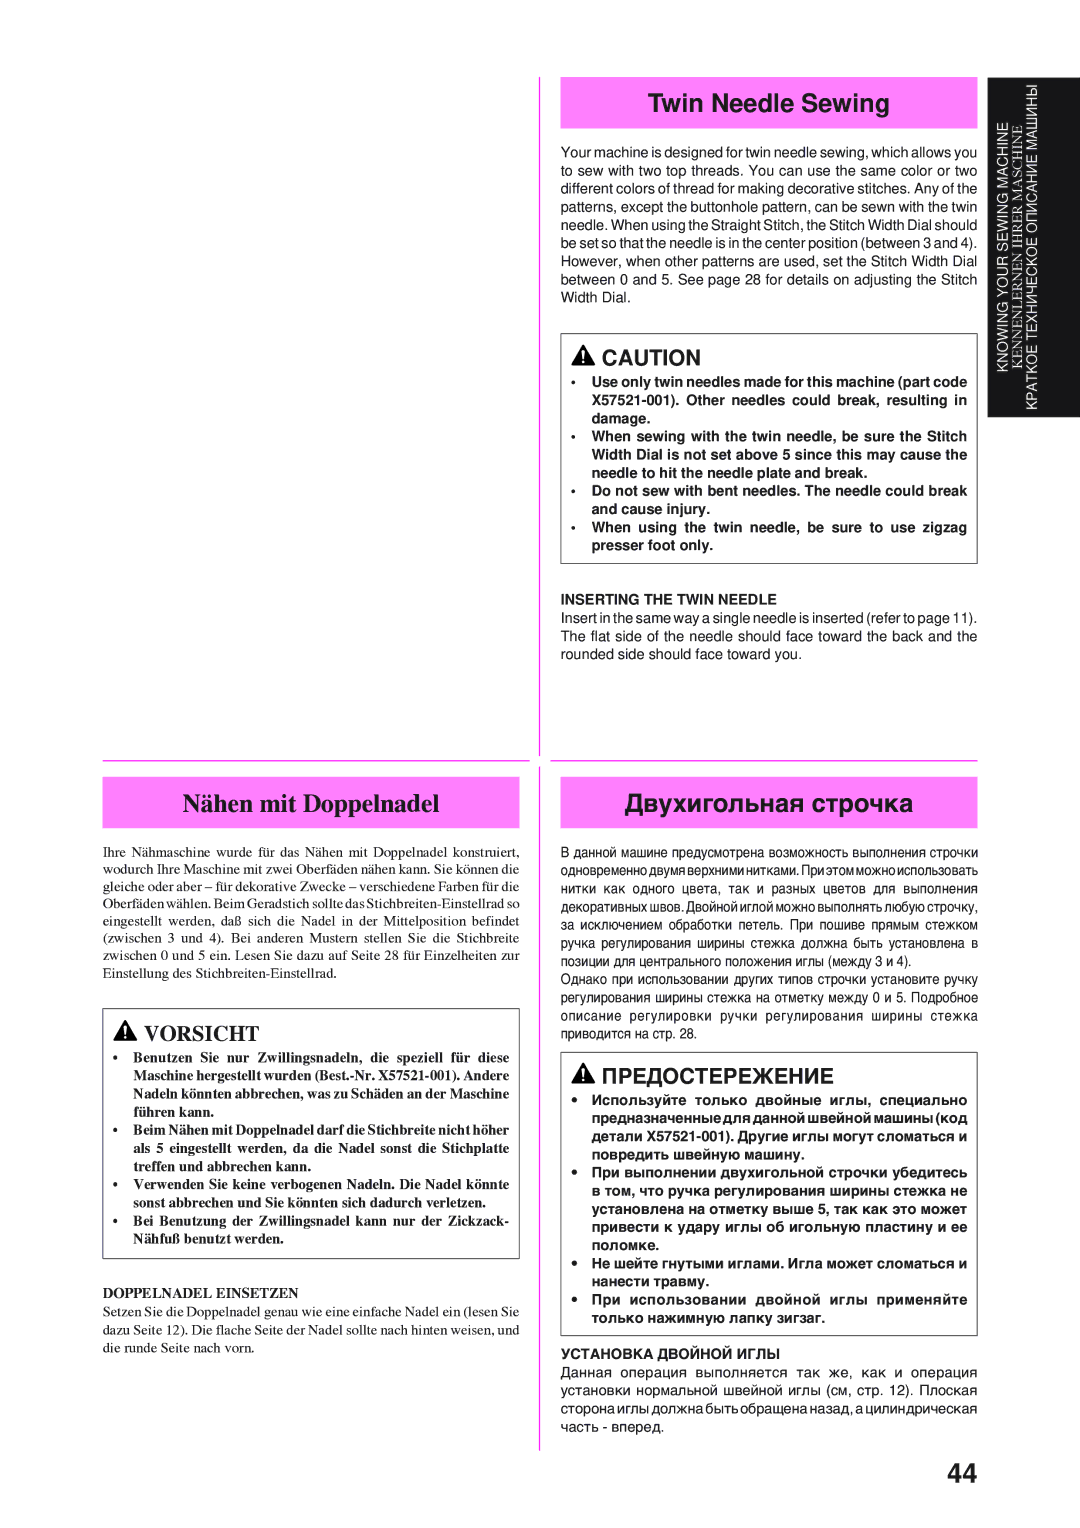
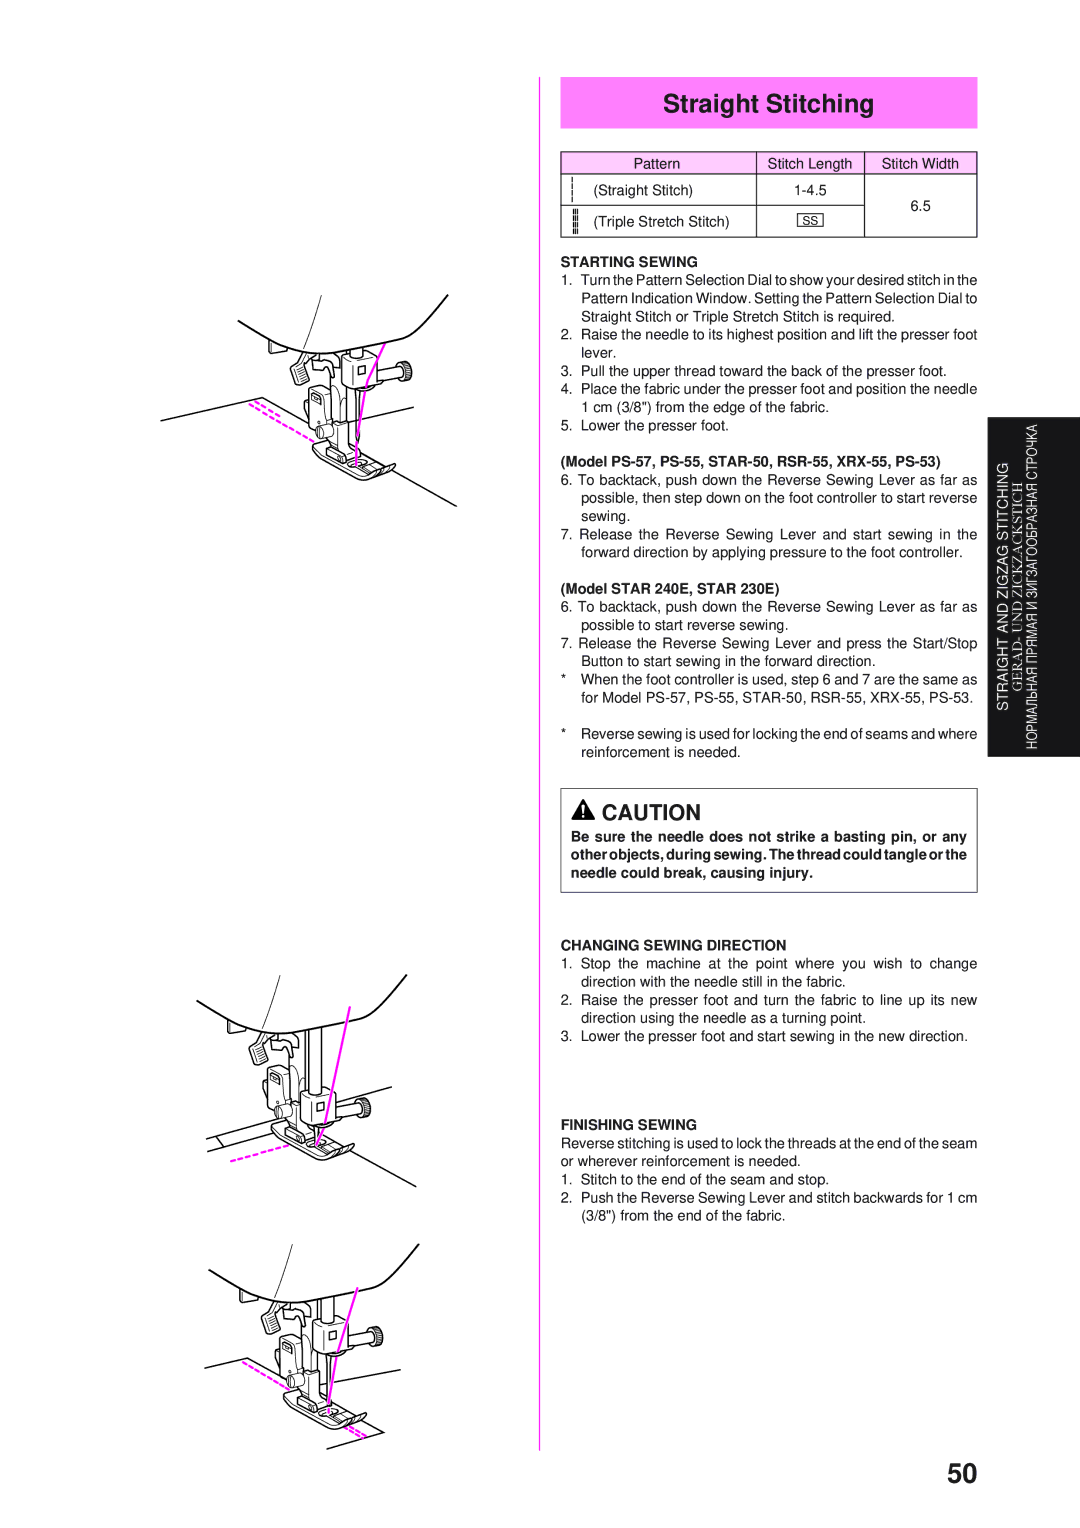
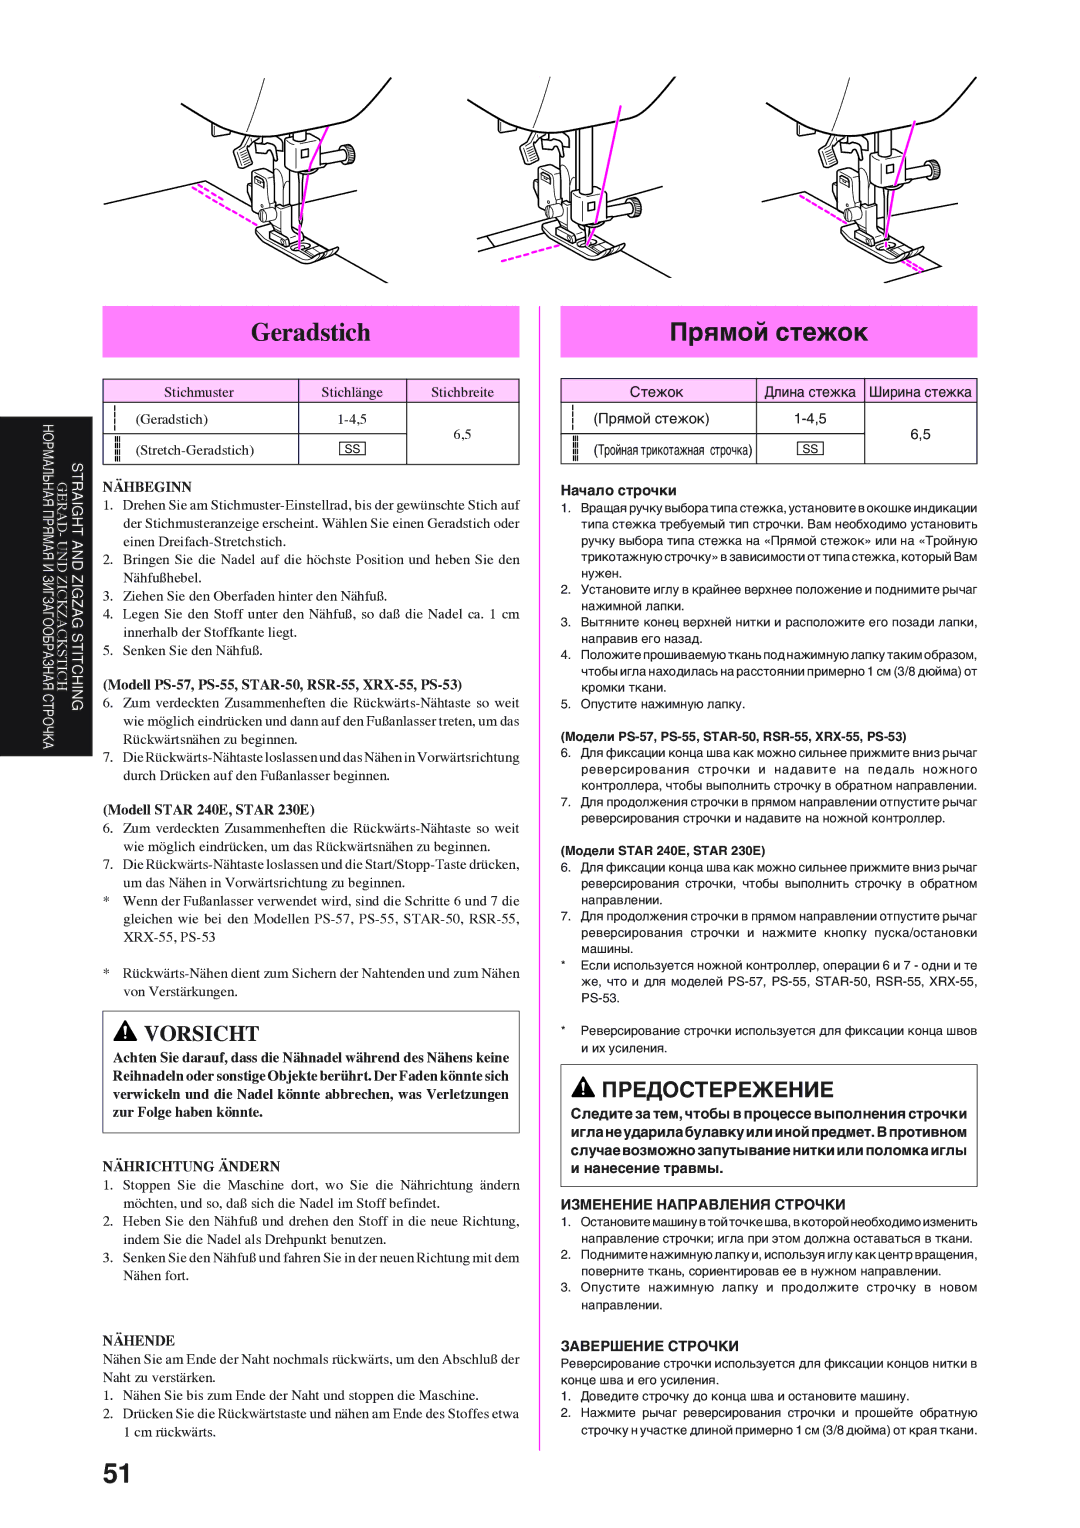
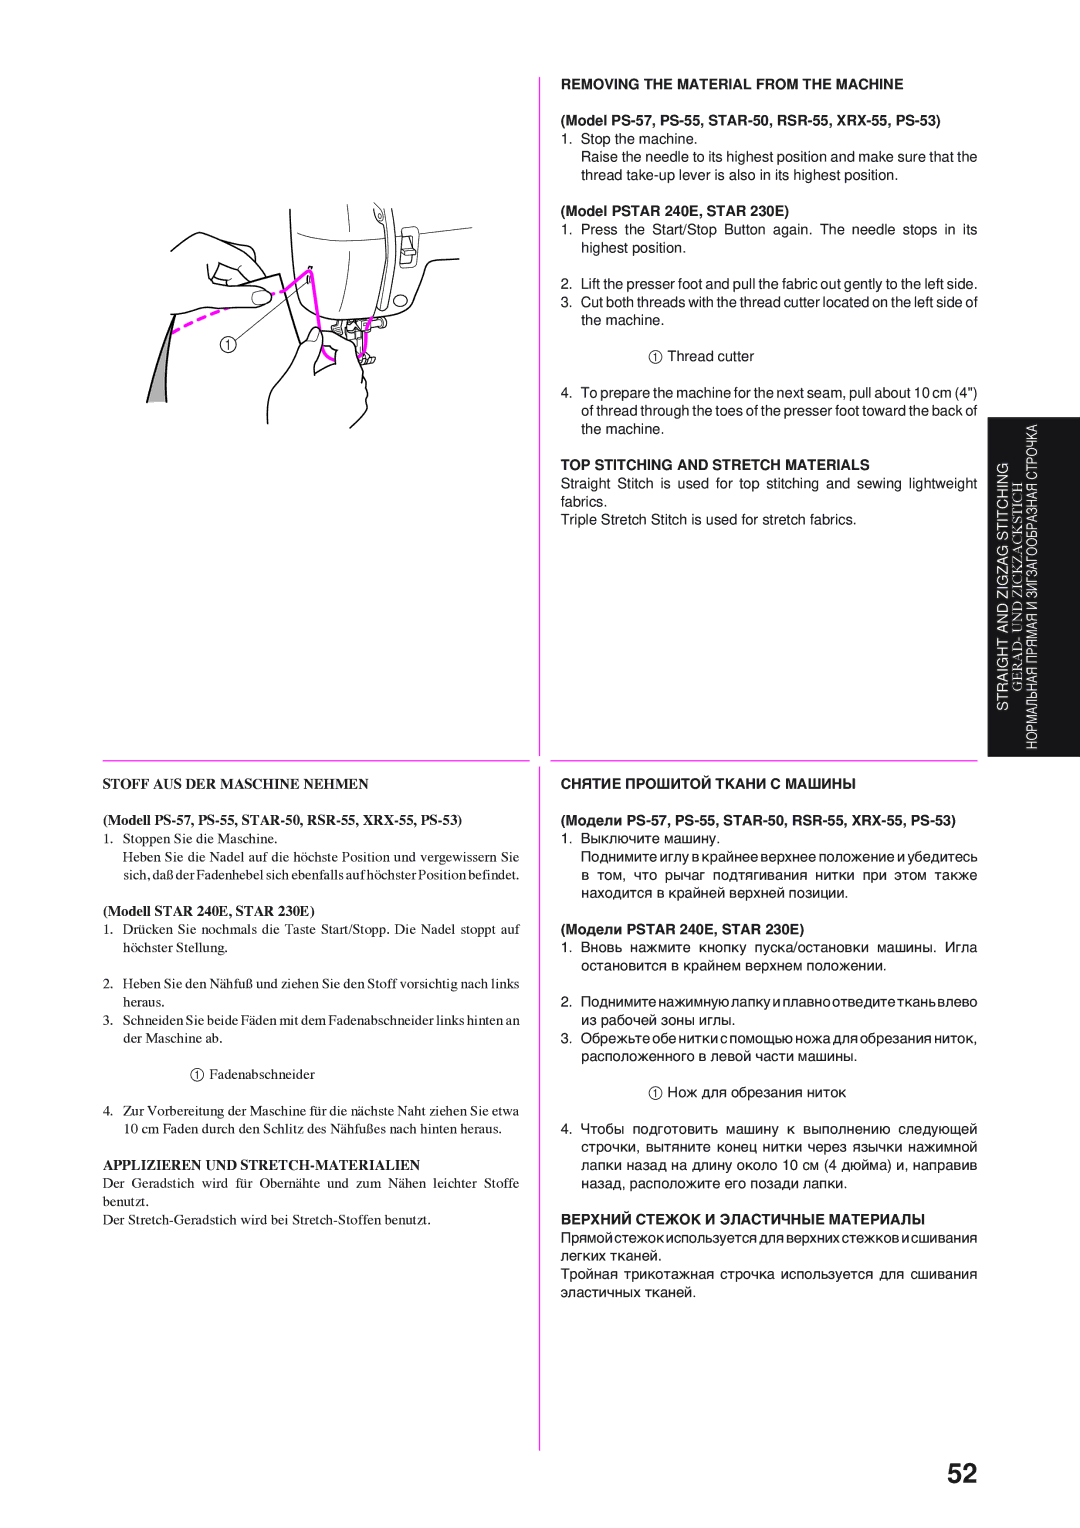
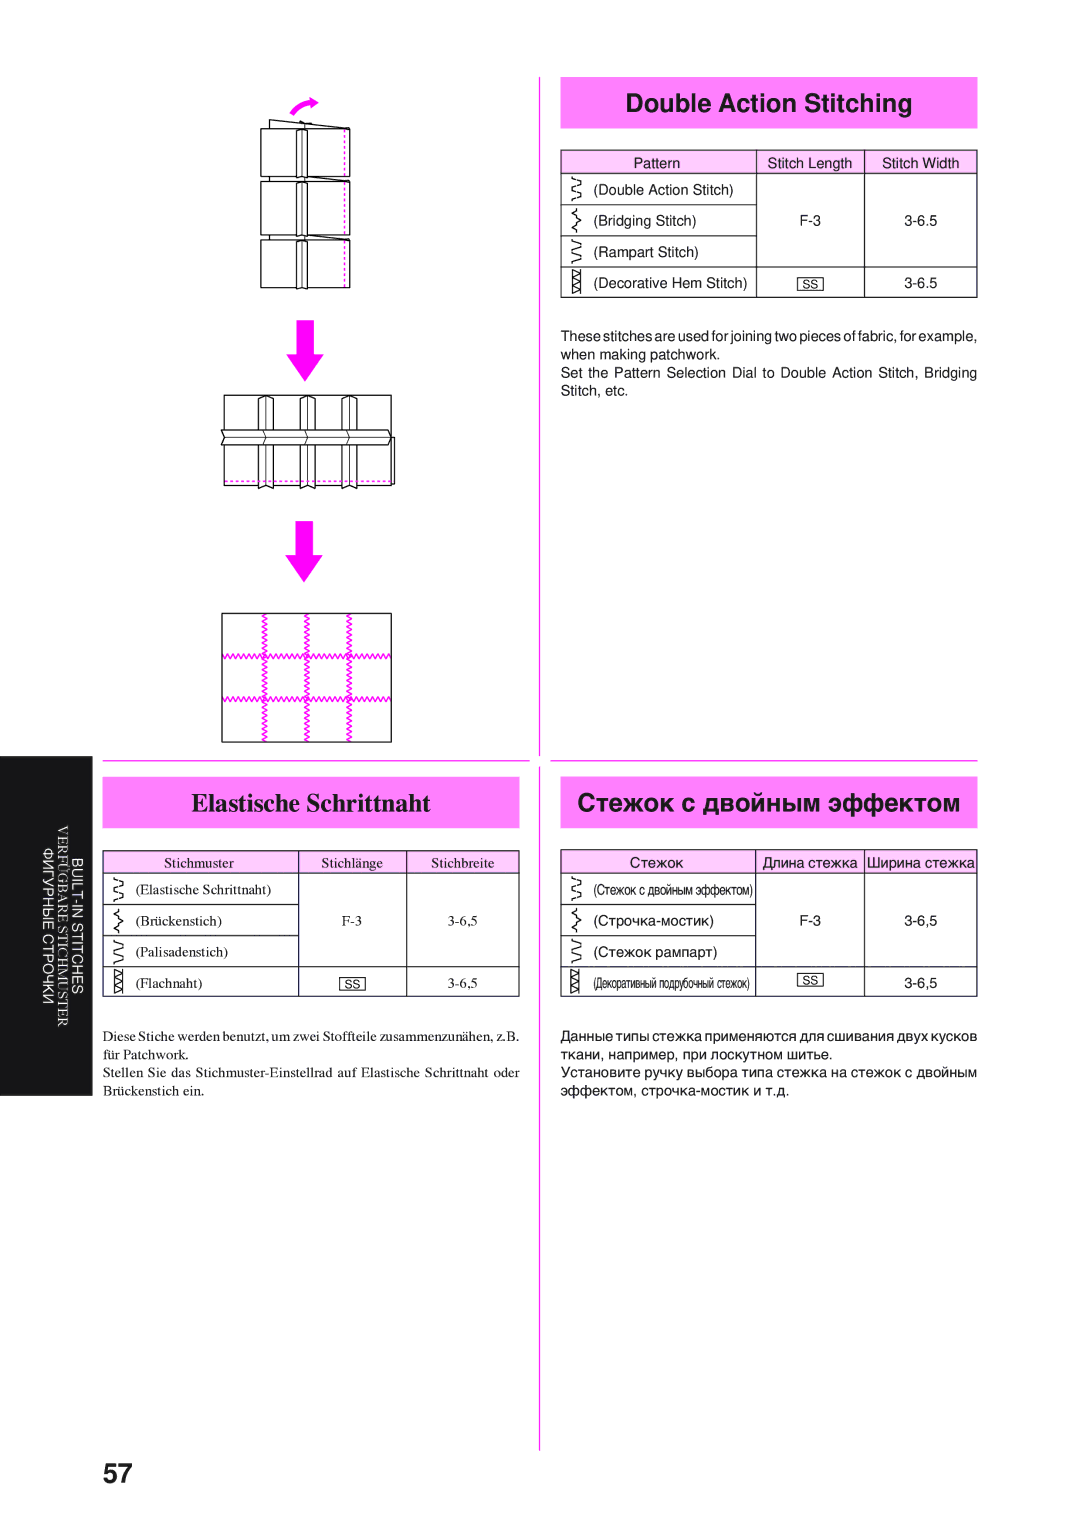
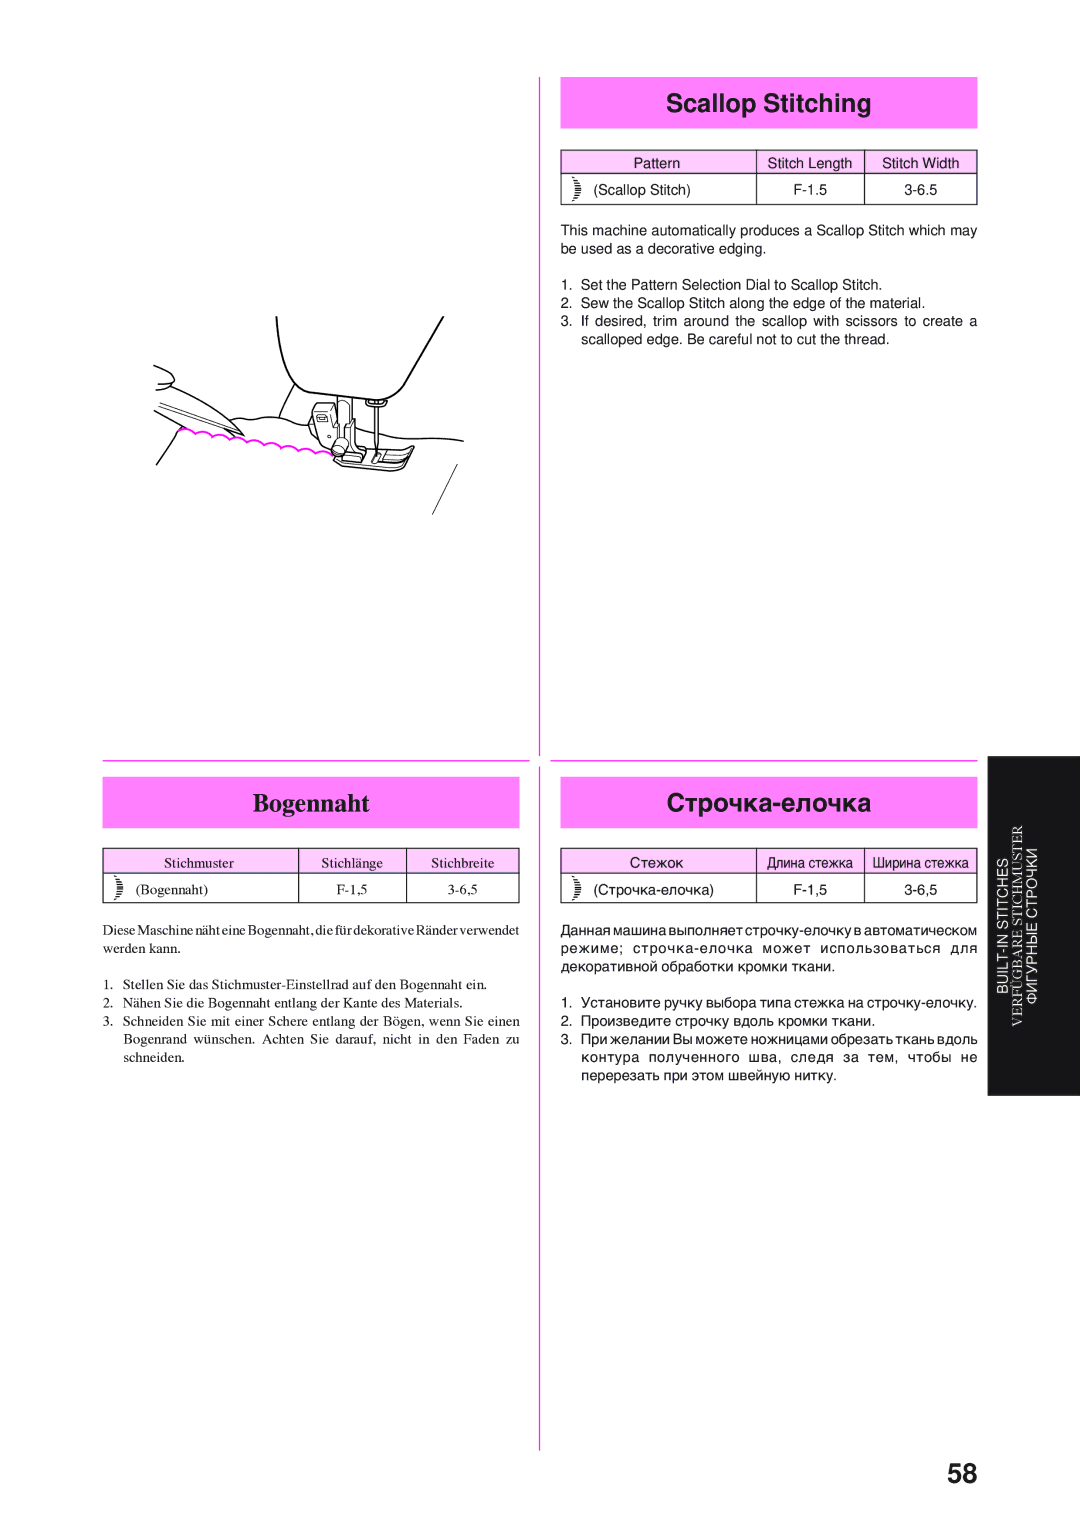
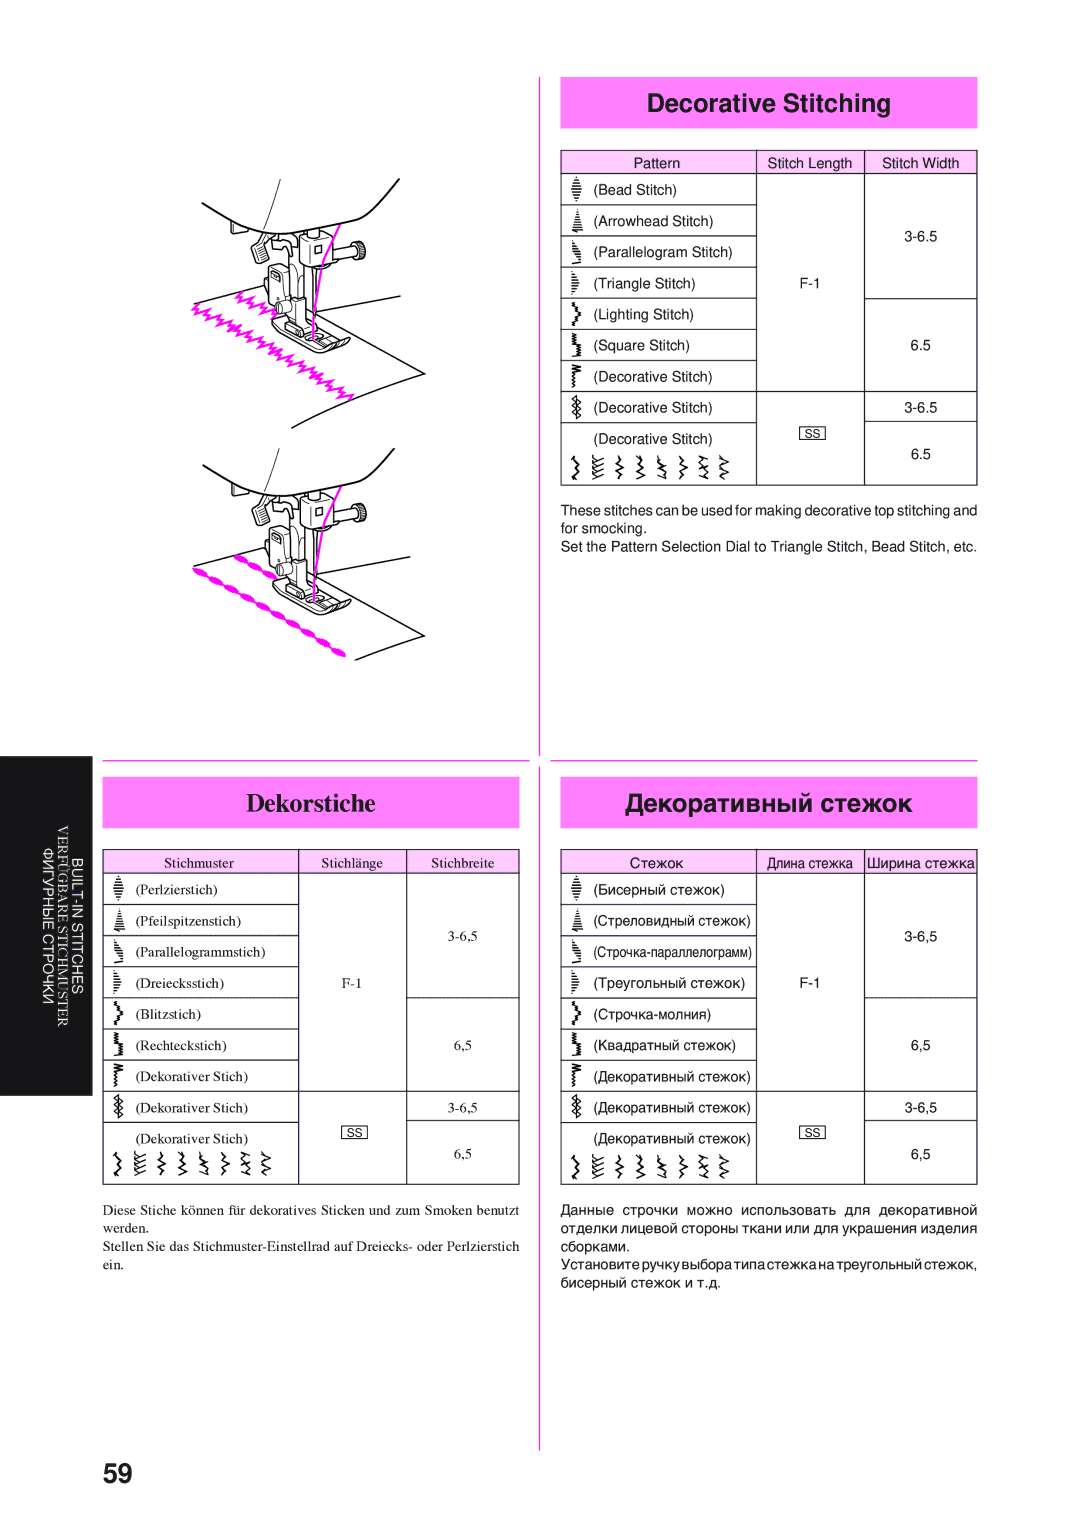
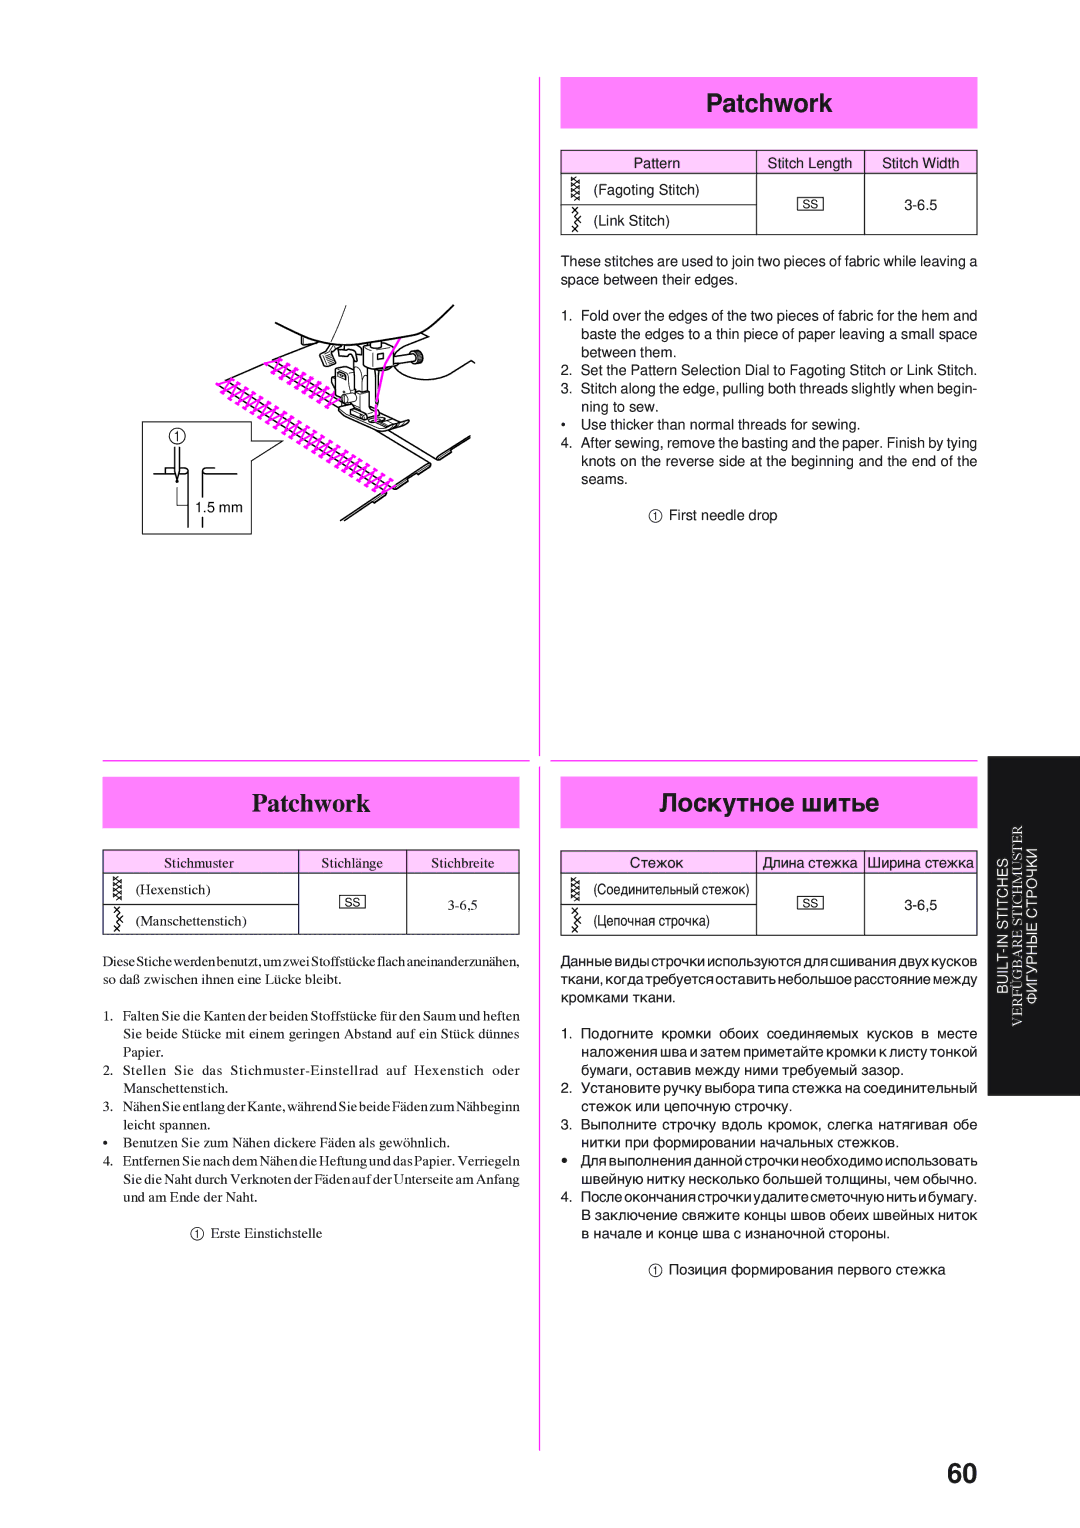
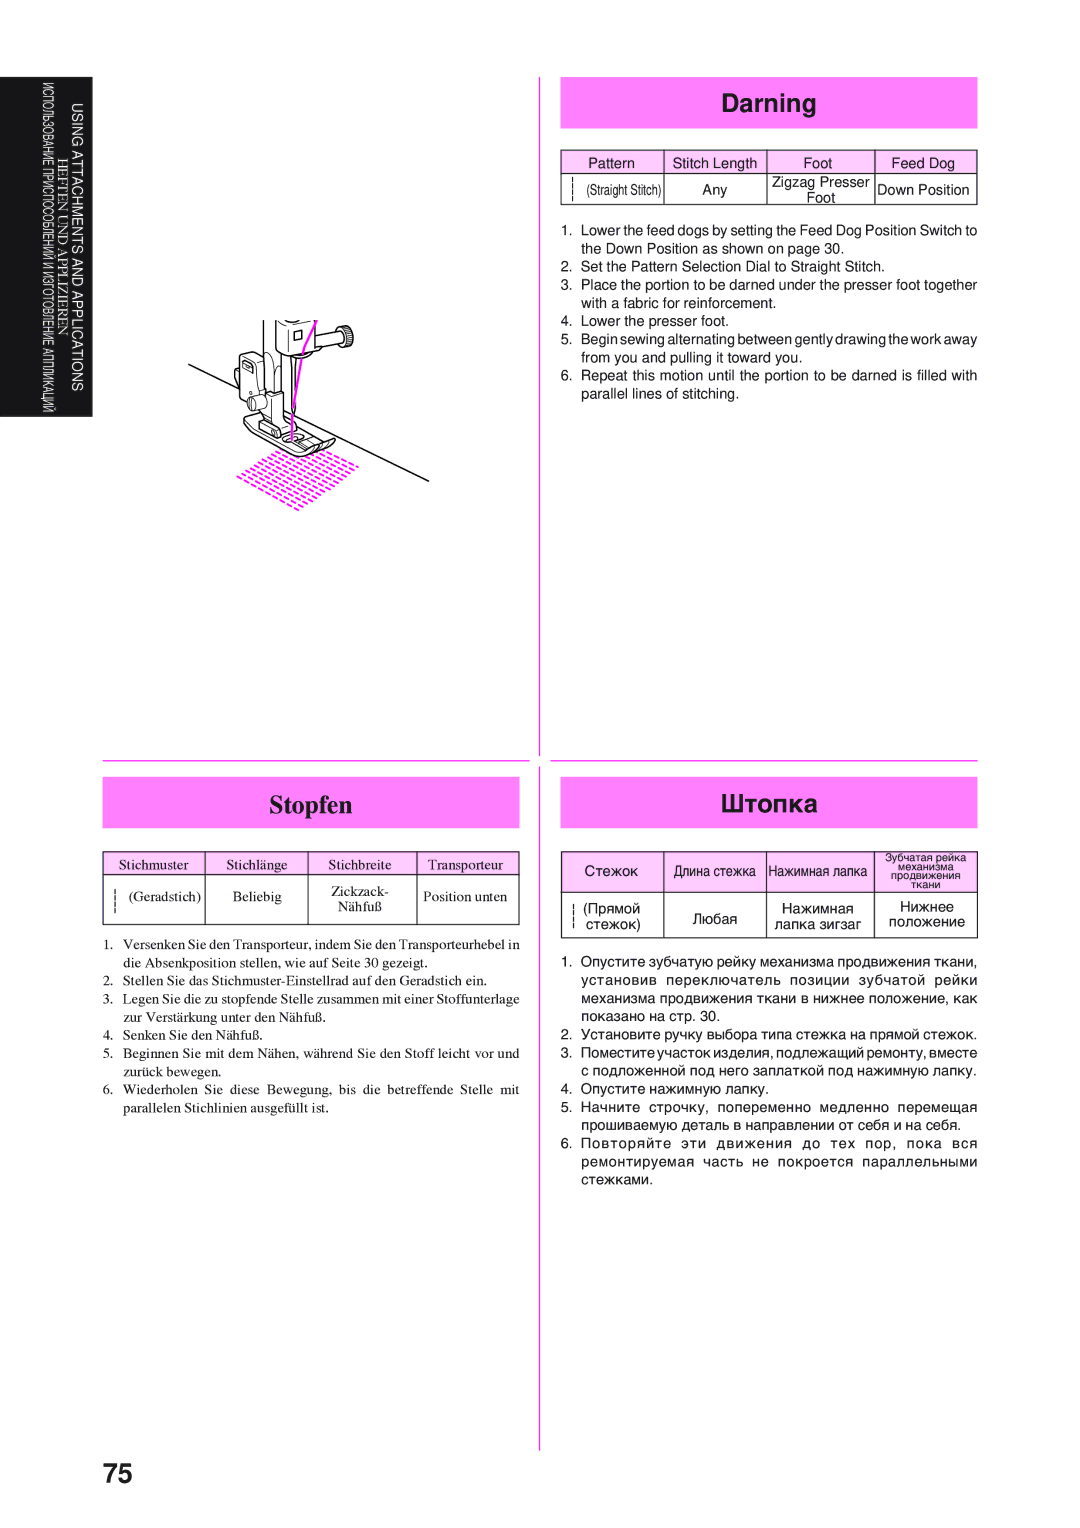
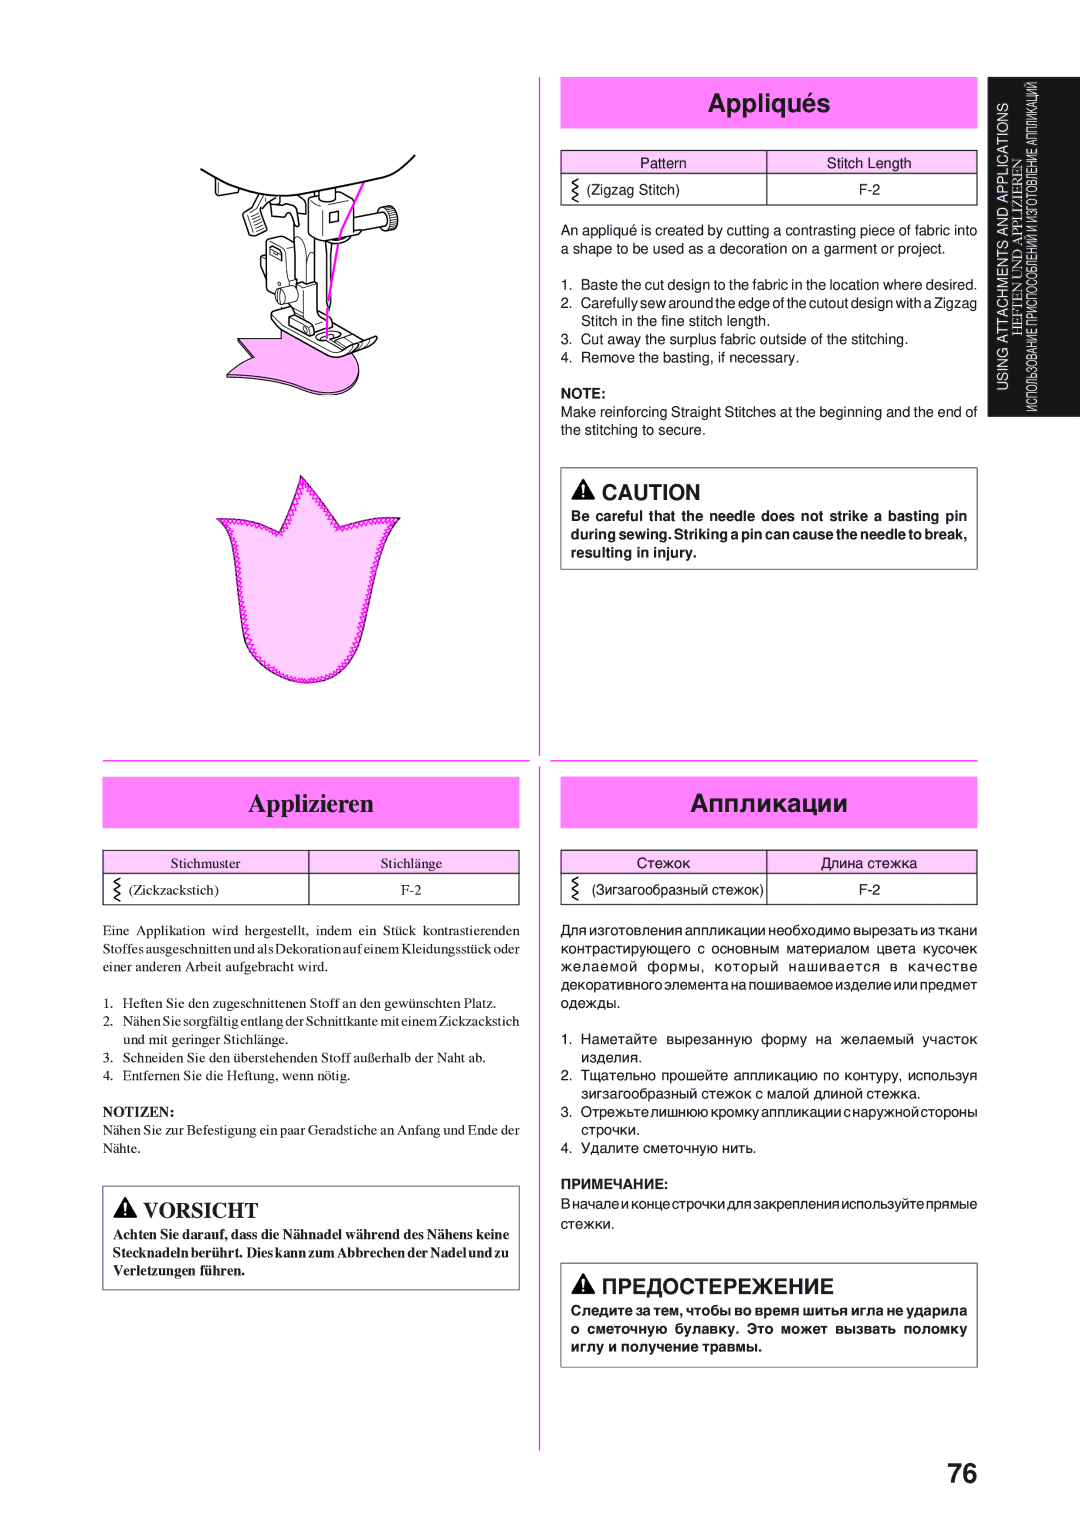
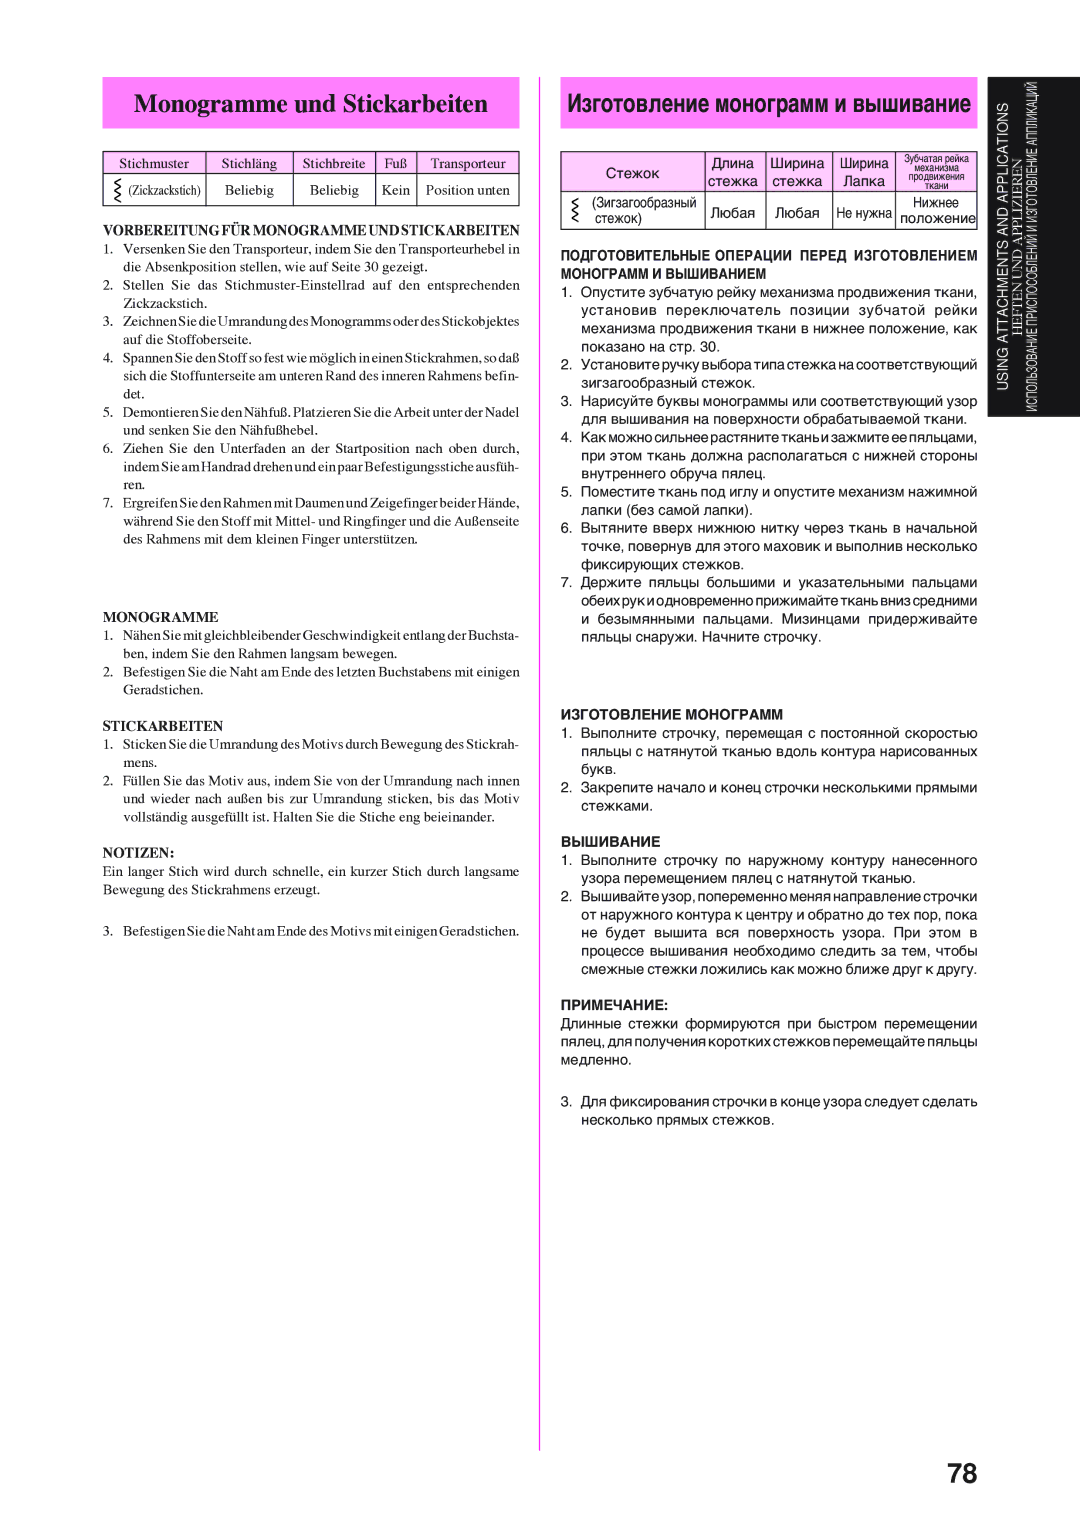
The Elastic Stitch can be used for 3 functions: mending, sewing elastic or joining fabric. Each is explained below.

Set the Pattern Selection Dial to Elastic Stitch.

MENDING

1.Place the reinforcement fabric under area to be mended.

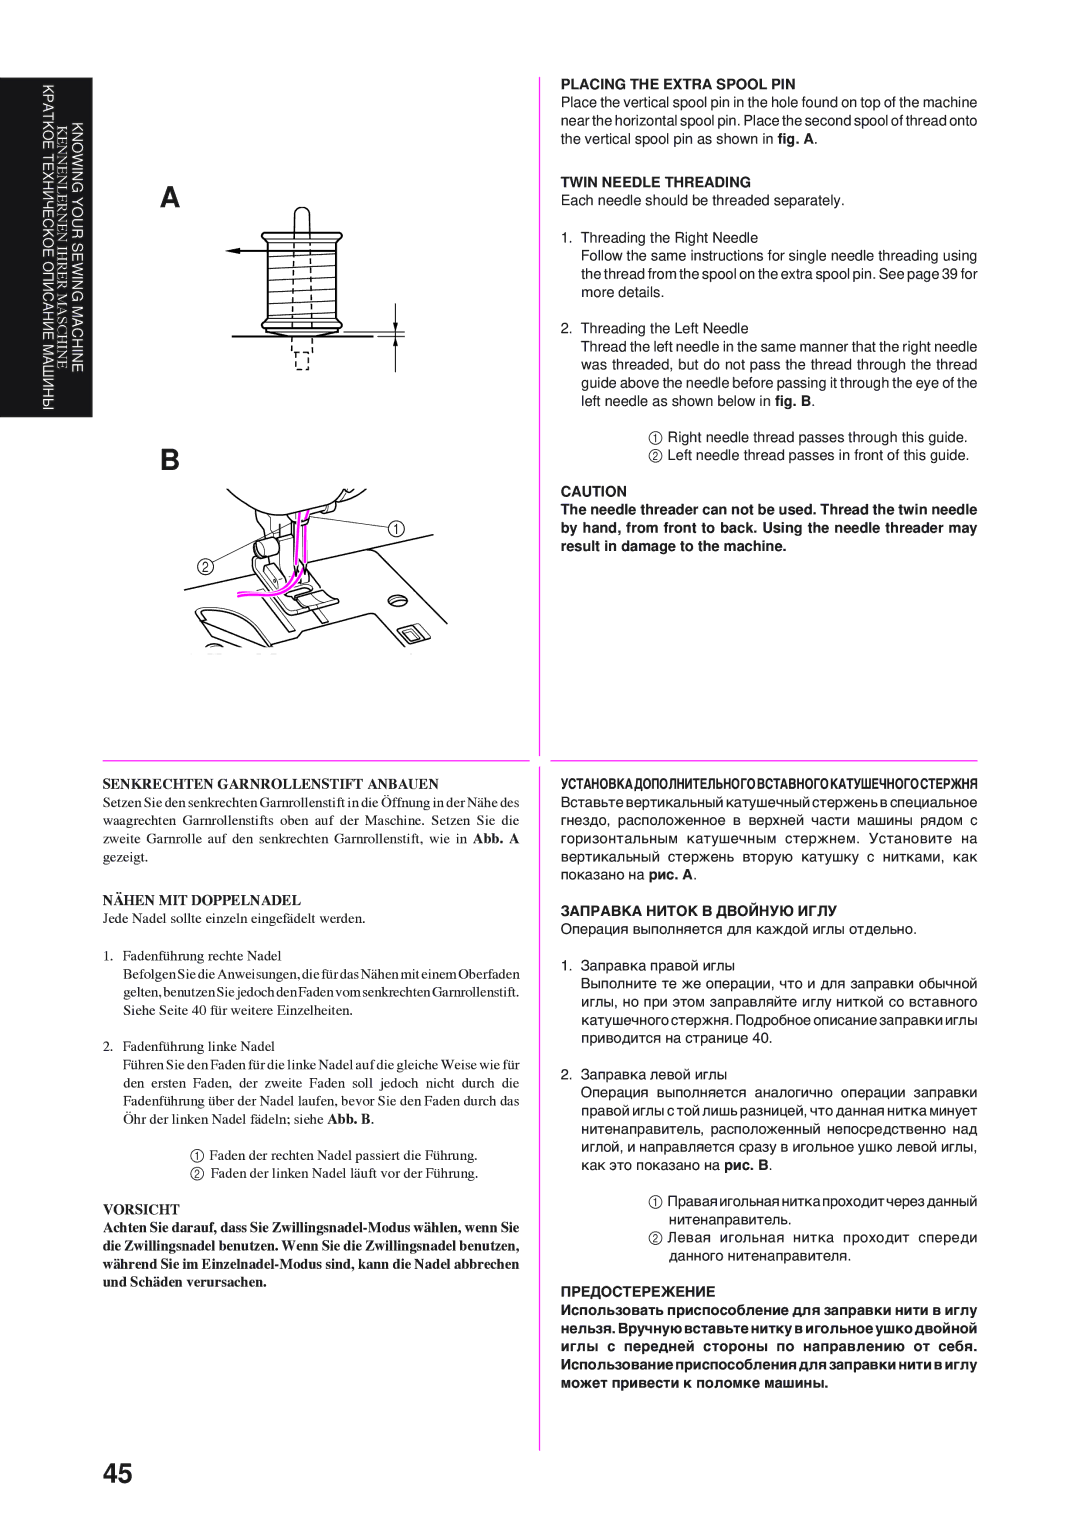
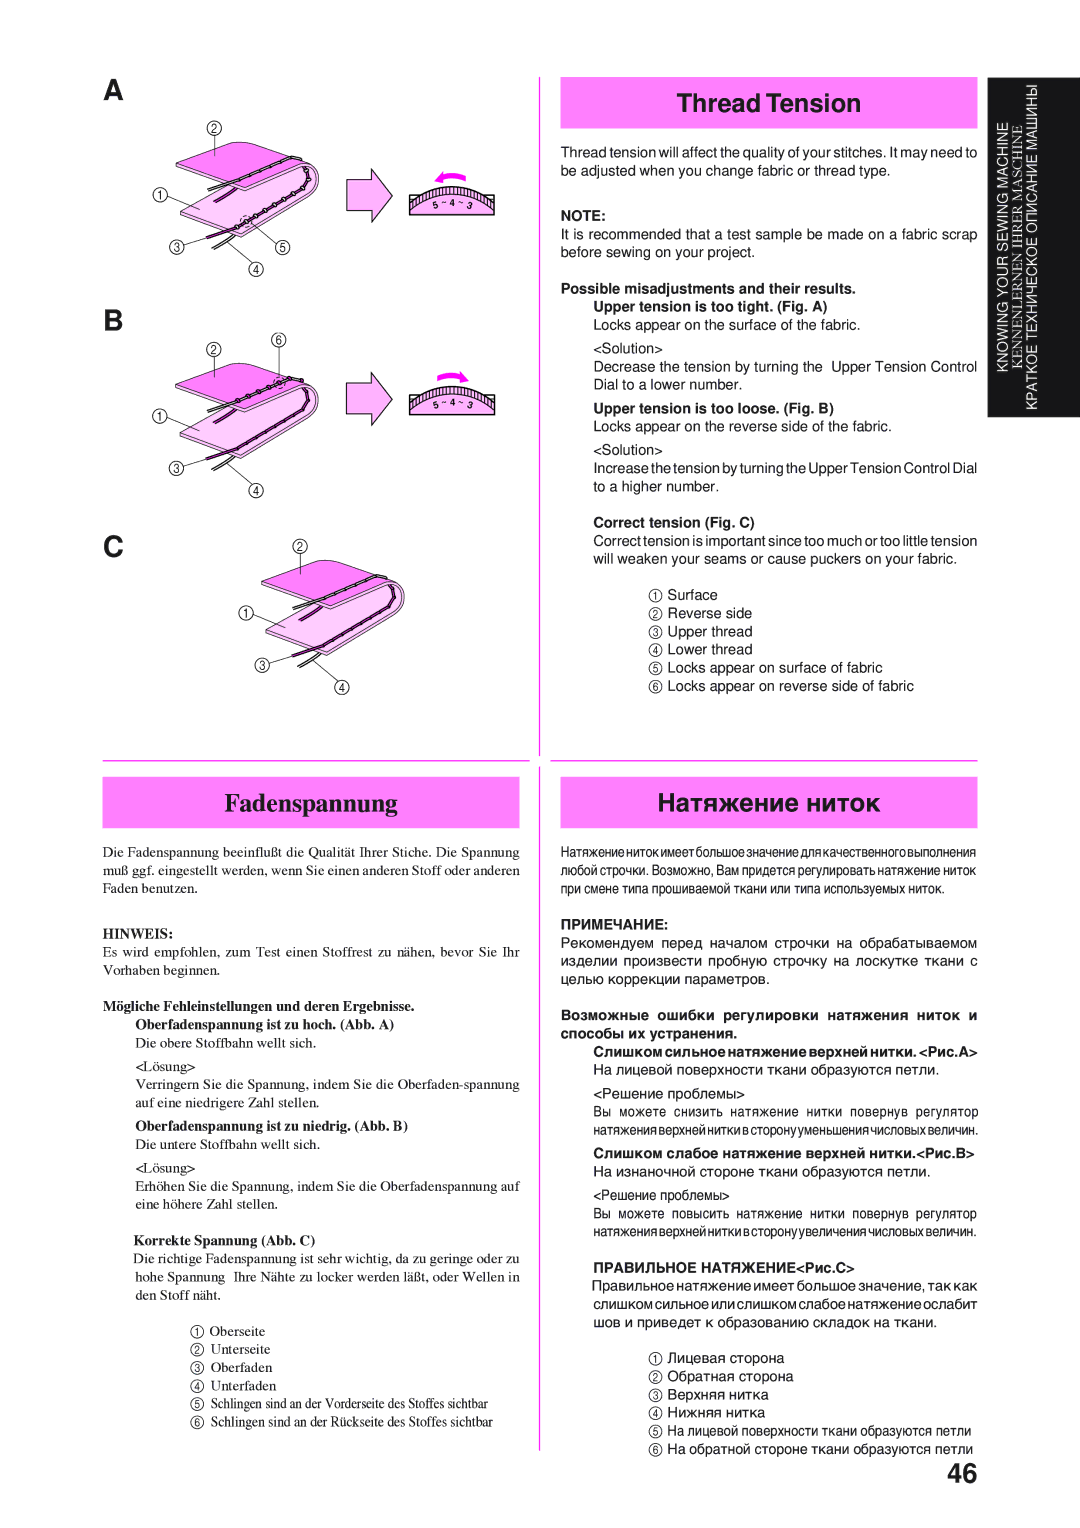
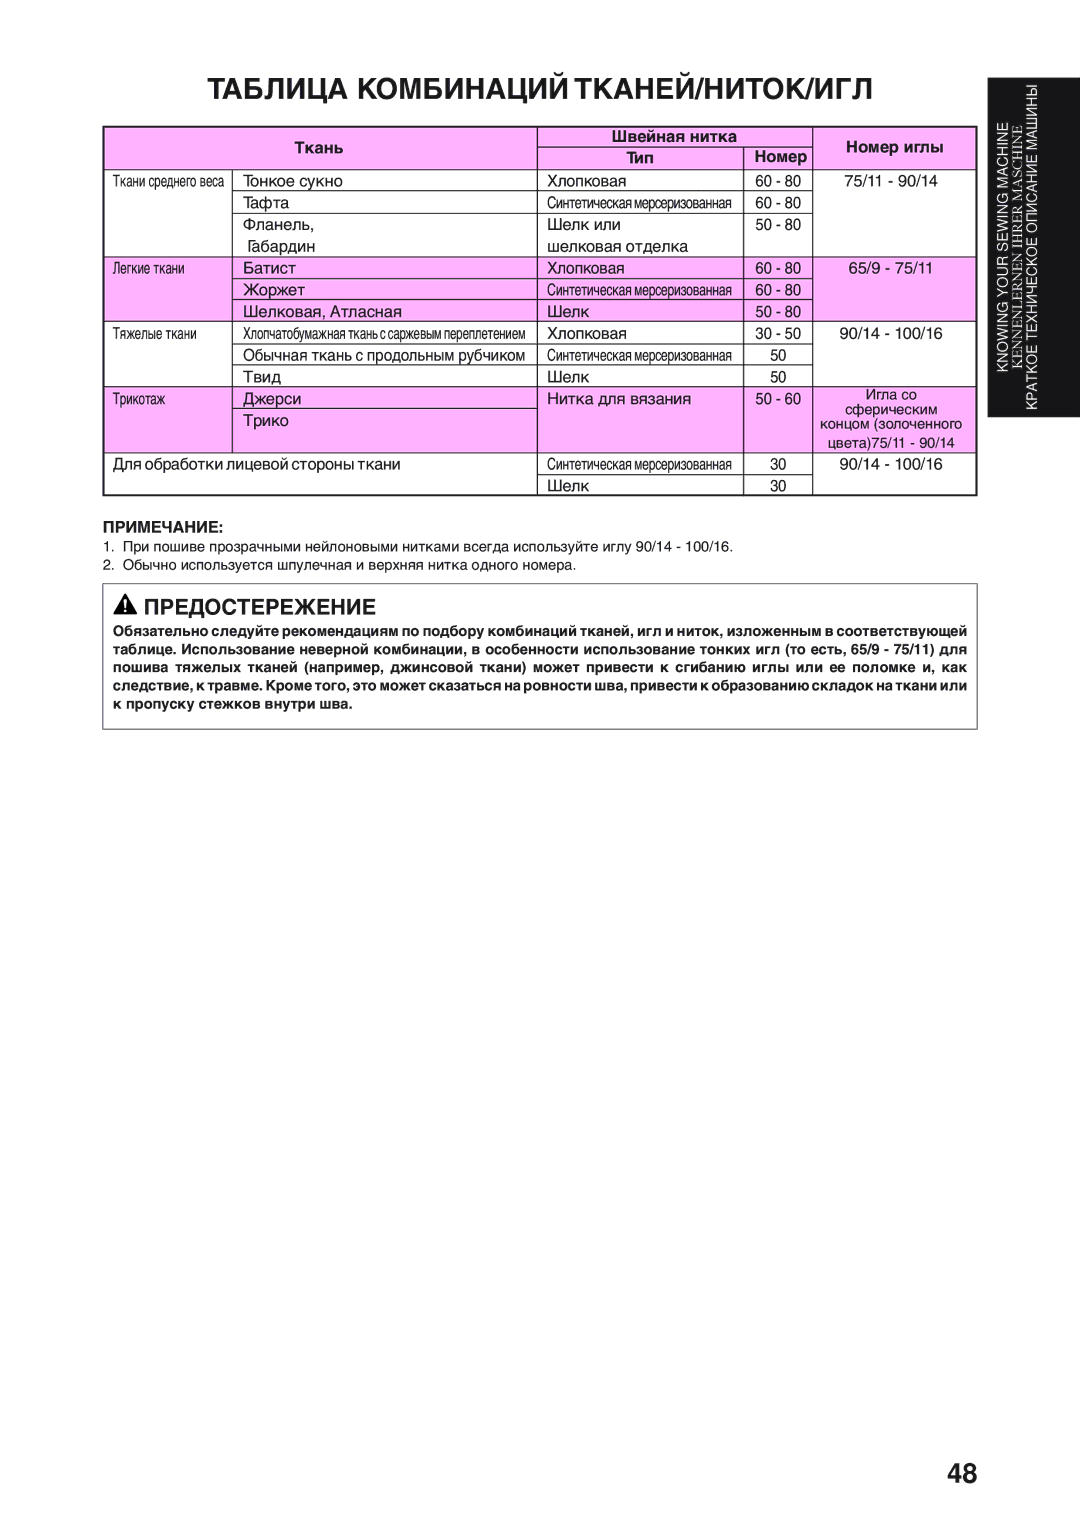
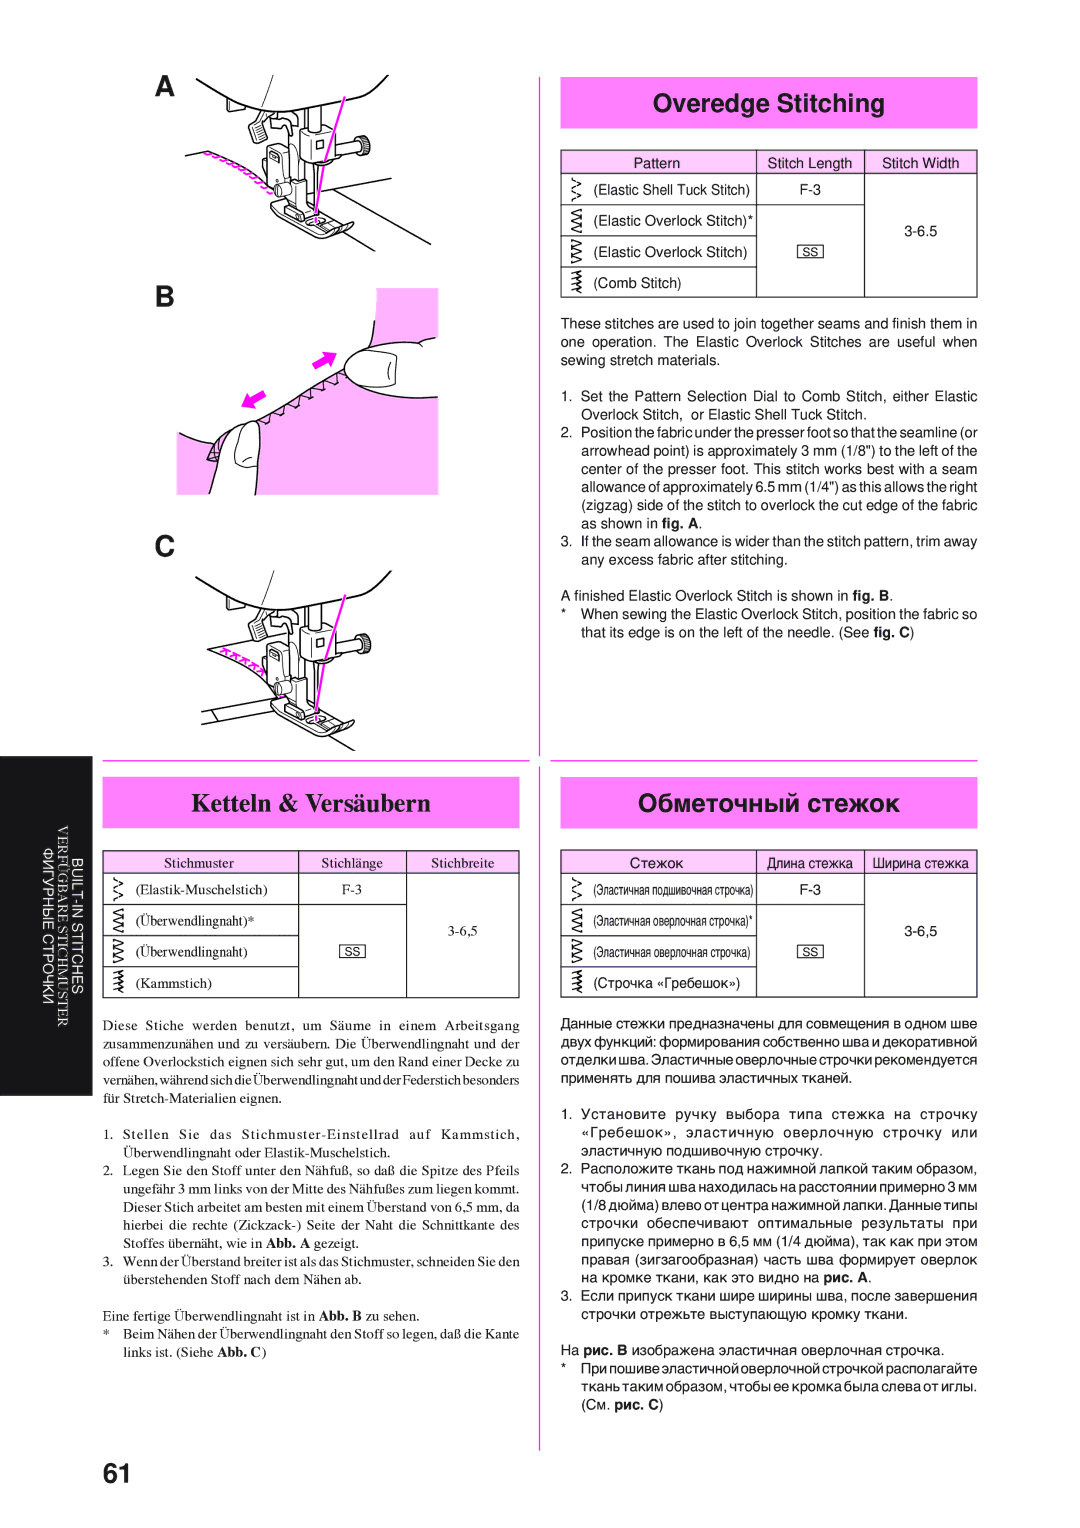
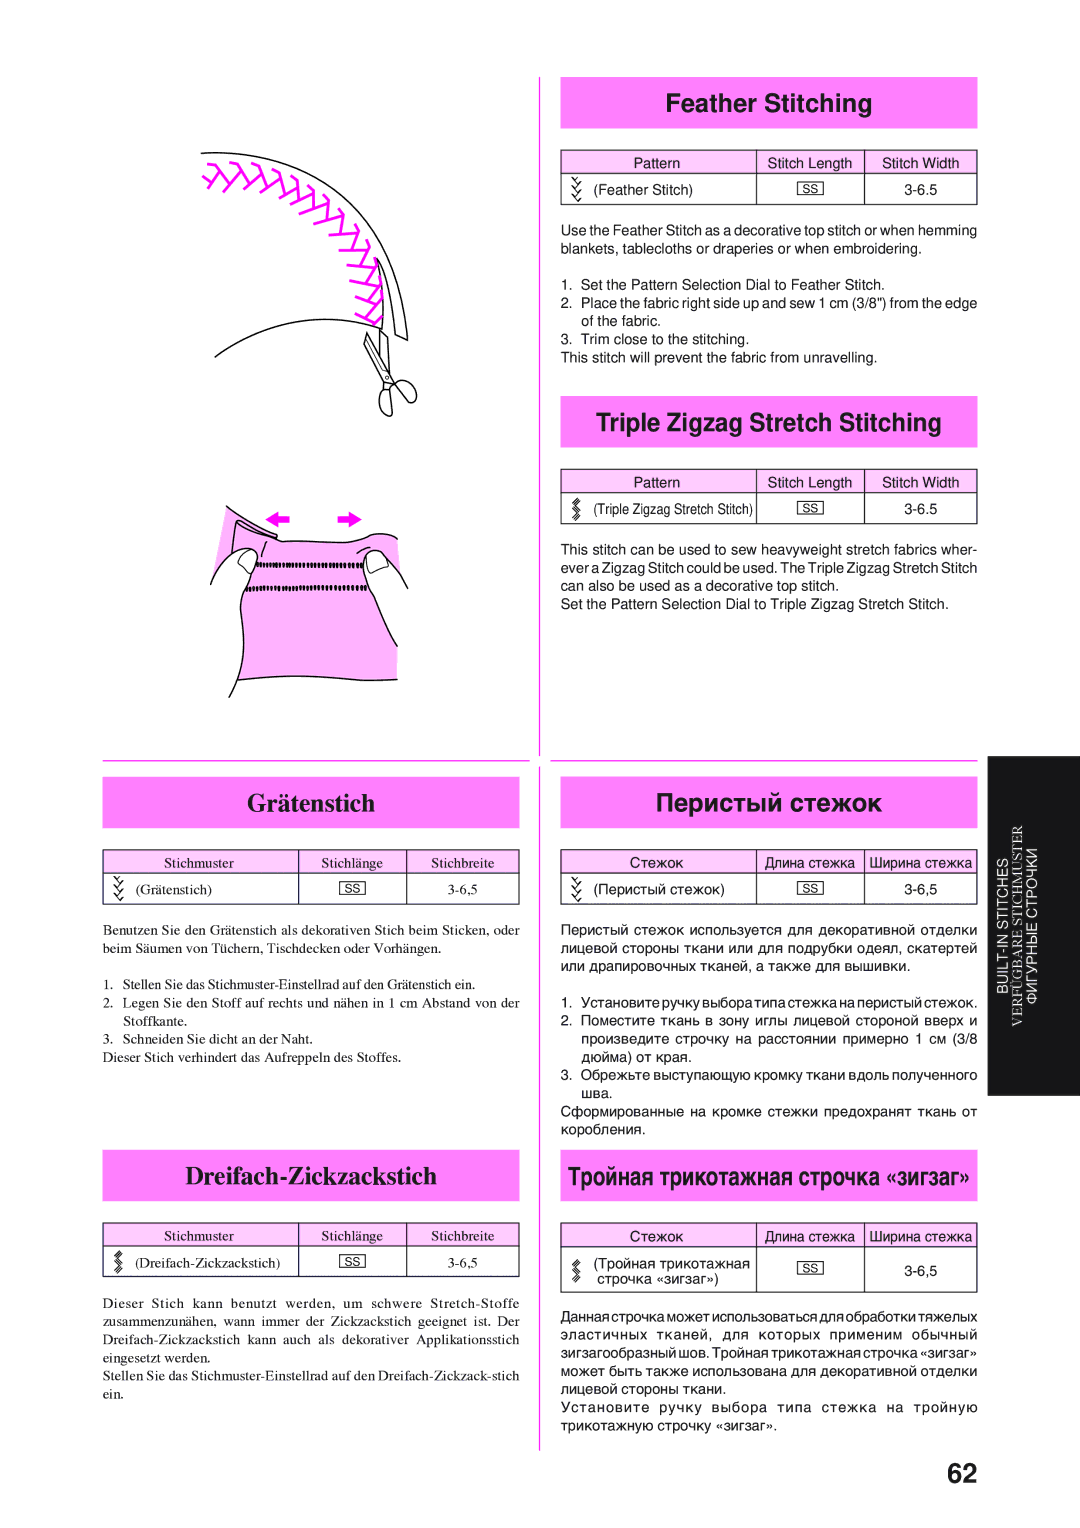
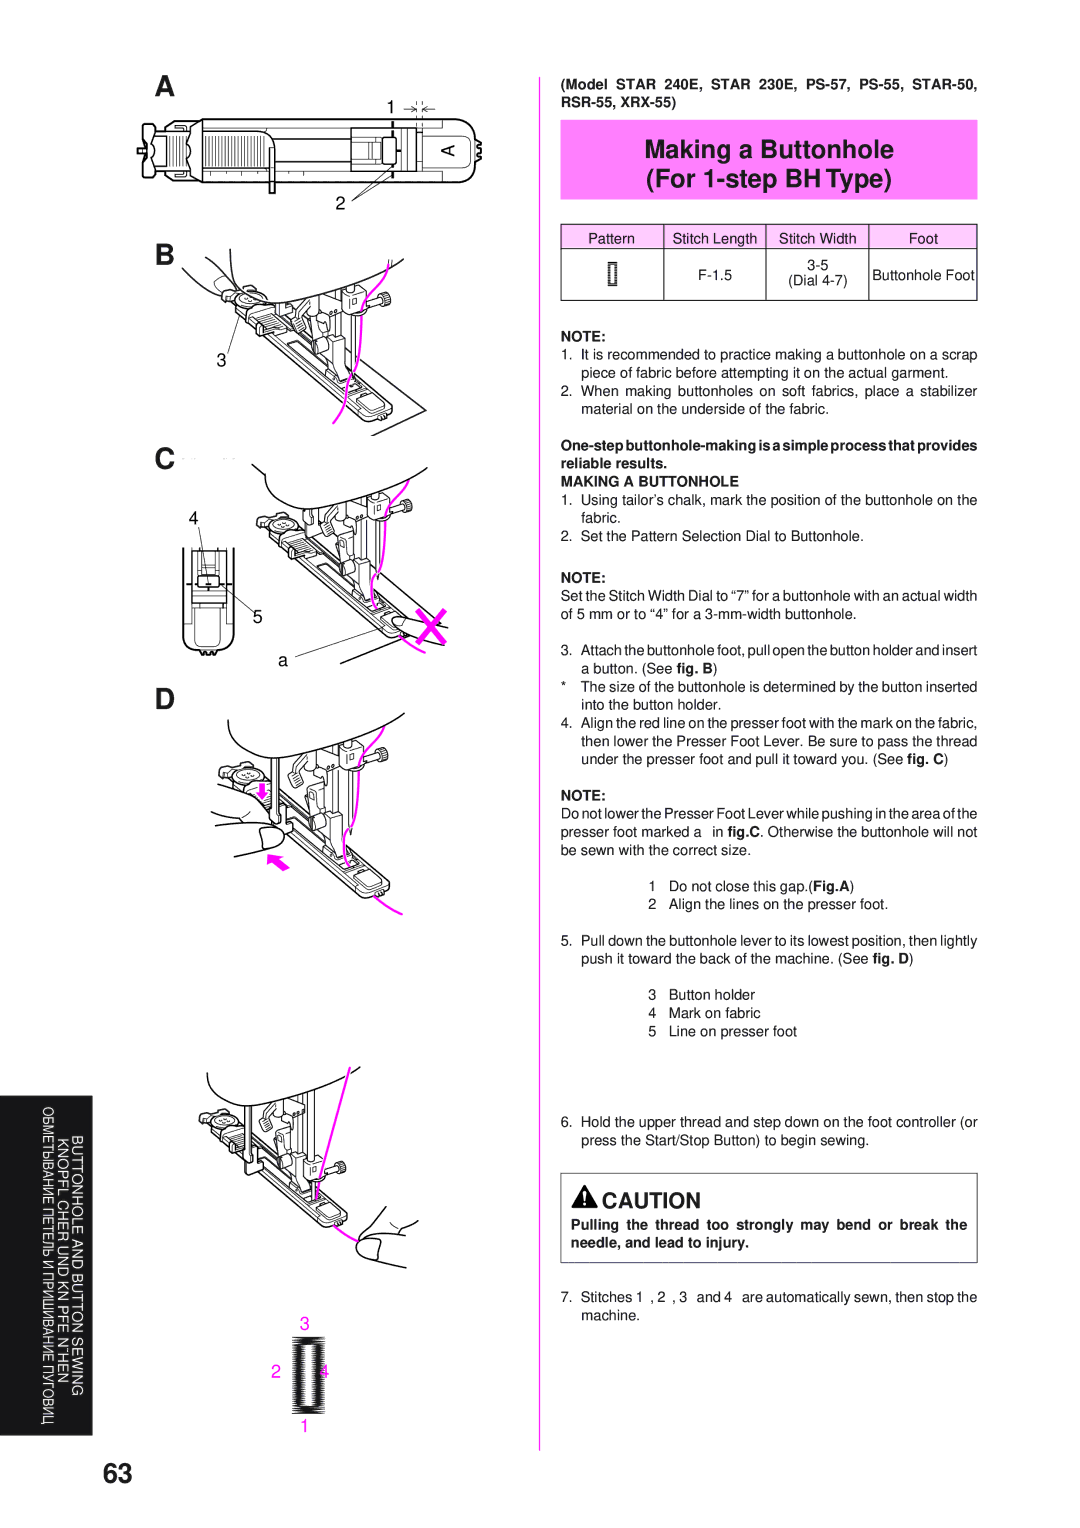
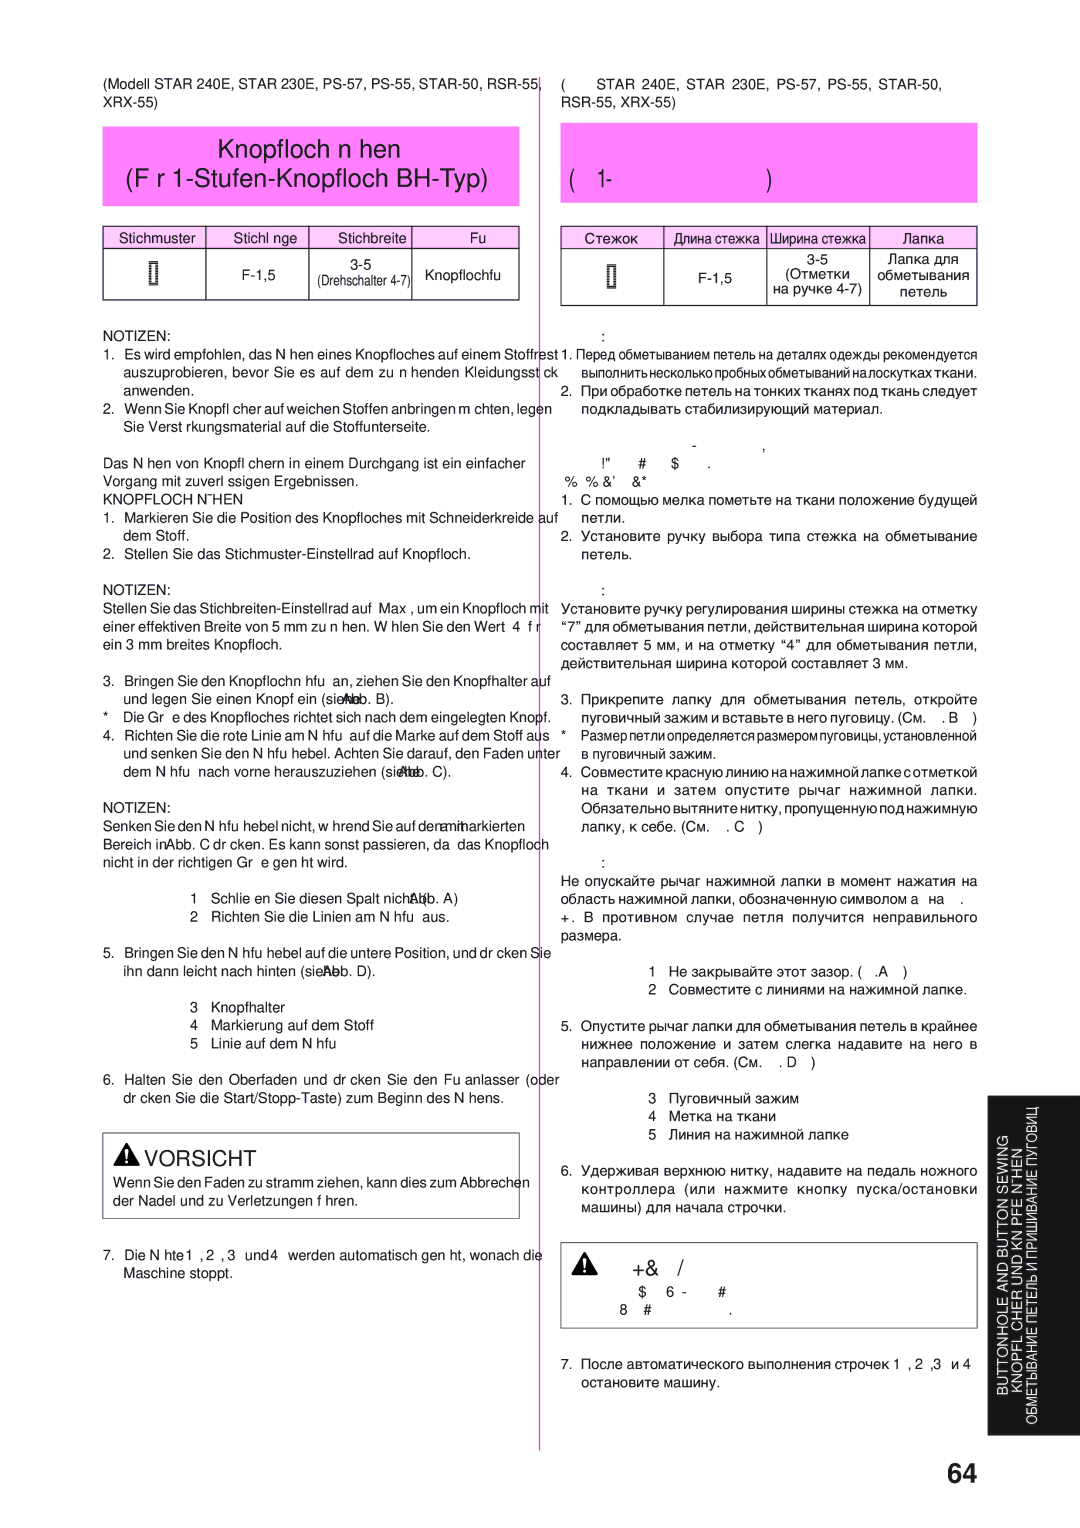
2.Following the line of the tear, sew using the Elastic Stitch as illustrated in fig. A.

SEWING ELASTIC

1.Place the elastic on the fabric.

2.As you sew, stretch the elastic both in the front and behind the presser foot as shown in fig. B.

JOINING FABRIC

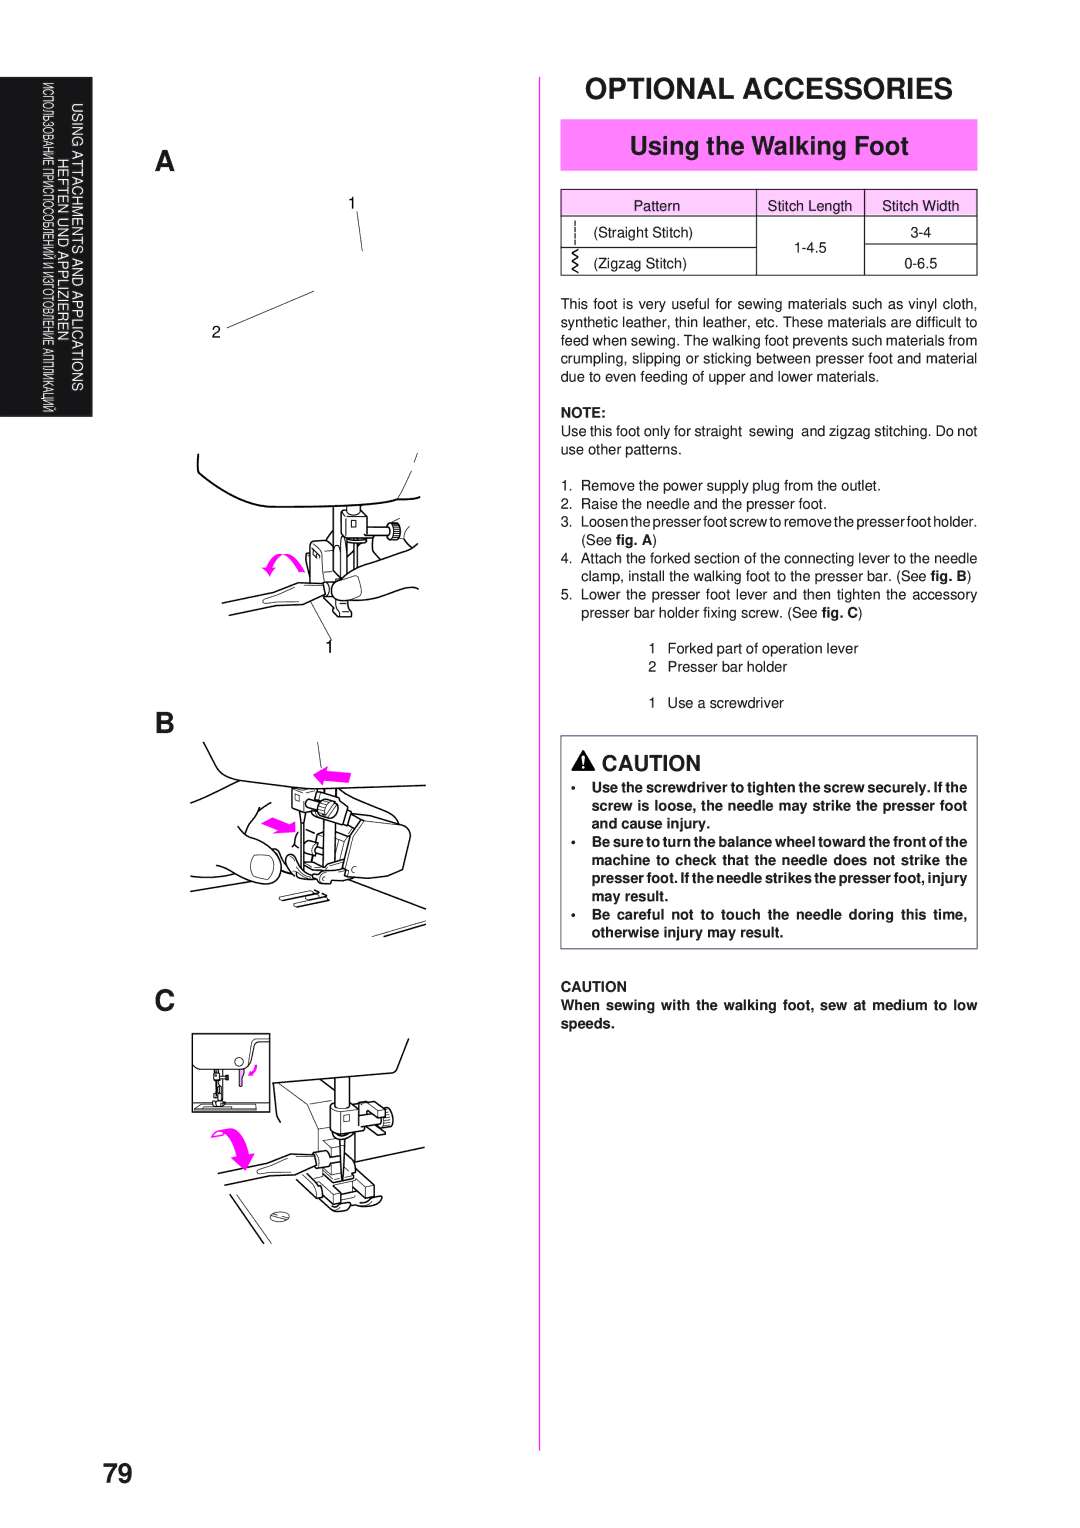
The Elastic Stitch can be used to join two pieces of fabric together and is very effective when sewing knitted fabrics. When nylon thread is used, the stitch will not be visible.

1.Place the edge of the two pieces of fabric together and center them under the presser foot.

2.Sew them together using the Elastic Stitch taking care to keep the two fabric edges close together as shown in fig. C.

Эластичная строчка


IN-BUILTSTITCHES

VERFÜGBARESTICHMUSTER

ФИГУРНЫЕСТРОЧКИ

ШТОПКА ПОРЕЗОВ ТКАНИ

Длина стежка

Ширина стежка

Стежок


(Подшивочная строчка)

F-2,5

3-6,5


Эластичная строчка может использоваться для трех целей: для штопки порезов ткани, для пришивания резинки и для сшивания кусков ткани. Каждый из указанных методов описан ниже.

Установите ручку выбора типа стежка на эластичную строчку.

1.Положите заплатку под порез, подлежащий ремонту.

2.Ориентируясь по направлению линии пореза ткани, выполните шов эластичной строчкой, как показано на рис. A.

ПРИШИВАНИЕ РЕЗИНКИ

1.Наложите резинку на ткань.

2.Во время выполнения строчки растягивайте резинку как спереди, так и сзади нажимной лапки, как показано на рис. B.

СШИВАНИЕ КУСКОВ ТКАНИ

Эластичная строчка может использоваться, когда необходимо сшить вместе два куска ткани. В частности, она особо эффективна для обработки трикотажных тканей. Если Вы примените нейлоновые нитки, шов становится практически невидим.

1.Поместите два куска ткани встык относительно друг друга и так, чтобы линия стыка проходила под нажимной лапкой.

2.Сшейте их вместе эластичной строчкой, следя за тем, чтобы в процессе продвижения ткани кромки обоих кусков были плотно прижаты друг к другу, как показано на рис. С.

56

Image 68
Contents Stru cti on Ma nu al Kabelanschlüsse VorsichtПредостережение Во время грозыГлавный выключатель питания Освещения зоны строчки Main Power/Sewing Light SwitchNetz- und Nählichtschalter Fußanlasser Foot ControllerНожной контроллер Ножной контроллерChecking the Needle Replacing the NeedleПроверка иглы Nadel prüfenNadel austauschen Changing the Presser Foot Nähfuß wechselnЗамена нажимной лапки SNAP-ON TypeПлатформа-приставка Anschiebetisch mit ZubehörfachFlat Bed Attachment Various Controls Pattern Selection DialStichmuster-Einstellrad Ручка выбора типа стежкаNotizen Ручка регулирования длины стежкаPattern Stitch Name Recommended Width Instruction ManualDouble Action Stitch Briding Stitch Important Safety Instructions Achtung «УКАЗАНИЯ ПО Технике БЕЗОПАСНОСТИ» Connecting Plugs and Main Power / Sewing Light Switch Model PS-57, PS-55, STAR-50, RSR-55, XRX-55, PS-53 Please Read Before Using this Machine Bitte VOR Benutzung Dieser Maschine Lesen ПОЖАЛУЙСТА, Прочитайте Перед Началом Эксплуатации Машины Table of Contents Inhalt Оглавление Не входящие в пуговичный зажимPrincipal Parts Balance WheelМодели Star 240E, Star 230E Механизм Намотки Шпульки Стр Ручка Регулирования Длины Стежка СтрМаховик Гнездо Подключения Ножного Контроллера Стр3 2 Transporteurhebel Seite Stichmusteranzeige Seite Optional Accessories Model PS-57,PS-55, STAR-50, RSR-55, XRX-55,PS-53Optionales Zubehör Дополнительные принадлежностиМодели Star 240E, Star 230E Примечание Только для СШАConnecting Plugs Operatingyour Sewing MachineDouble Action Stitch Empfohlene Stichlängen UND Stichbreiten AnleitungFixiert 3/32 STRETCH-GERADSTICH Модели Star 240E, PS-57 Строчка Наименование Стежка Заданная ШиринаНомер Страницы РуководстваМодели Star 230E, PS-55, STAR-50, RSR-55, XRX-55 Модели PS-53 Stitch Length Dial Higher the NUMBER, the Longer the StitchStichlängen-Einstellrad Ручка регулирования длины стежкаРучка регулирования длины стежка Длина Частые → SS Редкие Поверните ручку влево за0на позицию SS SS Фиксированная 2,5Stitch Width Dial Stichbreiten-EinstellradРучка регулирования Ширины стежка Ручка регулирования ширины стежкаРычаг реверсирования строчки Reverse Sewing LeverRückwärtstaste Feed Dog Position Switch TransporteurhebelStart-/Stopp-Taste Start/Stop ButtonКнопка пуска/остановки Машины Модель Star 240EHebel für den Geschwindigkeitsbereich Umbau auf FreiarmКонтроллер скорости шитья Переключение на режим Free-armThreading Machine Winding the BobbinAufspulen Прорези на торце катушкиНа катушечном стержне На машинеMode PS-57, PS-55, STAR-50, RSR-55, XRX-55, PS-53 Машины Lower Threading Unterfadenführung Заправка нижней ниткиОбязательно выключите электропитание. При Сдвиньте кнопку и откройте крышку Скользящая кнопка КрышкаUpper Threading Oberfadenführung Заправка верхней ниткиПомощью рычага нажимной лапки поднимите нажимную лапку Рычаг нажимной лапкиUsing Needle Threader Bedienung der Fadeneinfädelung Иглу убедитесь в том, что иглодержатель находится вНитенаправитель Держатель крючка Крючок НитьВытягивание нижней нитки Вручную Manually Drawing Up Lower ThreadManuelles Heraufholen des Unterfadens Nähen mit Doppelnadel Twin Needle SewingДвухигольная строчка Inserting the Twin NeedlePlacing the Extra Spool PIN Twin Needle ThreadingУстановкадополнительноговставногокатушечногостержня Заправка Ниток В Двойную ИглуThread Tension FadenspannungНатяжение ниток Слишком слабое натяжение верхней нитки.Рис.BFABRIC/THREAD/NEEDLE Combinations 75/11 90/14 65/9 75/11Тяжелые ткани 90/14 100/16Please Read Before Sewing Straight Stitching Starting SewingChanging Sewing Direction Finishing SewingGeradstich Прямой стежокНачало строчки Изменение Направления СтрочкиRemoving the Material from the Machine TOP Stitching and Stretch MaterialsСнятие Прошитой Ткани С Машины Модели Pstar 240E, Star 230EZigzag Stitching ZickzackstichЗигзагообразный стежок Zigzag StitchBlind Hem Stitching BlindsaumstichПотайной подрубочный шов Выполните строчку, как показано на рис. СПодшивочная строчка BiesenstichShell Tuck Stitching Эластичная строчка ElastikstichElastic Stitching Elastische Schrittnaht Double Action StitchingСтежок с двойным эффектом Стежок Длина стежка Ширина стежкаСтрочка-елочка BogennahtScallop Stitching Декоративный стежок DekorsticheDecorative Stitching Patchwork PatchworkЛоскутное шитье Позиция формирования первого стежкаKetteln & Versäubern Overedge StitchingОбметочный стежок Строчка «Гребешок»Feather Stitching Triple Zigzag Stretch StitchingПеристый стежок Тройная трикотажная строчка «зигзаг»Making a Buttonhole For 1-step BH Type Making a ButtonholeKnopfloch nähen Für 1-Stufen-Knopfloch BH-Typ Обметывание петельKnopfloch Nähen Обработка ПетлиKnöpfe die nicht in den Halter passen НапримерОбметывание петли простая операция, обеспечивающая Making a Buttonhole For 4-step BH TypeKnopfloch nähen Für 4-Stufen-Knopfloch BH-Typ Обметывание петель Шаг Тип стежка Последовательность операцийПетли Чего поднимите ее над тканью Шаг Сделайте 5-6 стежковStiche Sichern UND Knopfloch Aufschneiden Securing the Stitching and Cutting the BUTTON- HoleЗакрепление ШВА И Прорезка Петли Используя нож для распарывания швов с цельюButtonhole Fine Adjustment Knopfloch-Feineinstellung Тонкая настройка для обметывания петельMethode 2 siehe Abb. B Knöpfe annähen Button SewingПришивание пуговиц Лапка ЗигзагообразныйZipper Insertion GatheringEinnähen eines Reißverschlusses RaffenОбработка сборок CтежокШтопка StopfenDarning Appliqués ApplizierenАппликации Стежок Длина стежкаMonogramming Embroidering Preparing for Monogramming and EmbroideringMonogramming EmbroideringВышивание Monogramme und StickarbeitenИзготовление Монограмм Using the Walking Foot Optional AccessoriesOptionales Zubehör Einsatz des ObertransporteursOptional Accessories Using the Spring-action Quilting FootСтеганый узор Линия Einsatz des StopffußesМатериале Using the 1/4-Inch Quilting Foot Einsatz des Patchworkfuß Использование направляющей Лапки 1/4 дюйма 6,5 ммChanging the Light Bulb Отвинтите винт крепления крышки с обратной стороны Nählichtlampe auswechselnЗамена лампочки освещения Cleaning Поверните маховик на себя, чтобы паз челнока был на ReinigungЧистка машины Performance Check List Обслуживание Checkliste LassenNein Чрезмерное УстановкаНижней нитки НиткиСтр.27 Нет Стр.12 Игла Нет Стр.48 Стр.12Стр.12 Нет Спутывание нитки Стр.48 Стр.34Переупаковка машины Repacking the MachineMaschine verpacken Inch Quilting Foot Nadel Главный выключатель питания English Deutsch

XRX-55, STAR-230E, STAR-50, RSR-55, STAR-240E specifications

Brother has long been a prominent player in the realm of sewing machines, consistently delivering reliable products equipped with innovative features. Among its impressive line-up are the Brother STAR-240E, RSR-55, STAR-50, STAR-230E, and XRX-55. Each model embodies unique characteristics and technologies, making them excellent choices for various sewing needs.

The Brother STAR-240E is a versatile sewing machine ideal for both beginners and experienced sewists. It boasts 40 built-in stitches, including decorative options and essential utility stitches, allowing users to explore a wide array of creative projects. Its automatic needle threader saves time, while the easy-to-use interface enhances the overall user experience. The machine also features a drop feed for free motion sewing and quilting, adding to its versatility.

The RSR-55 stands out with its user-friendly design. This model is perfect for those looking for a straightforward, reliable sewing machine. Its strong motor handles various fabric types with ease, from lightweight fabrics to heavier materials. The RSR-55 also includes an adjustable stitch length and width for customized sewing, catering to individual preferences.

Sibling to the STAR-240E, the Brother STAR-50 offers a more streamlined experience. It has 50 built-in stitches and an automatic one-step buttonhole feature, making it suitable for creating professional-looking garments. Its lightweight design and compact size make it easily portable, ideal for sewing on the go.

The STAR-230E is another exceptional model that combines affordability with advanced features. It includes a top-loading bobbin system for quick changes and a variety of built-in stitches that ensure ample options for any project. The STAR-230E's LCD display allows for easy navigation through its functions, making it user-friendly for all levels.

Lastly, the XRX-55 rounds out this lineup with its focus on creating intricate designs. Equipped with advanced embroidery features, including multiple embroidery designs and a USB port for importing custom designs, the XRX-55 is perfect for those wanting to elevate their sewing projects. Its robust construction ensures reliability and longevity, making it an investment for both hobbyists and professionals alike.

In conclusion, the Brother STAR-240E, RSR-55, STAR-50, STAR-230E, and XRX-55 each bring unique strengths to the sewing table. From beginner-friendly features to advanced embroidery capabilities, these machines cater to a wide audience, establishing Brother as a leading name in the sewing machine industry.