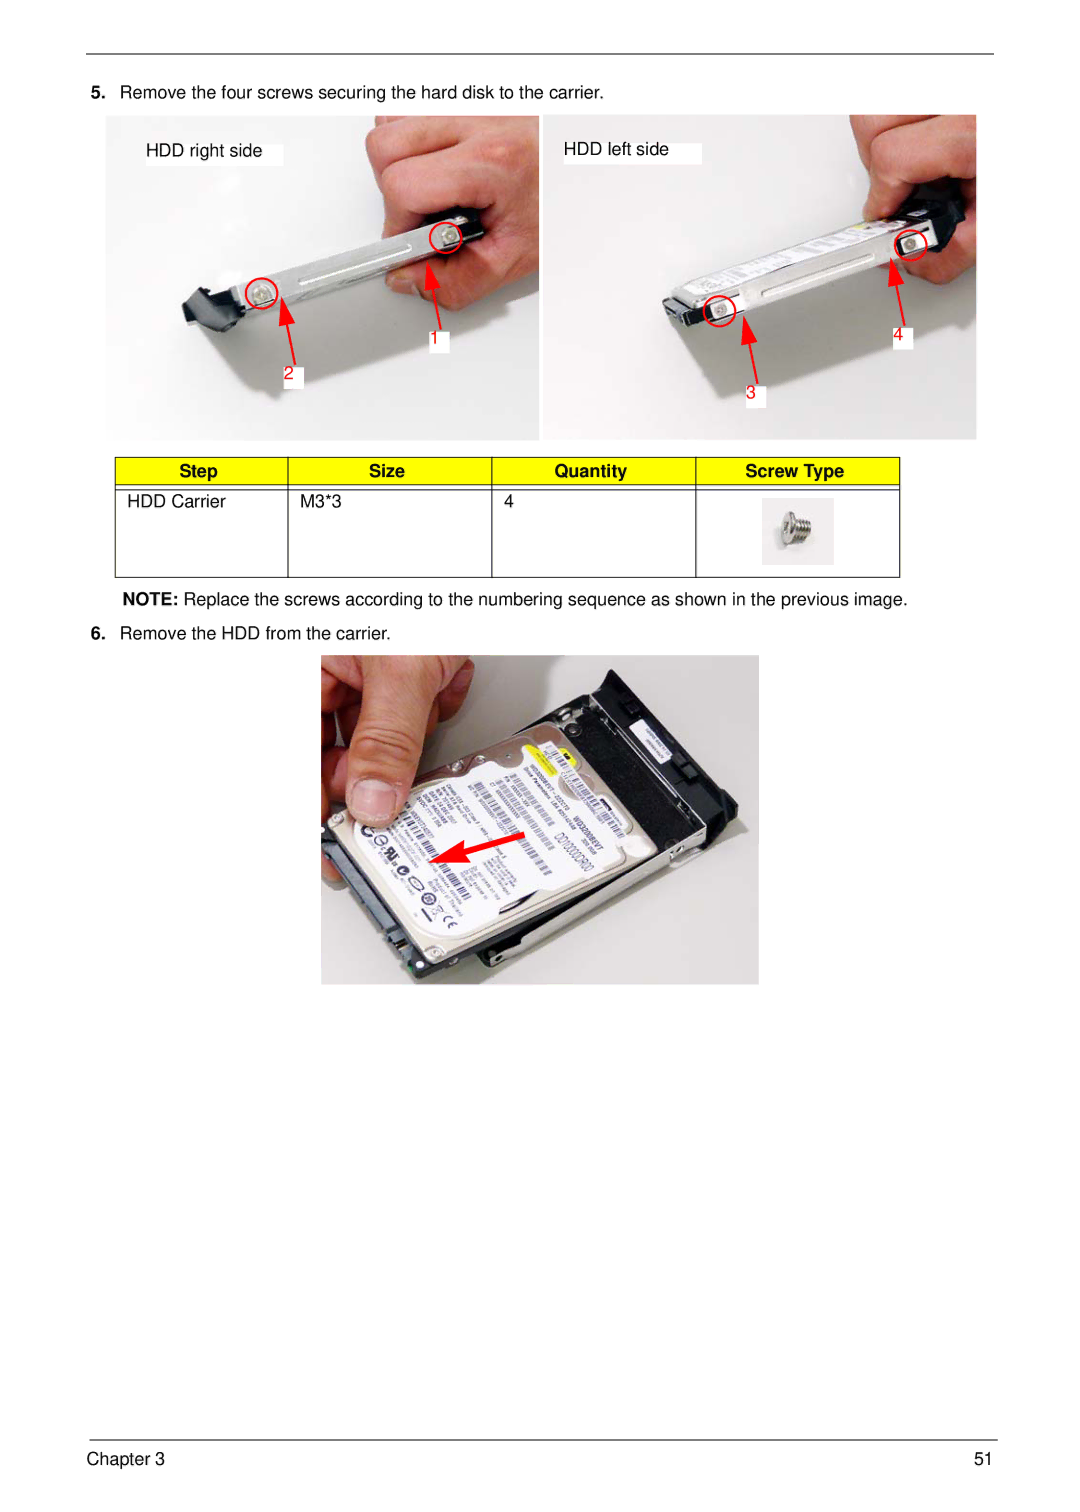
5.Remove the four screws securing the hard disk to the carrier.
|
|
|
HDD right side |
| HDD left side |
|
|
|
|
|
|
|
| |||
|
|
|
|
|
| 4 | ||||
| 1 |
|
| |||||||
|
|
|
|
|
|
|
|
|
|
|
|
|
|
|
|
|
|
|
|
|
|
| 2 |
|
|
|
|
|
|
|
|
|
|
|
|
|
|
|
| 3 |
|
|
|
|
|
|
|
|
|
| ||||
|
|
|
|
|
|
|
|
|
|
|
Step |
| Size | Quantity | Screw Type |
| |||||
|
|
|
|
|
|
|
|
|
|
|
HDD Carrier | M3*3 | 4 |
|
|
|
|
| |||
|
|
|
|
|
|
|
|
|
|
|
NOTE: Replace the screws according to the numbering sequence as shown in the previous image.
6.Remove the HDD from the carrier.
Chapter 3 | 51 |