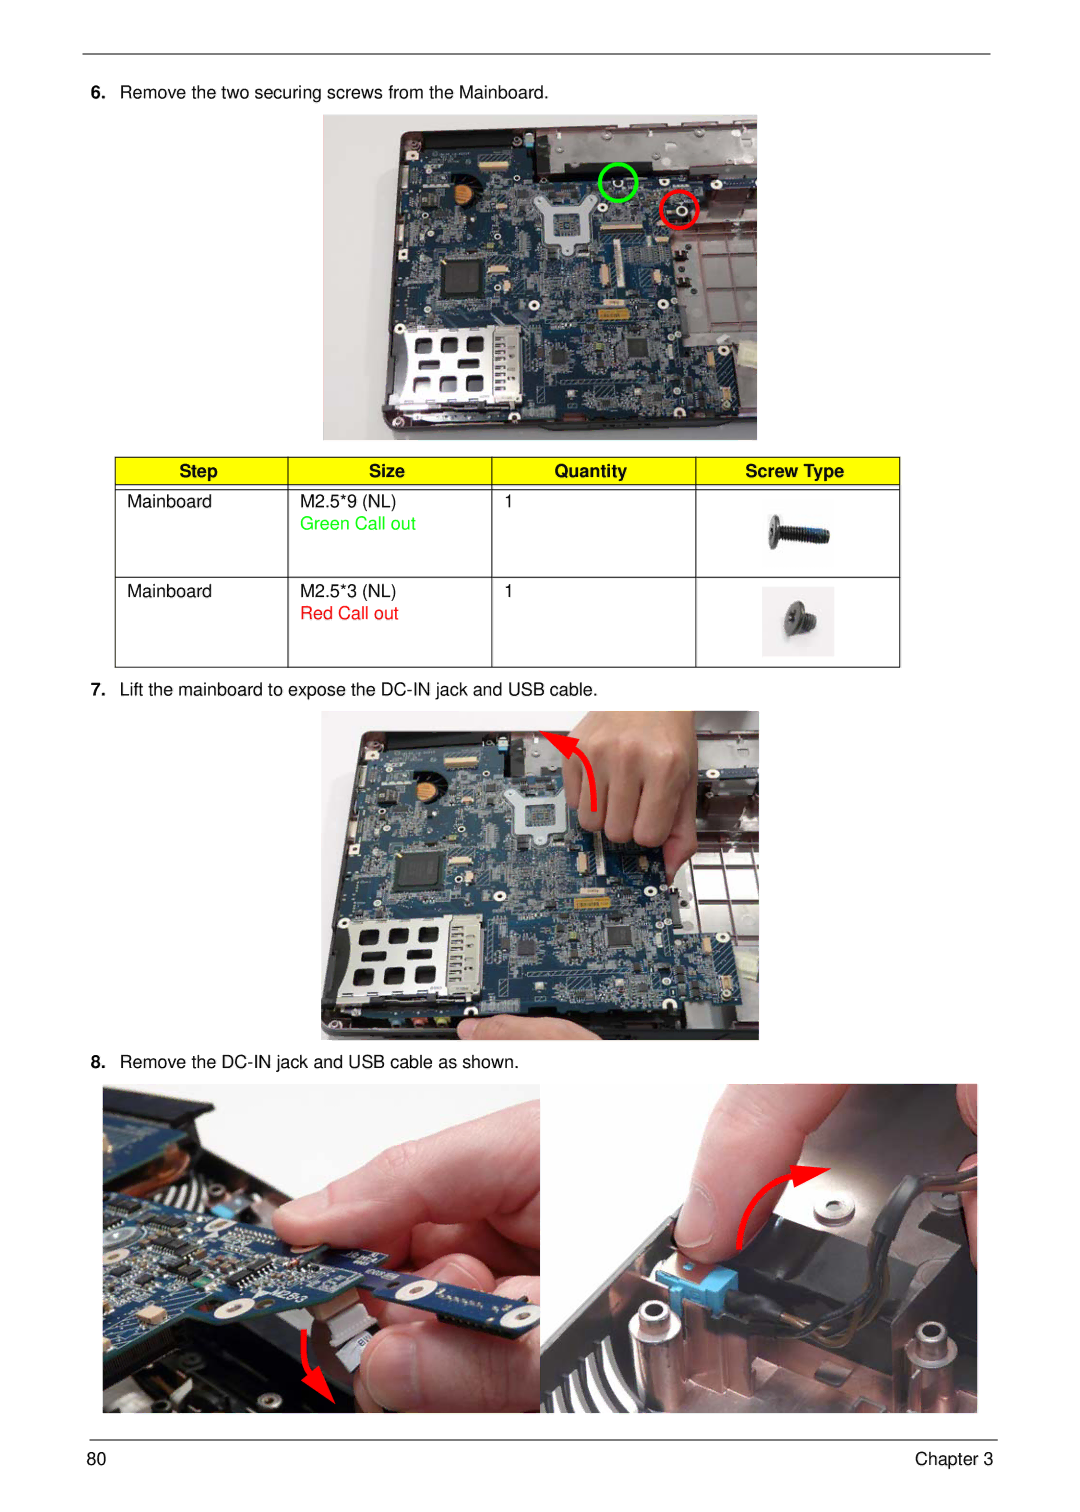
6.Remove the two securing screws from the Mainboard.
Step | Size | Quantity | Screw Type |
|
|
|
|
Mainboard | M2.5*9 (NL) | 1 |
|
| Green Call out |
|
|
|
|
|
|
Mainboard | M2.5*3 (NL) | 1 |
|
| Red Call out |
|
|
|
|
|
|
7.Lift the mainboard to expose the
8.Remove the
80 | Chapter 3 |
6.Remove the two securing screws from the Mainboard.
Step | Size | Quantity | Screw Type |
|
|
|
|
Mainboard | M2.5*9 (NL) | 1 |
|
| Green Call out |
|
|
|
|
|
|
Mainboard | M2.5*3 (NL) | 1 |
|
| Red Call out |
|
|
|
|
|
|
7.Lift the mainboard to expose the
8.Remove the
80 | Chapter 3 |