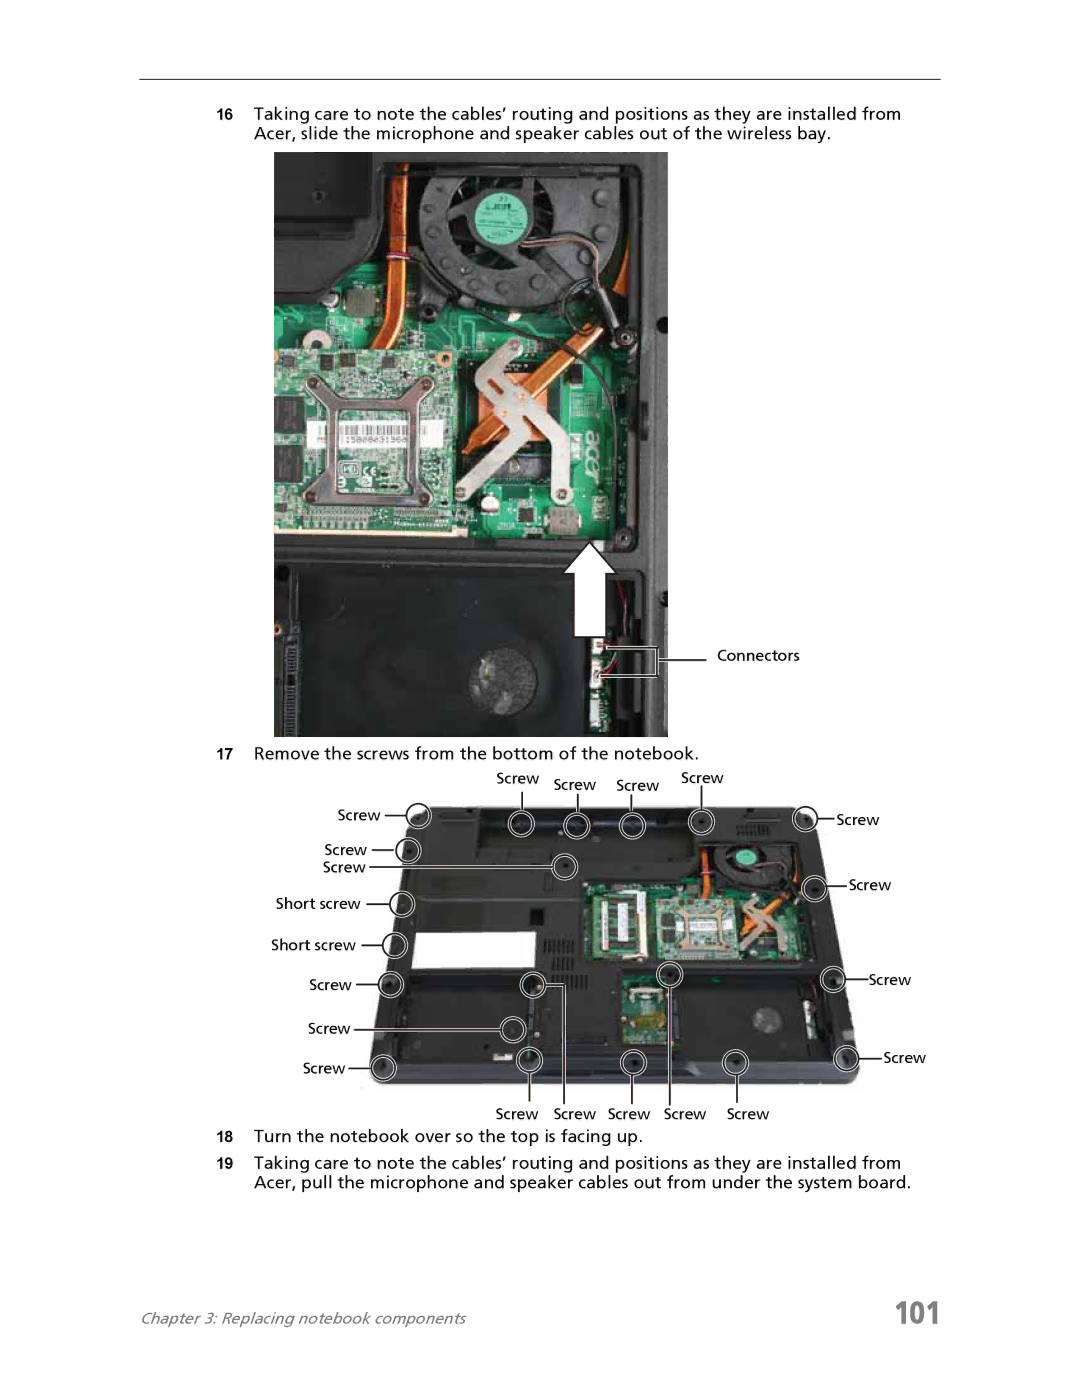
16Taking care to note the cables’ routing and positions as they are installed from Acer, slide the microphone and speaker cables out of the wireless bay.
Connectors
17Remove the screws from the bottom of the notebook.
Screw Screw Screw Screw
Screw | Screw | |
Screw |
| |
Screw | Screw | |
Short screw | ||
| ||
Short screw |
| |
Screw | Screw | |
| ||
Screw |
| |
Screw | Screw | |
|
Screw Screw Screw Screw Screw
18Turn the notebook over so the top is facing up.
19Taking care to note the cables’ routing and positions as they are installed from Acer, pull the microphone and speaker cables out from under the system board.
Chapter 3: Replacing notebook components | 101 |
