3Use the thumb notch to lift the hard drive bay cover, then remove it. Be careful not to break off the tabs located on the end of the cover opposite the thumb notch.
Thumb notch
4Using the plastic tab, lift straight up on the hard drive, then remove it.
5If your new hard drive already includes the hard drive bracket, go to step Step 10.
If you need to move the hard drive bracket from your old hard drive to your new hard drive, go to step Step 6.
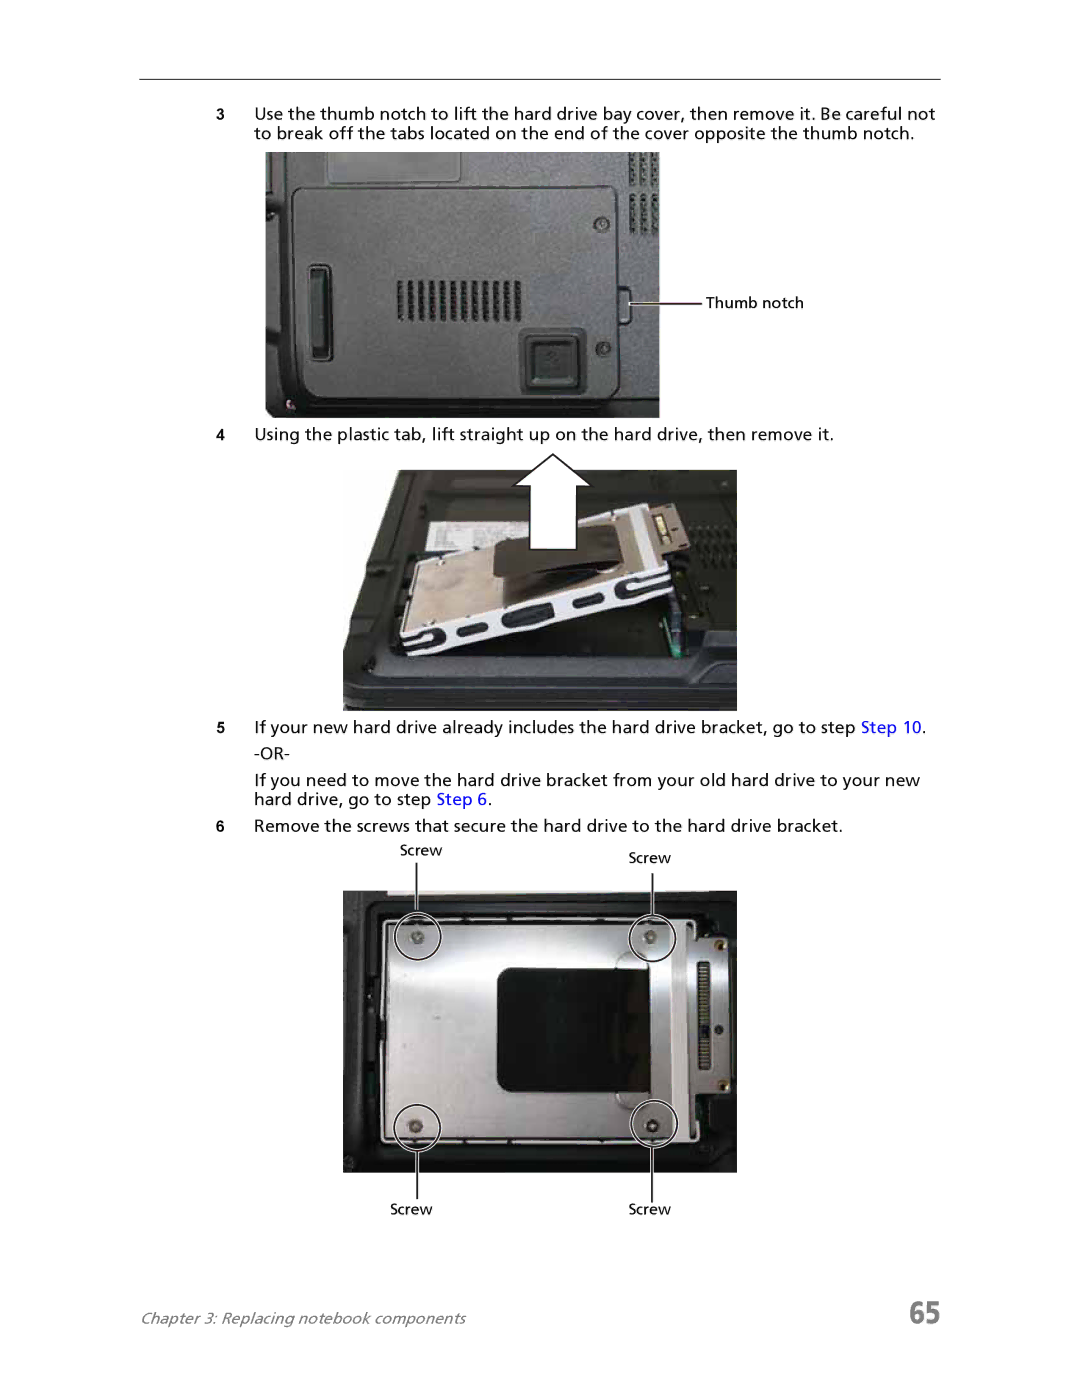
6Remove the screws that secure the hard drive to the hard drive bracket.
ScrewScrew
ScrewScrew
Chapter 3: Replacing notebook components | 65 |
