3If the notebook has wireless networking built in, unplug the wireless antennas by following the steps in “Replacing the IEEE 802.11 wireless card” on page 67.
4Remove the hard drive(s) by following the steps in “Replacing the primary hard drive” on page 64 and “Replacing the secondary hard drive” on page 73.
5Remove the keyboard cover by following the steps in “Replacing the keyboard cover” on page 78.
6Remove the keyboard by following the steps in “Replacing the keyboard” on page 80.
7Remove the LCD assembly by following the steps in “Replacing the LCD assembly” on page 84.
8Remove the palm rest by following the instructions in “Replacing the palm rest” on page 96.
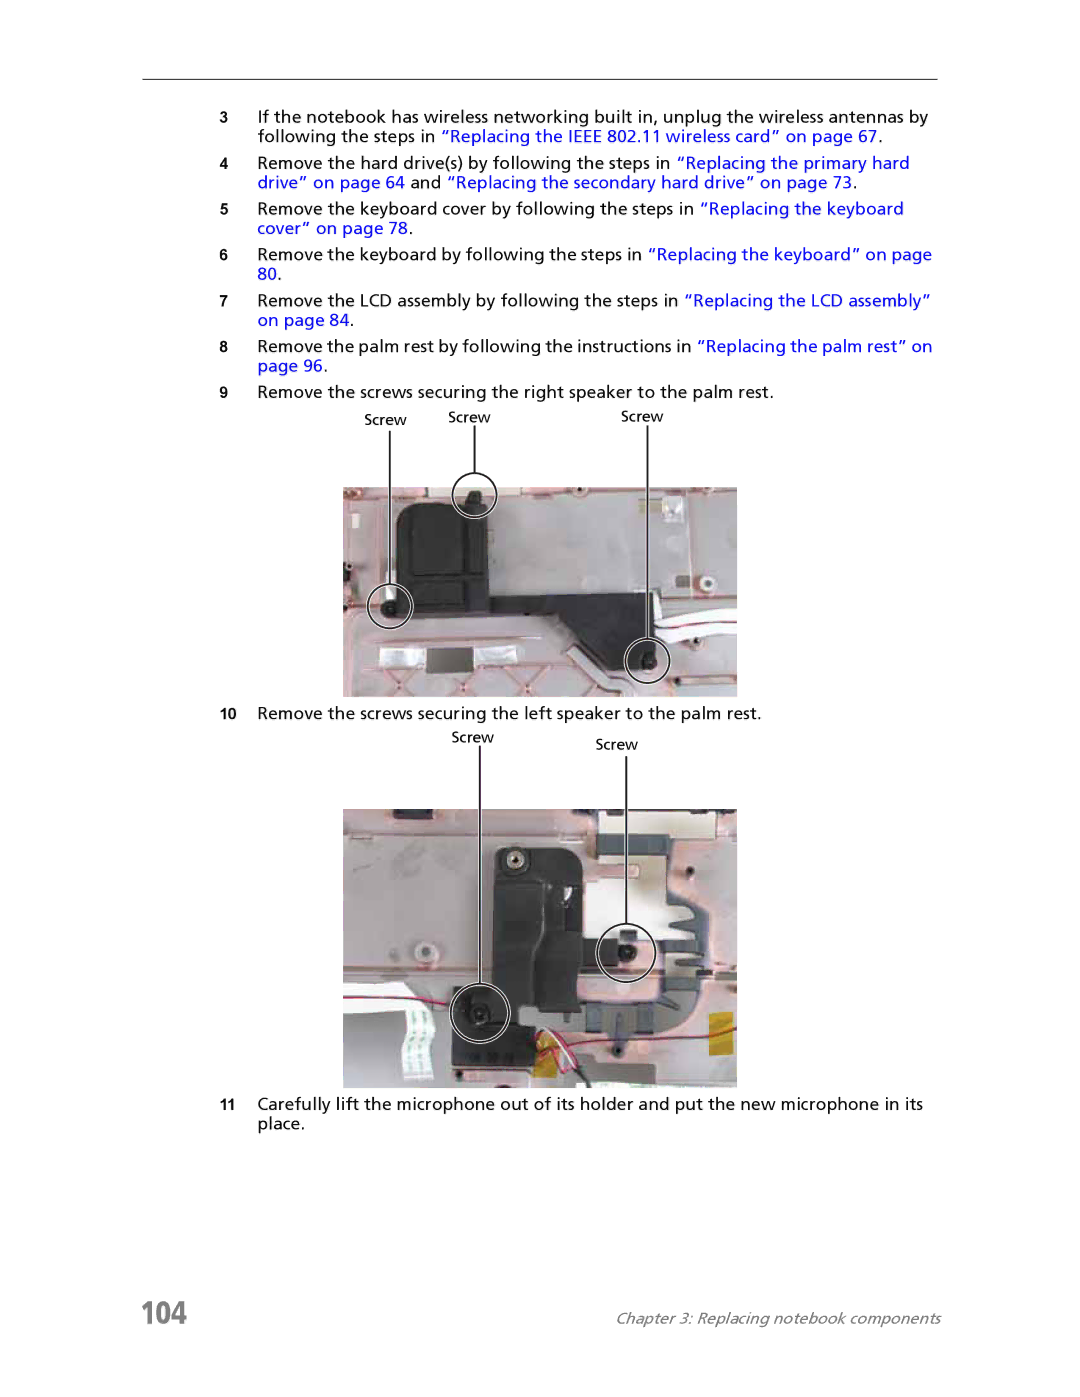
9Remove the screws securing the right speaker to the palm rest.
Screw | Screw | Screw |
10Remove the screws securing the left speaker to the palm rest.
ScrewScrew
11Carefully lift the microphone out of its holder and put the new microphone in its place.
104 | Chapter 3: Replacing notebook components |
