Acer Altos G610 manual When applicable, pull out any previously installed hard disk

Models: Altos G610

1 156
Download 156 pages 29.16 Kb
Page 74
Image 74
4When applicable, pull out any previously installed hard disk.

64

3 Upgrading your system

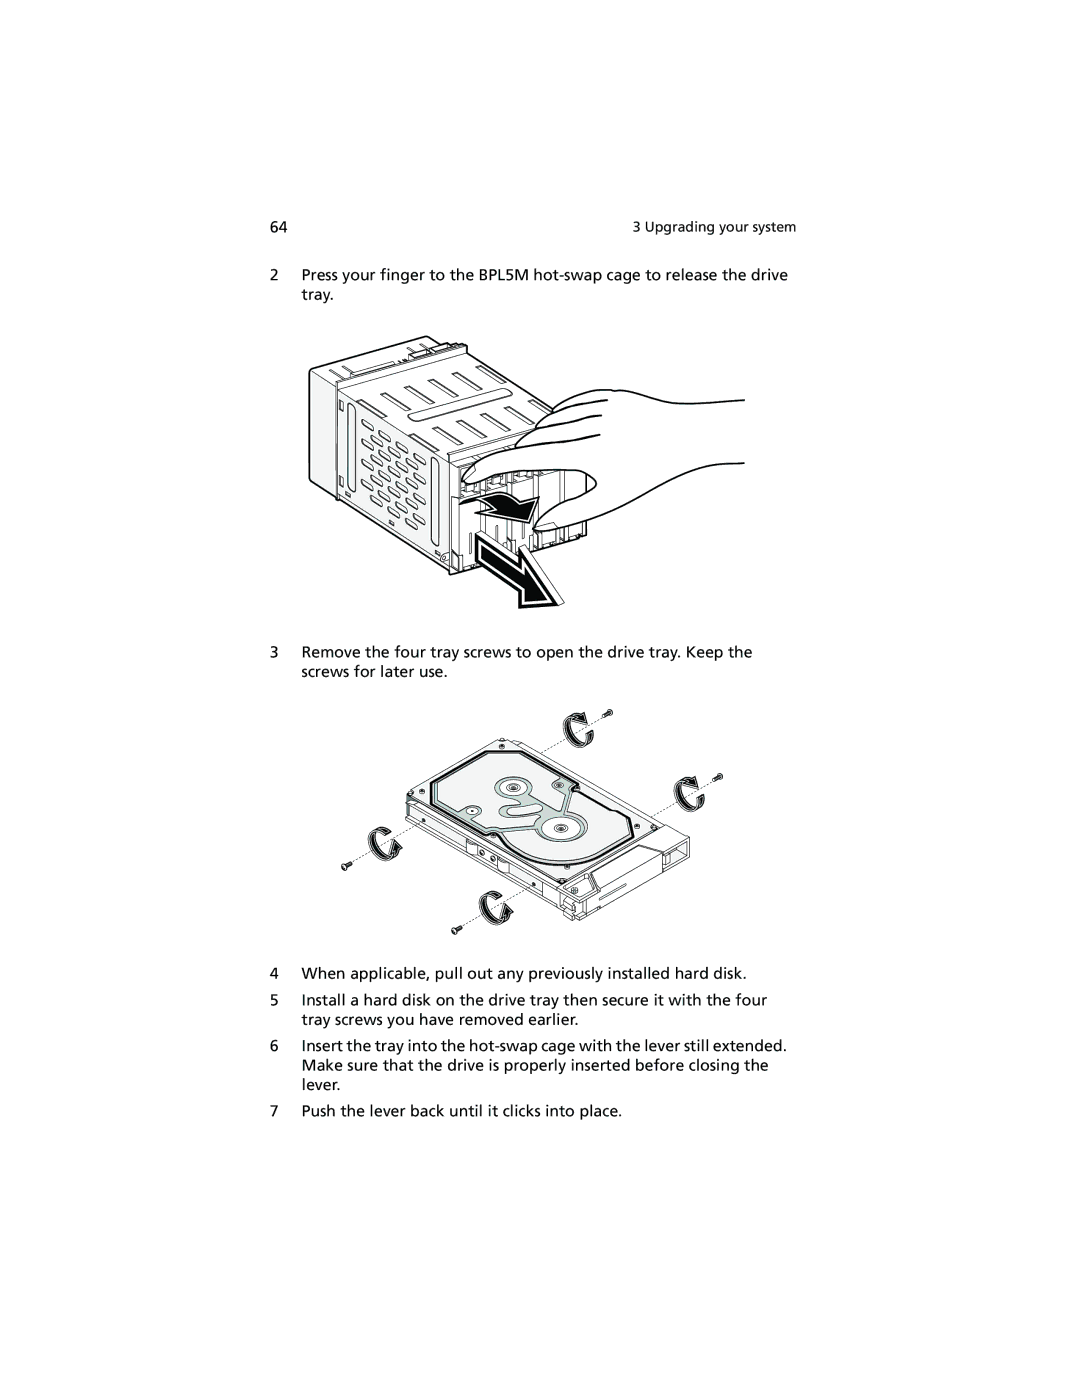
2Press your finger to the BPL5M hot-swap cage to release the drive tray.

3Remove the four tray screws to open the drive tray. Keep the screws for later use.

4When applicable, pull out any previously installed hard disk.

5Install a hard disk on the drive tray then secure it with the four tray screws you have removed earlier.

6Insert the tray into the hot-swap cage with the lever still extended. Make sure that the drive is properly inserted before closing the lever.

7Push the lever back until it clicks into place.

Page 74
Image 74
Acer Altos G610 manual When applicable, pull out any previously installed hard disk