34 | 2 System tour |
Installing the system into the rack
To install the system into the rack:
The rails allow the system to slide in and out of the rackmount for maintenance purposes. Follow these steps to install the mounting rails:
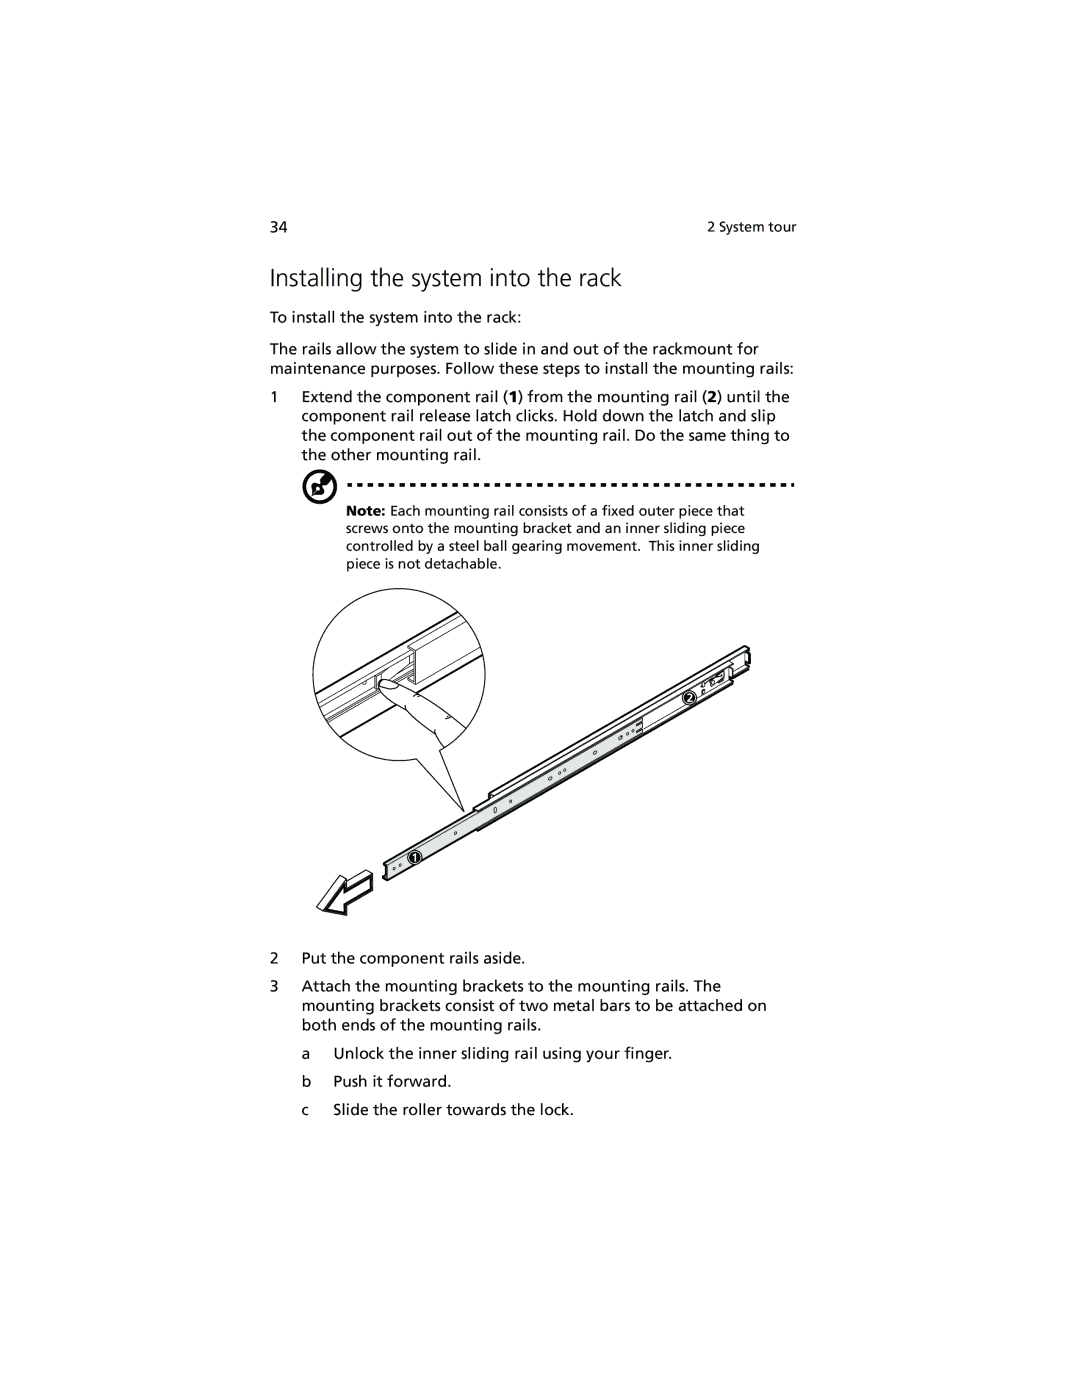
1Extend the component rail (1) from the mounting rail (2) until the component rail release latch clicks. Hold down the latch and slip the component rail out of the mounting rail. Do the same thing to the other mounting rail.
Note: Each mounting rail consists of a fixed outer piece that screws onto the mounting bracket and an inner sliding piece controlled by a steel ball gearing movement. This inner sliding piece is not detachable.
2Put the component rails aside.
3Attach the mounting brackets to the mounting rails. The mounting brackets consist of two metal bars to be attached on both ends of the mounting rails.
a Unlock the inner sliding rail using your finger. b Push it forward.
c Slide the roller towards the lock.