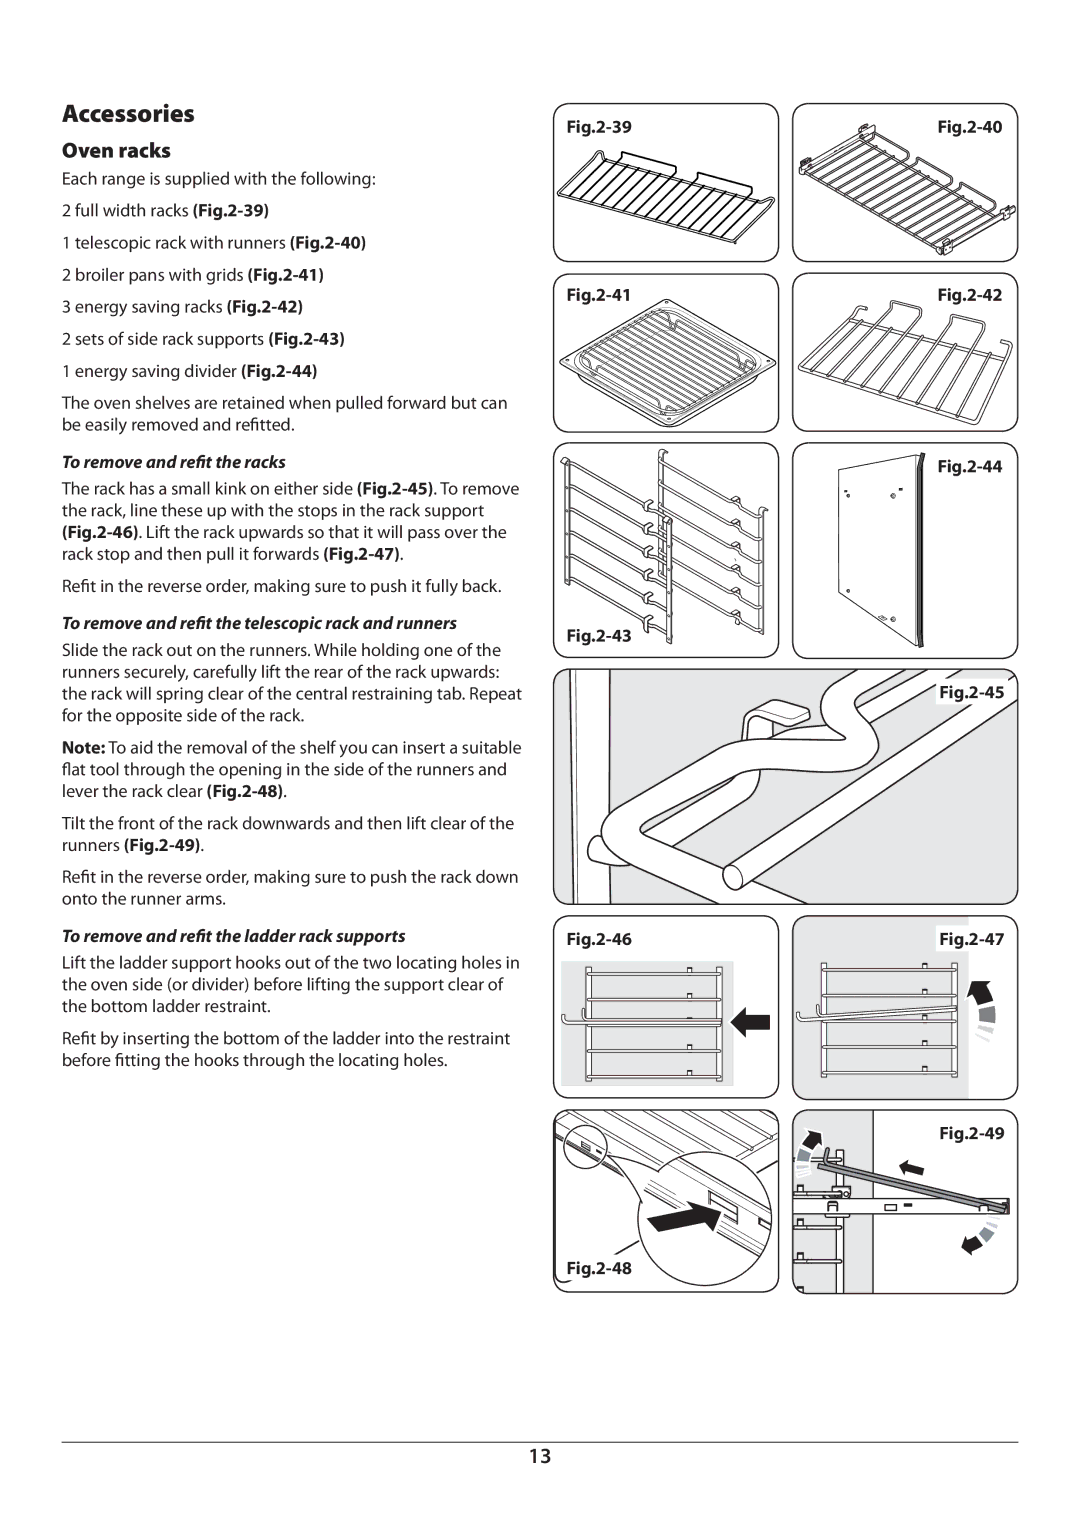
Accessories
Oven racks
Each range is supplied with the following:
2 full width racks
1 telescopic rack with runners
2 broiler pans with grids
3 energy saving racks
2 sets of side rack supports
1 energy saving divider
The oven shelves are retained when pulled forward but can be easily removed and refitted.
To remove and refit the racks
The rack has a small kink on either side
Refit in the reverse order, making sure to push it fully back.
To remove and refit the telescopic rack and runners
Slide the rack out on the runners. While holding one of the runners securely, carefully lift the rear of the rack upwards: the rack will spring clear of the central restraining tab. Repeat for the opposite side of the rack.
Note: To aid the removal of the shelf you can insert a suitable flat tool through the opening in the side of the runners and lever the rack clear
Tilt the front of the rack downwards and then lift clear of the runners
Refit in the reverse order, making sure to push the rack down onto the runner arms.
To remove and refit the ladder rack supports
Lift the ladder support hooks out of the two locating holes in the oven side (or divider) before lifting the support clear of the bottom ladder restraint.
Refit by inserting the bottom of the ladder into the restraint before fitting the hooks through the locating holes.
ArtNo.331-0008 - 90SC grill pan & trivet
13