Prof+ pyro US - Control to low
LO
HI
OFF
![]() pans
pans ![]() gas
gas
Fig.2-5 Fig.2-6
Art No.
|
|
|
|
|
|
|
|
|
|
The igniter should spark and light the gas. Keep holding the knob pressed in to let the gas through to the burner for about ten seconds.
If, when you let go of the control knob, the burner goes out, then the FSD has not been bypassed. Turn the control knob to the OFF position and wait for one minute before you try again, this time making sure to hold in the control knob for slightly longer.
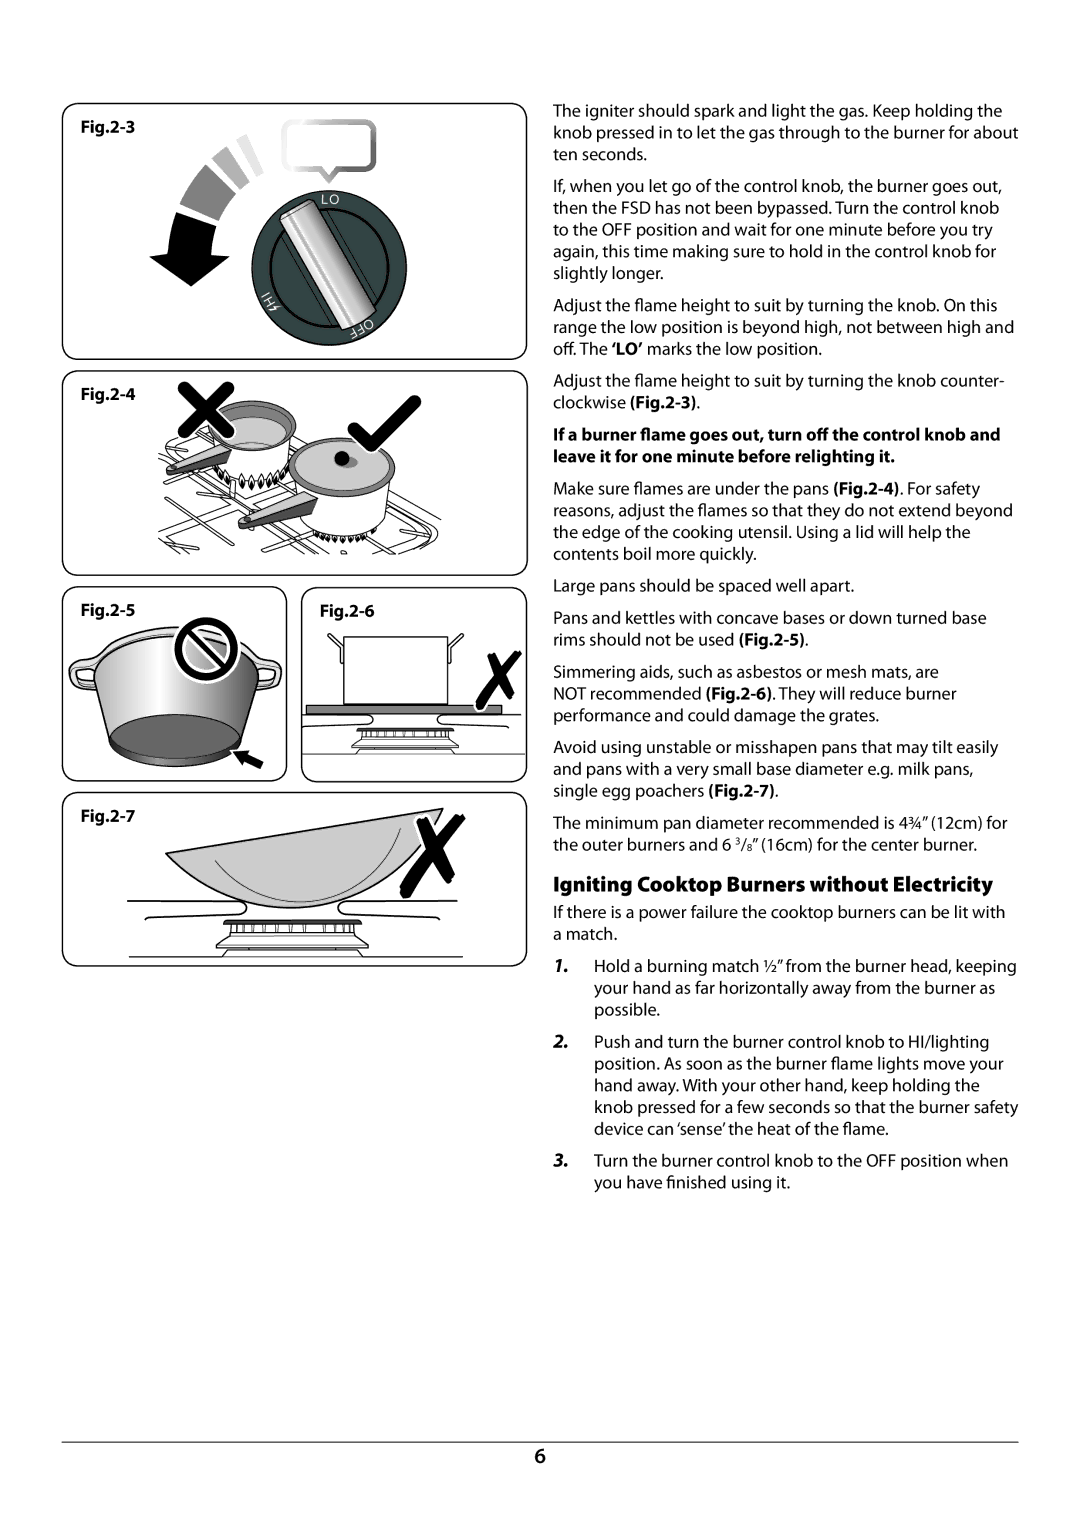
Adjust the flame height to suit by turning the knob. On this range the low position is beyond high, not between high and off. The ‘LO’ marks the low position.
Adjust the flame height to suit by turning the knob counter- clockwise
If a burner flame goes out, turn off the control knob and leave it for one minute before relighting it.
Make sure flames are under the pans
Large pans should be spaced well apart.
Pans and kettles with concave bases or down turned base rims should not be used
Simmering aids, such as asbestos or mesh mats, are NOT recommended
Avoid using unstable or misshapen pans that may tilt easily and pans with a very small base diameter e.g. milk pans, single egg poachers
The minimum pan diameter recommended is 4¾” (12cm) for the outer burners and 6 3/8” (16cm) for the center burner.
Igniting Cooktop Burners without Electricity
If there is a power failure the cooktop burners can be lit with a match.
1.Hold a burning match ½” from the burner head, keeping your hand as far horizontally away from the burner as possible.
2.Push and turn the burner control knob to HI/lighting position. As soon as the burner flame lights move your hand away. With your other hand, keep holding the knob pressed for a few seconds so that the burner safety device can ‘sense’ the heat of the flame.
3.Turn the burner control knob to the OFF position when you have finished using it.
6