INSTALLATION
Check the appliance is electrically safe and gas sound when you have finished.
8. Conversion to Another Gas
Important!
•Observe all governing codes and ordinances.
•The range must be properly grounded.
•Save these instructions for the local electrical inspector’s use.
When servicing or replacing gas carrying components disconnect from the gas supply before commencing operation and check the appliance is gas sound after completion. When checking for gas leaks use a liquid leak detector at all joints and connections to check for leaks in the system. Use a product specifically manufactured for leak detection. Leak testing of the appliance shall be conducted in accordance to the manufacturer’s instructions.
For Your Safety
DO NOT store or use combustible materials, gasoline or other flammable vapors and liquids in the vicinity of this or any other appliance.
Conversion to Propane
This appliance is supplied set for Natural gas. A conversion kit for Propane gas is supplied with the range.
If the appliance is to be converted this must be done before installation. The conversion must be performed by a qualified LP gas installer. After conversion the installation must comply with the relevant regulations and also the local electricity supply company requirements. Read the instructions before converting this appliance.
Failure to convert the appliance correctly could invalidate any warranty or liability claims and lead to prosecution.
This instruction must be used in conjunction with the rest of the appliance instruction, in particular for information on Standards, range positioning, connection hose suitability, etc.
When servicing or replacing
DO NOT use reconditioned or unauthorized gas controls.
Orifices
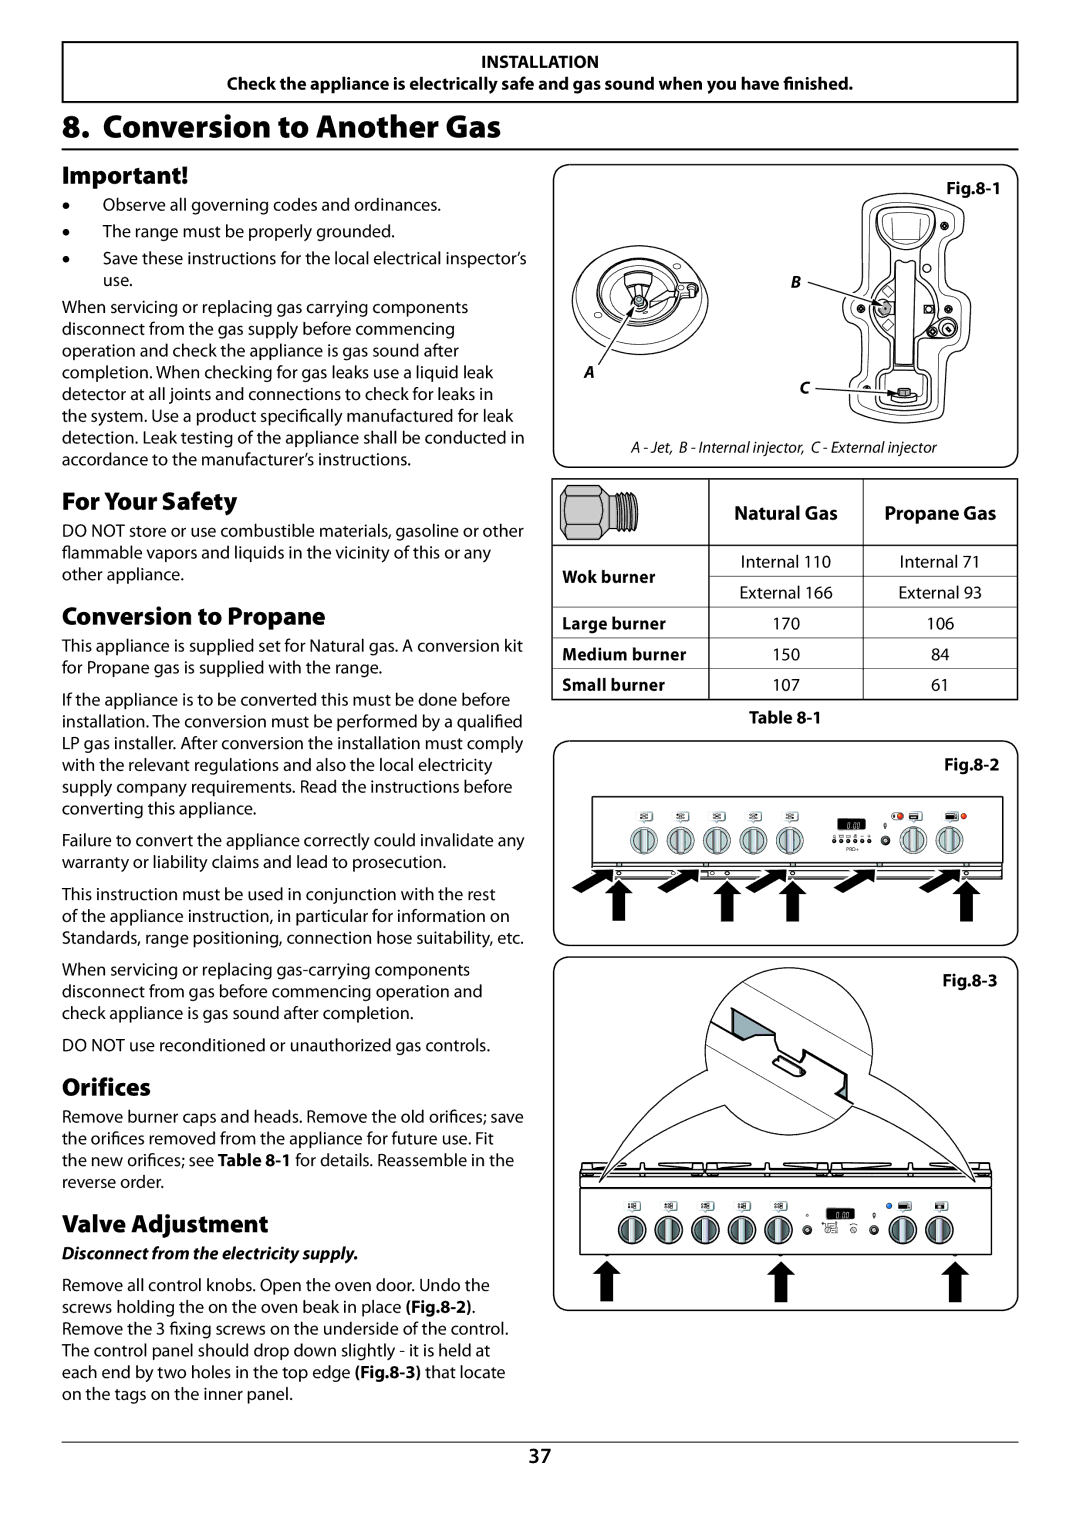
Remove burner caps and heads. Remove the old orifices; save the orifices removed from the appliance for future use. Fit the new orifices; see Table
Valve Adjustment
Disconnect from the electricity supply.
Remove all control knobs. Open the oven door. Undo the screws holding the on the oven beak in place
|
|
| ||
|
| B |
| |
A |
| C |
| |
| ||||
|
| |||
A - Jet, B - Internal injector, C - External injector | ||||
| Natural Gas | Propane Gas | ||
Wok burner | Internal 110 | Internal 71 | ||
External 166 | External 93 | |||
| ||||
Large burner | 170 | 106 | ||
Medium burner | 150 | 84 | ||
Small burner | 107 | 61 | ||
| Table |
| ||
OFF | OFF |
PRO+
Removing the control panel |
37