6. Cleaning Your Range
Essential Information
Before thorough cleaning, turn off the circuit breaker. Allow the range to cool.
A
After cleaning, remember to switch on the circuit breaker and reset the clock before
Never use paint solvents, caustic cleaners, biological powders, bleach, chlorine based bleach cleaners, coarse abrasives or salt. Do not mix different cleaning products – they may react together with hazardous results.
Daily Care
Cleaning the range is not a welcomed chore, but it has to be done to maintain efficiency and appearance. Remember it is better to wipe up any spills as they occur, this will prevent them burning on and becoming more difficult to remove later.
Make sure the flow of combustion and ventilation air to the range is unobstructed – for example by build- up of fats or grease.
If the flame is distorted, check that the burner head is correctly placed over the burner base.
If the flame burns with a long white tip you should call for service.
Cleaning for Spills
For spills and
Do not allow surplus water to seep into the range.
Cooktop Burners
The Single Ring Burners
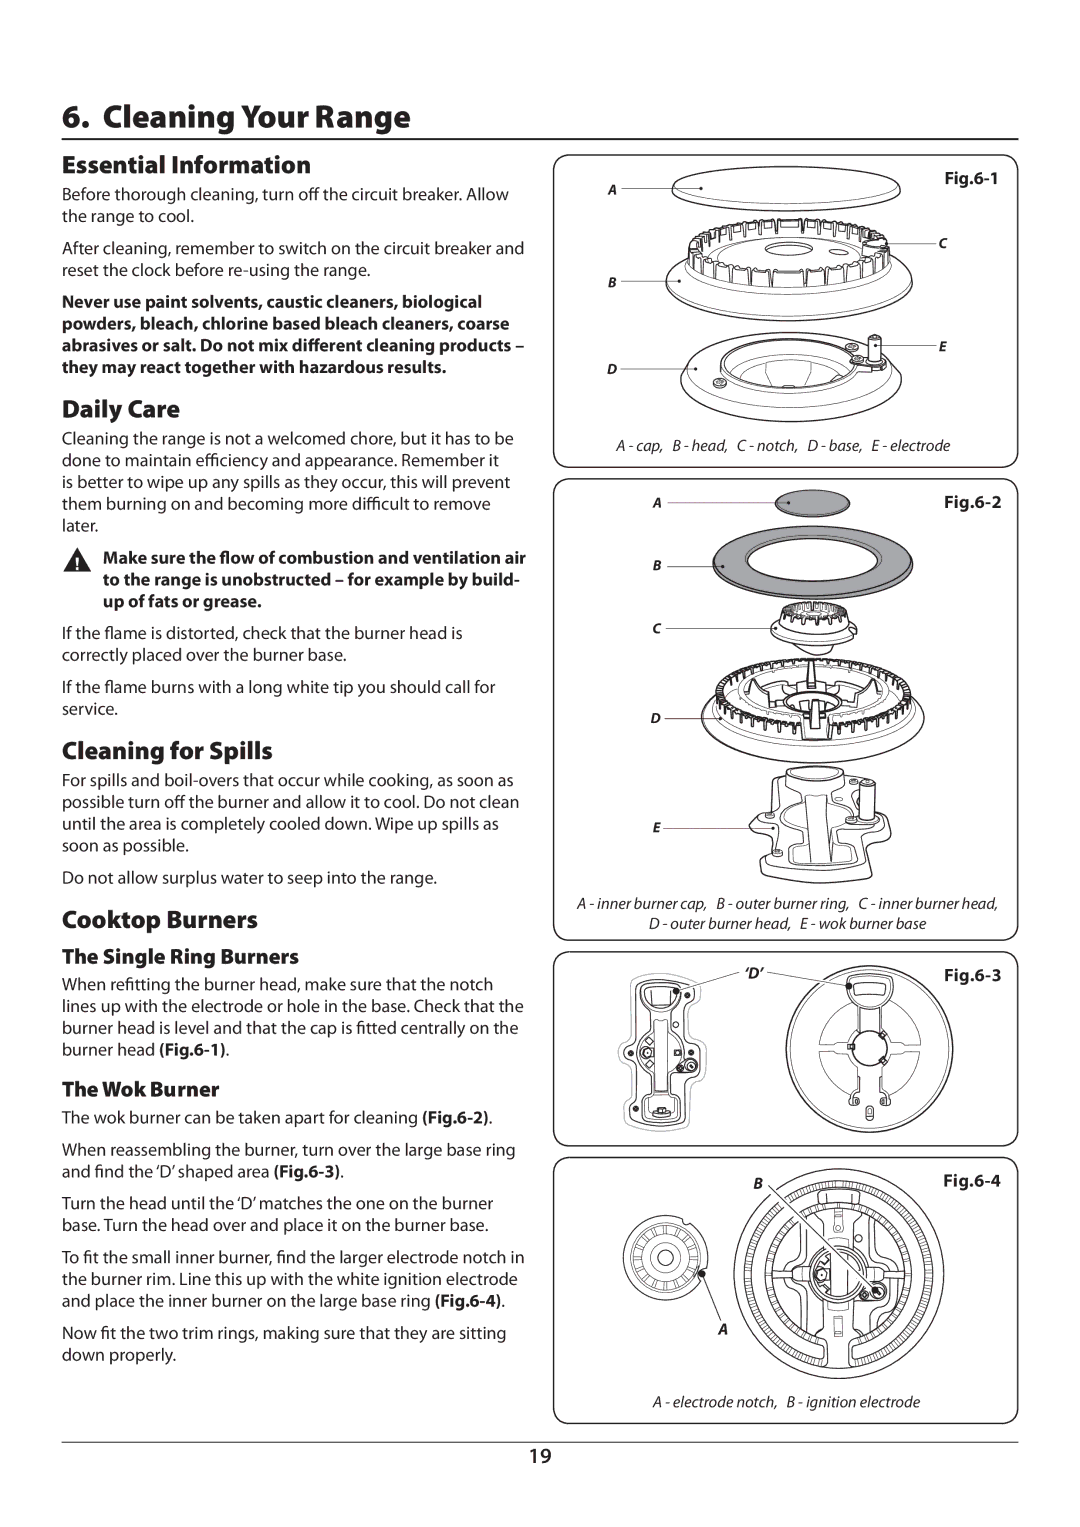
When refitting the burner head, make sure that the notch lines up with the electrode or hole in the base. Check that the burner head is level and that the cap is fitted centrally on the burner head
The Wok Burner
The wok burner can be taken apart for cleaning
When reassembling the burner, turn over the large base ring and find the ‘D’ shaped area
Turn the head until the ‘D’ matches the one on the burner base. Turn the head over and place it on the burner base.
To fit the small inner burner, find the larger electrode notch in the burner rim. Line this up with the white ignition electrode and place the inner burner on the large base ring
Now fit the two trim rings, making sure that they are sitting down properly.
C
B
E
D
A - cap, B - head, C - notch, D - base, E - electrode
A | ||
|
B
C
D
E
A - inner burner cap, B - outer burner ring, C - inner burner head,
D - outer burner head, E - wok burner base
‘D’ |
B |
A
![]()
A - electrode notch, B - ignition electrode
19