INSTALLATION
Check the appliance is electrically safe and gas sound when you have finished.
Moving the Range
The range is very heavy. Take great care.
We recommend two people maneuver the range. Ensure that the floor covering is firmly attached or removed to prevent it being disturbed when moving the range around. You will need the leveling tool.
Removing the Oven Door
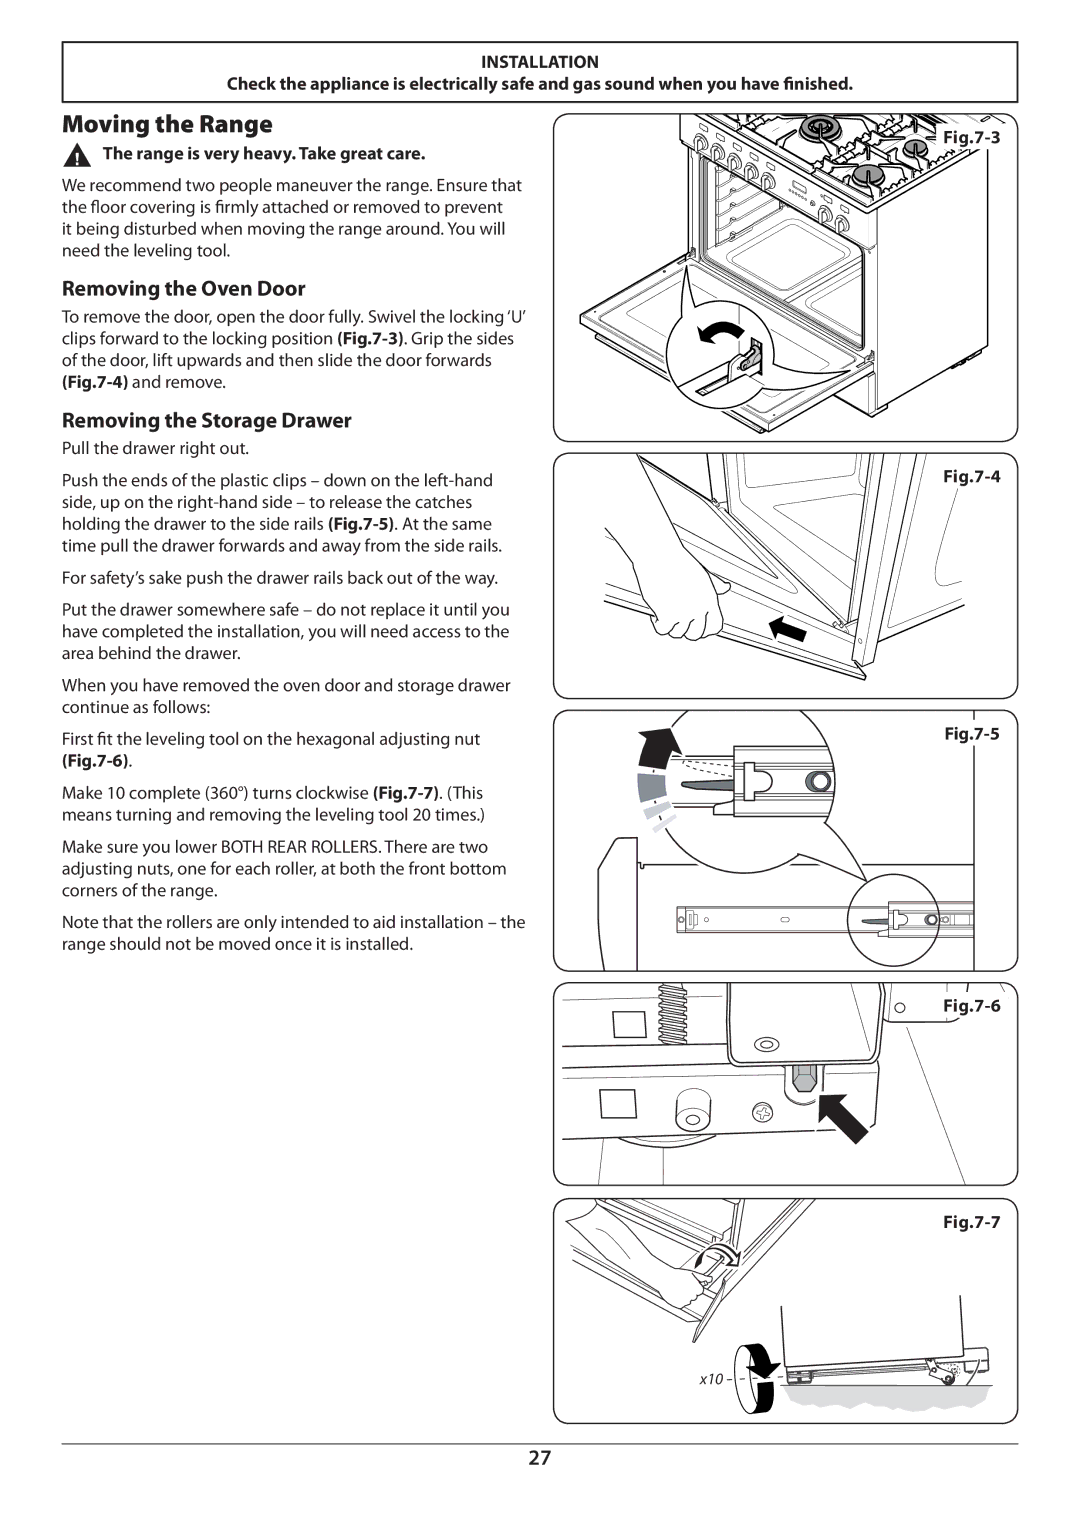
To remove the door, open the door fully. Swivel the locking ‘U’ clips forward to the locking position
Removing the Storage Drawer
Pull the drawer right out.
Push the ends of the plastic clips – down on the
For safety’s sake push the drawer rails back out of the way.
Put the drawer somewhere safe – do not replace it until you have completed the installation, you will need access to the area behind the drawer.
When you have removed the oven door and storage drawer continue as follows:
First fit the leveling tool on the hexagonal adjusting nut
Make 10 complete (360°) turns clockwise
Make sure you lower BOTH REAR ROLLERS. There are two adjusting nuts, one for each roller, at both the front bottom corners of the range.
Note that the rollers are only intended to aid installation – the range should not be moved once it is installed.

![]()
![]()
![]()
![]()
![]() Fig.7-3
Fig.7-3
|
![]()
x10
27